
Player Guide
Release 125: April 25, 2024
Shroud of the Avatar: Forsaken Virtues is a fantasy role-playing game that combines a single player narrative with a sandbox massively-multiplayer online game. More information can be found at www.shroudoftheavatar.com.
Thank you for your continuing support of Shroud of the Avatar: Forsaken Virtues! We’ve provided information here on what is available in the current build of the game for you to explore, test, and give feedback on. If you are a returning player, features that are new for this release are marked as [New] and highlighted.
Steam (Windows, Mac, and Linux)
Logging In/Out and Avatar Creation
Interactive Mode versus Targeting Mode
Traveling between Scenes and the Overworld
Character Names and Health Bars
Player Menu and Trade (“Right-Click Menu”)
Sticky Targeting and assigning a Soft Lock
Nameplate Colors and Creature Strength
Player vs. Player Combat (PvP)
Summons, Tamed Creatures, and Companions
Creating and Setting Permissions For A House
Moving a Decorated Lot or Basement
Changing a POT’s Default Spawn Point
Player-Owned Town Chat Window Commands
Shopping and Merchants in Offline Mode
Playing Instruments with Your Keyboard
Playing Instruments with In-Game Sheet Music
Chat Window Commands for Music
How to Install an Add-On Made With Lua
Where to Get Shroud of the Avatar Add-Ons and Lua Information
Heraldry Blazon Device Generator
Brittany Graveyard Tombstone Name
Shroud of the Avatar Credits Page Name
Conversation Window Chat Commands
- Helpful Tip: If you need assistance, help is offered from many locations beyond this document. While the game itself will give you hints for what to do next, it’s also true that many players will be happy to share their knowledge and insights with you! Players with the “Hospitaller” title visible on their characters are known to be very helpful, but you can also ask questions of anyone in your chat window. Outside the game, you’ll find our official message boards at https://www.shroudoftheavatar.com/forum/ and fantastic websites like SotAHelp.org with plenty of guides and tutorials.
System Requirements
Windows
- Minimum:
- OS: Windows 7 64 bit or newer
- Processor: Quad Core 2.4 GHz or faster
- Memory: 12GB RAM
- Graphics: DirectX 11 Compatible NVIDIA 960/AMD 560
- DirectX: Version 11
- Network: Broadband Internet connection (Not required for Offline mode)
- Hard Drive: 40 GB available space
- Recommended:
- Processor: Quad Core 2.8GHz or faster
- Memory: 16 GB RAM
- Graphics: DirectX 11 Compatible AMD Radeon R9 / NVIDIA GeForce GTX 1070
- Hard Drive: SSD with 40 GB Available Space
Mac OS X
- Minimum:
- OS: 10.8.5 (Mountain Lion) or newer
- Processor: Quad Core 2.4 GHz or faster
- Memory: 12 GB RAM
- Graphics: DirectX 11 Compatible NVIDIA 960/AMD 560
- Network: Broadband Internet connection (Not required for Offline mode)
- Hard Drive: 40 GB available space
- Recommended:
- Processor: 2.4 GHz Intel Core 2 Duo (Dual-Core)
- Memory: 16 GB RAM
- Graphics: DirectX 11 Compatible NVIDIA GTX 1070 / ATI Radeon HD 5870
- Hard Drive: SSD with 40 GB Available Space
SteamOS + Linux
- Minimum:
- OS: Ubuntu 10.10 or newer officially but most linux flavors supported
- Processor:Quad Core 2.4 GHz or faster
- Memory: 12 GB RAM
- Graphics: DirectX 11 Compatible NVIDIA 960/AMD 560
- Network: Broadband Internet connection (Not required for Offline mode)
- Hard Drive: 40 GB available space
- Recommended:
- Processor: Quad Core Processor 2.8GHz or faster
- Memory: 16 GB RAM
- Graphics: DirectX 11 Compatible NVIDIA GTX 1070/ATI Radeon HD 5870
- Hard Drive: SSD with 40 GB Available Space
Firewall Ports Required
Besides the system specification to run the game, the following firewall ports must be open for the Launcher and Game Client to run properly.
- Launcher:
- TCP 5074
- UDP 3544
- UDP 6881
- Game Service:
- UDP 5054
- UDP 5055
- UDP 5056
- UDP 5057
- UDP 5058
- UDP 5059
Installing the Game
Shroud of the Avatar (SotA) can be played on Windows, OSX (Macintosh), and Linux computers. The game may be played though our custom launcher (available below) or through the Steam client.
Steam (Windows, Mac, and Linux)
The Steam client can be downloaded and installed for free from the link below.
If you do not have a Steam account already, you will be prompted to create one on first starting the client.
Shroud of the Avatar is available through the Steam client. You may purchase the game directly through the client, or online from the link below.
If you already have a SotA account and have purchased a pledge, you do not need to obtain the game again to play it through Steam. You may attach your existing SotA account and pledge to a Steam account, adding SotA to your Steam Library and allowing you to download and play the game through Steam.
To connect your SotA and Steam accounts, go to https://www.shroudoftheavatar.com/, and click on the “Login” button.
After you enter your username and password, go to your “Account” page (via the link in the upper right corner of the screen) and scroll down to the “Game Client Download” section. The “Play SotA through Steam” heading will allow you to attach your SotA account to your Steam account.
If you are already logged into Steam on the computer in question you may choose the “Sign in through Steam” option while logging into the SotA website. This will also allow you to connect your SotA and Steam accounts.
Windows (Non-Steam)
Download the installer file, “SotAInstaller.exe” from the link below.
Running this file will install the Shroud of the Avatar Launcher application, which will download the rest of the game. We recommend having at least 4GB of free disk space on the drive you install to, though the game will only download about 1.5GB of data. Note that downloading and installing the game may take some time, especially on slower Internet connections.
You can update the game for future releases by running the Launcher again; there is no need to re-download it.
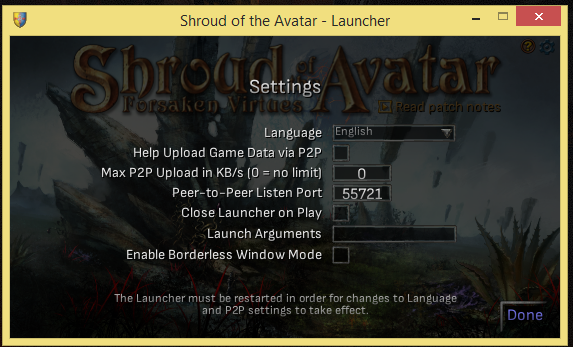
The Launcher uses BitTorrent bandwidth sharing to distribute the Shroud of the Avatar game files to other players. Leaving the Launcher open will help us and others by providing some of your bandwidth to assist others in downloading the game, but doing so is optional. If you do not wish to use BitTorrent at all, you can turn it off via an option in the Options screen of the Launcher.
From the option screen, you can also specify using “borderless window mode” (a special windowed mode that aligns with the primary monitor of your system, which is helpful for users with multiple monitors).
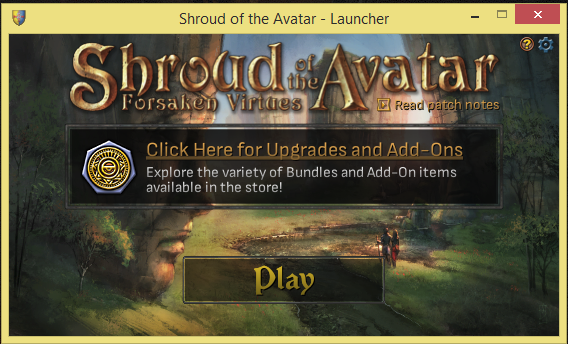
Once the game has finished downloading and is patched to the latest version, you can click the “Launch Game” button to play the game.
Macintosh (Non-Steam)
Download the installer package from the link below.
Open the file (which by default should be in your Downloads directory) and run it; it is a standard installer file that will install “Shroud of the Avatar - Launcher” to your Applications directory.
Running the Launcher will download the rest of the game and allow you to launch it from there. We recommend having at least 4GB of free disk space on the drive you installed the Launcher to, though the game will only download about 1.5GB of data. Note that downloading and installing the game may take some time, especially on slower Internet connections.
You can update the game for future releases by running the Launcher again; there is no need to reinstall it.
The Launcher uses BitTorrent bandwidth sharing to distribute the Shroud of the Avatar game files to other players. Leaving the Launcher open will help us and others by providing some of your bandwidth to assist others in downloading the game, but doing so is optional. If you do not wish to use BitTorrent at all, you can turn it off via an option in the Options screen.
Once the game has finished downloading and is patched to the latest version, you can click the “Play” button to launch the game.
If you have participated in previous releases, and have an older “Shroud of the Avatar” or “Shroud of the Avatar - Launcher” app outside of Applications, you should delete it as it is no longer needed.
Linux (Non-Steam)
We offer a debian package and a simple tarball of the game launcher file. The package is the preferred way of installing the game, but if you run into troubles or your distribution doesn’t handle .deb packages, fall back to downloading an archive containing the program’s files.
Download the .deb package shroud-of-the-avatar-launcher_1.0.0_amd64.deb from the link below.
For the “latestPatcherLinux.tar.gz” raw archive, use the link below.
Both contain the Shroud of the Avatar Launcher application, which will download the rest of the game. If you use a Gnome or KDE based desktop, the application should register correctly and can be launched from e.g. your dash. If not, included are two launcher binaries, “Shroud of the Avatar - Launcher.x86” and “Shroud of the Avatar - Launcher.x86_64.” Run the one most appropriate for your system architecture (most likely “Shroud of the Avatar - Launcher.x86_64”). When using the .deb package, you can also simply run “shroud-of-the-avatar-launcher.”
We recommend having at least 4GB of free disk space on the drive you install to, though the game will only download about 1.5GB of data. Note that downloading and installing the game may take some time, especially on slower Internet connections.
You can update the game for future releases by running the Launcher again; there is no need to re-download it.
The Launcher uses BitTorrent bandwidth sharing to distribute the Shroud of the Avatar game files to other players. Leaving the Launcher open will help us and others by providing some of your bandwidth to assist others in downloading the game, but doing so is optional. If you do not wish to use BitTorrent at all, you can turn it off via an option in the Options screen of the Launcher.
Once the game has finished downloading and is patched to the latest version, you can click the “Launch Game” button to play the game.
Manual Data Migration
Players can change the location where their Shroud of the Avatar data is stored, including saved games, music files, etc.
Manual Data Migration Instructions: To migrate your existing data into a different directory, follow the instructions below:
- While playing the game, type “/datafolder” into your chat window. This will open your current data path folder in your operating system’s file browser. Select everything in this folder and copy it to your clipboard.
- While playing the game, open up the "Options" menu, click the "Game" button, and click the “Data Path” button. A window will appear that shows your "Current" data path and a "New" field in which you can type your desired data path. Enter in your new data path in the “New” field and click the “Set” button.
- While playing the game, type “/datafolder” into your chat window. This will open your new data path folder in your operating system’s file browser. Paste the contents you had copied from your original data folder into this new folder.
Logging In/Out and Avatar Creation
Logging In
Once you launch the game, you will be prompted to log in after the initial screens.
User accounts are handled through the Shroud of the Avatar website at https://www.shroudoftheavatar.com/. Your Shroud of the Avatar username and password is used to access the game, even in Private mode.
The default matchmaking mode for online play is “Open,” a multiplayer mode in which you play Shroud of the Avatar in the same game world as all other “Open” players. Choose “Private” or “Party” to play Shroud of the Avatar in your own private space while still being able to see players in your adventuring party, and still being able to see and interact with the persistent works of other players such as vendors, houses and Player-Owned Towns. Choose whichever you prefer; you play the same character in either and can switch your character to another matchmaking mode at any time. While playing online, you can quickly switch between Open, Party, and Private modes without having to log out of the game. To do so, go to the "Multiplayer" section of the Options Menu and choose a "Matchmaking Mode" (Open, Party, or Private). If you choose to proceed with the change, the scene will reload and you'll be playing in the new mode.
If you already have created a character, you will be asked whether to play Shroud of the Avatar with that character or delete it so that you can create a new one. Otherwise, you will be taken to avatar creation after logging in.
Logging Out
In the Options window (the “gears” icon in the upper-right of your UI), you’ll find two logout functions: Exit to “Menu” and “Quit.”
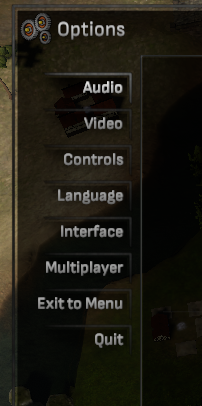
Exit to Menu: When using this option, you’ll be asked to give feedback before you press the “Exit” button. Feedback is voluntary and not required to exit (but appreciated!). When you you finish exiting, you’ll be sent to the main menu for Shroud of the Avatar.
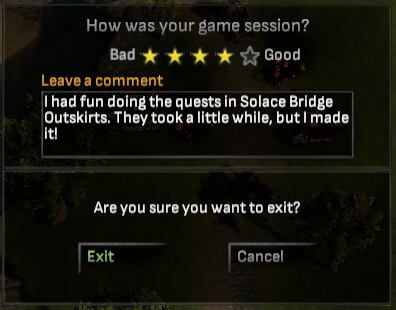
- How was your game session? You can optionally give a rating and comment (125 characters) about your latest game session to the developers. You can provide new feedback after each game session. Your feedback is very important! Your comments are only used internally by the developers (i.e., not made public).
- Are you sure you want to exit? Just confirm to “Exit” or press “Cancel” to continue playing.
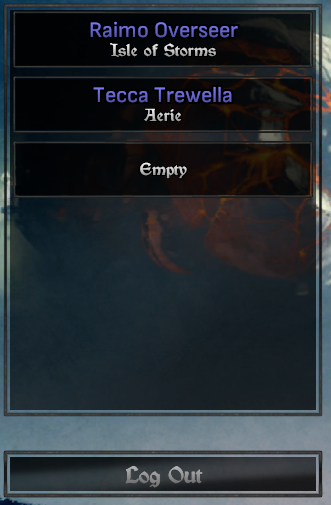
After exiting, you can choose to “Resume” (takes you back into the game where you left off), “Start on World Map” (sends you to an overworld map), “Select Avatar” (change avatars), or “Log Out” (logs you out of the game session, and you’ll have to use your username and password to re-enter the game).
Quit: This option is identical to “Exit to Menu,” except when you press “Quit (confirm),” the game application closes. Note that pressing Alt+F4 closes the game in the same way.
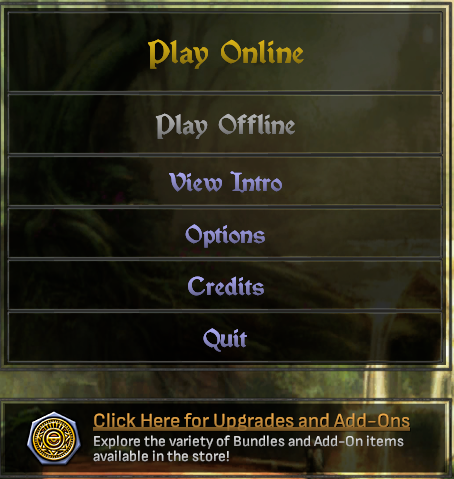
Offline Play
Playing in Offline mode requires no internet connection or log-in process. Your Offline Avatar and your Online Avatar are separate characters. In Offline mode, you will never encounter other Avatars. Elements placed by, or dependent on, other Avatars—such as player vendors, auctions, guilds, Player-Owned Towns, and Player-versus-Player (PvP)—will be absent. You can explore, fight, craft, and follow questlines in Offline mode the same as in Online mode.
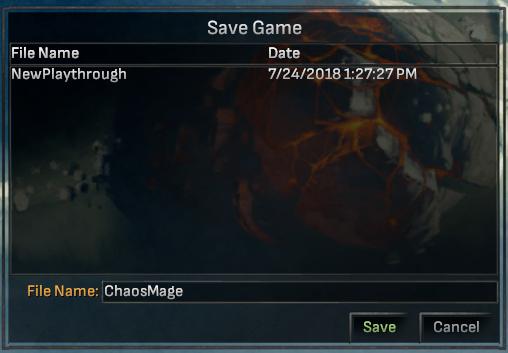
In Offline mode, your Avatar and progress are saved constantly (much like in Online mode). You may exit to the menu or quit the game at any point and your Avatar will be as they were when you next resume play. You may also manually create save files with the Save Game button on the Options menu.
Save files can be loaded from the character selection screen through the Load Game button. Loading a save restores your Avatar, world, and progress to exactly as they were when the save file was created. Any progress since then will be lost forever, unless you make an alternate save before loading your previous one.
Playing in Offline mode also allows you to recruit non-player character (NPC) Companions to accompany you in your travels and aid you in combat. Fiona in Peladjar's Tavern in Ardoris is one such Companion. These NPCs exist and can be conversed with in Online mode, but will not accompany you as Companions.
When playing in Offline Mode, many scenes will not respawn its enemies unless you reload that scene. For example, you could clear an underground area and then mine peacefully (while the resource nodes continue to respawn).
Avatar Creation
On creating a new Avatar, you will first be prompted to choose a name and select a gender.
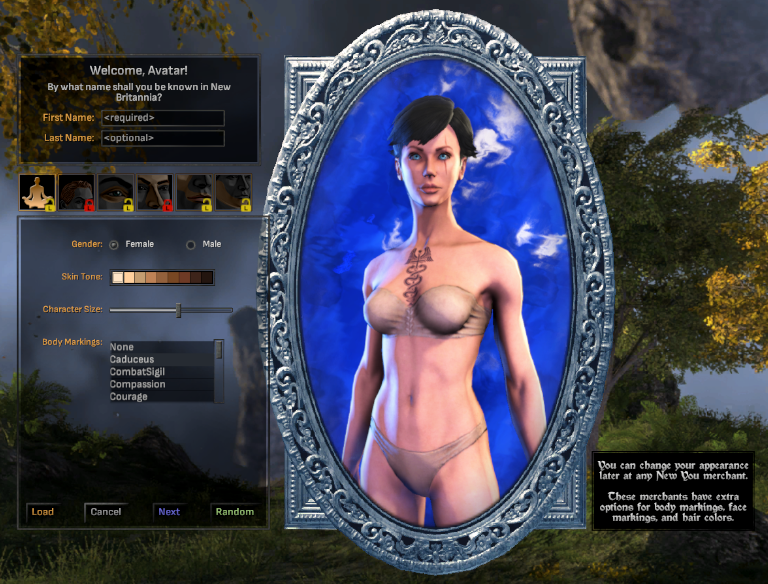
Your name is checked to see if it is valid and not already in use. The combination of first and last names are unique; you can share the same first name as someone or the same last name, but not both. If your name is rejected, the reason will appear in the status line below your chosen name. Note that last names are optional; your Avatar may have a first name with no last name.
The gender you set for your character affects your Avatar’s appearance and may have some minor influence on the dialogue options used by some non-player characters.
Next are a series of tabbed options and sliders for customizing your face and body. Everything from hair and eye color to ear size and positioning can be adjusted to your liking. You’ll also have the option to add extras like body markings (e.g. tattoos). Clicking the “Random” button will randomize fields in every tab. Tabs are “unlocked” by default, as shown by the yellow lock icon. Click the yellow lock icon to lock a tab, which will change the lock icon to red. Click a red lock icon to unlock that tab.
- Helpful Tip: If you want to change your appearance after creation, for any reason, you can! While still in the original creation screen, you can change your Avatar’s appearance any number of times. Once your Avatar enters the game world, it is possible to change your appearance again later at a New You shop by spending Crowns of the Obsidians (a.k.a. “Crowns” or “COTOs”).
Click “Finish” in the last customization tab to assume the physical body you have chosen and be sent into your first adventure in New Britannia!
- Helpful Tip: Once you press the “Finish” button, your avatar’s “character creation” appearance information will be saved in a local file that you can reload later using the “Load” button in a character appearance screen.
Multiple Characters
Eligible players may have multiple characters on a single account. Each additional character will be created in the same way as your first. Note that all characters owned by a single account share the following.
- Gold
- Pooled Experience (from daily login bonus experience)
- A common bank account
- Guild membership
- Land ownership (including lot access permissions and rentals)
- Virtue reputation.
In Online modes, players who are eligible for Multiple Characters will now receive the appropriate number of extra character slots. In Offline mode, all players are granted 10 slots, regardless of purchase.

Playing the Game
Your first adventure in New Britannia will take place in the Battle of Solace Bridge, a once-quiet outpost now swarming with the undead! As you fight your way out of the scene, you’ll learn some lessons about playing the game.
- Helpful Tip: While playing, you can quickly adjust the distance between your camera and your Avatar using the mouse wheel.
After completing this short mission, you’ll be sent off to a new location called Solace Bridge Outskirts where you’ll start encountering other players.
User Interface
The menus for the game appear in the upper-right corner. They are described in more detail below.
At the top of the screen is a compass, along with the name of the area in which you are currently located.
A view of your Health and Focus (and those of your party members) appears in the upper left-hand corner. The stats of a targeted NPC appear next to those.
- Your Health bar is a visual representation of your current Health points. When your Health is at its maximum, your Health bar will be fully red. As you lose Health points, your red Health bar will grow shorter. As you regain Health, your health bar will appear more full. Positive changes to Health are shown as green. Negative changes to Health are shown as yellow.
- Your Focus bar is similar to your Health bar, although it is represented by a blue bar. Also, positive changes to Focus are shown as cyan while negative changes to Focus are shown as gray-blue.
By default, your conversation log appears in the lower-left corner, though it can be moved.
After you leave the Isle of Storms, the Combat Hotbar and Utility Hotbar will appear at the bottom of your screen. By default, the Combat Hotbar is always visible and will include your starting skills. You'll add other skills to this hotbar over time. The Utility Hotbar can include non-combat spells, maps, and some consumables. Potions and other consumables can still be used in combat, they just need to be part of your Deck. Hotbars, Decks, and potions are described in more detail in the Deck and Deck Building section.
Menus and Help
The available menus in the upper right of the interface are described below, in order from left to right.

- Stained-glass Window: A drop-down list of many useful windows in the game.
- Social: Access the "Looking for Group" and other social-themed windows. Includes a number when groups are looking for members.
- Question Mark: Launches a web browser to display this document.
- Crossed Swords and Shield: A view of the character, with basic stats and the character’s inventory slots.
- Saddlebag: Opens up the player’s inventory.
- Gears: Opens the option menu for audio, visual, gameplay, and control, and language options.
- Crown of the Obsidians: Opens the in-game store window. Items in the in-game store can be purchased with Crowns of the Obsidians (a.k.a. Crowns or COTOs). Includes an asterisk (*) when new items are in the store.
- Treasure Chest: Opens up the player’s Rewards inventory. Includes a “Claim Reward” button.
If this is the first time you have played the game, helpful hints will pop up to explain different controls and concepts at the appropriate time. If you do not wish to see these hints, simply uncheck the “Show Hints” box in game options. If you wish to review them again, click on the “Reset Hints” button in the game options. Your inventory also contains a helpful “Notes for New Players” book to review at your leisure.
Shroud of the Avatar includes several other help displays.
- There is a contextual help system that allows you to hover over some content (interface elements, items, etc.) in the game and get information about it.
- An information button (identified by “?” in a circle) is on the top-right of many of our interfaces. Clicking the information button brings up a window containing more information about that interface or the system that interface interacts with.
- Some interfaces (merchant, vendor, bank, and trade windows, as well as the combat and utility hotbars) have short explanatory text in important locations. For example: “Drag items here” appears in the trade window when it’s empty.
Moving through the World
You can move through the game world using the W, A, S, and D keys (often abbreviated as WASD, and used similar to most other PC games). You can redefine these keys to any others preferred (the arrow keys, for example) in the Controls section of the options menu. Also, holding both the left and right buttons down simultaneously (only in Interactive mode), or holding down the middle mouse button/wheel, will move the Avatar in the direction they are facing.
Double-tapping W will cause the Avatar to sprint forward for as long as you hold the W key. While in adventure scenes, this faster movement comes at the cost of a constant drain on Focus. You cannot sprint if you do not have enough Focus.
The E key will interact with whatever the mouse cursor (in Interactive Mode) or reticle (in Targeting Mode) is over, as if you had double-clicked on it. Bodies and chests will be looted, resources nodes will be harvested, doors will be opened, etc. When a corpse is nearby but nothing is targeted, pressing the “E” key will loot that nearby corpse.
Pressing the SPACEBAR key will cause your Avatar to jump. Jumping consumes a small amount of Focus, but has a chance (about 20%) to break stun and root effects. This can be very useful when fighting other players.
Double-tapping A, S, or D (in combat stance) allows you to perform a quick directional roll left, back, or right respectively. Rolling consumes Focus and requires a short break before it can be done again. You cannot roll if you do not have enough Focus. Rolling can be disabled from the Game Options menu if desired.
You can swim simply by moving into deep water. You cannot currently swim underwater, jump, or engage in combat while swimming.
You may toggle between running and walking (for example, someone role-playing an event may find it inappropriate to be constantly running everywhere) by using the / (FORWARD SLASH) key on the numeric keypad. The chat command /walk will also do this.
Pressing the Number Pad “+” key will cause your avatar to “auto-run,” or move without a key being pressed. Pressing the Number Pad “+” key again will cancel this.
Pressing the TAB key will mark an enemy in front of you with a target icon, setting it as your current target. Additional presses of TAB will cycle the target icon through available enemy targets. (More details on that are below.)
The “Toggle First-Person” hotkey (V by default) toggles between the three different camera modes, first-person, third person centered, and third-person “over the shoulder.” In both third-person views you can zoom the camera in and out by scrolling the mouse wheel.
Interactive Mode versus Targeting Mode
There are two primary modes of interacting with the world: Interactive mode and Targeting mode. Interactive mode is the default mode used by all players and is easily identified by the pointer usable to interact with objects in the game. Targeting mode is easily identified by mouse movements controlling the facing of the camera, also known as “mouselook.” Targeting mode is not available until a hotkey is set for the “Toggle Cursor” control in the Options menu.
Interactive mode has a mouse cursor on screen at all times, allowing access to menu options and user interface elements. Even when not in Interactive mode, the game automatically enters Interactive mode when you open a menu or use an object that requires the mouse to use properly, such as when you open a chest or enter conversation with an NPC.
Holding down the Right Mouse Button in Interactive mode allows you to move the camera around for a better view. If you aren’t comfortable with this default setting, you may invert how this works with an option in the Options Menu (the gear icon). Holding down both the Left and Right Mouse Buttons at the same time causes the Avatar to run forward (outside of combat stance).
You may enter combat stance in Interactive mode. In Interactive mode, select enemies using TAB or by left-clicking on them with the mouse cursor will set them as your target, and you will always swing, fire, or cast at that target so long as you are facing them. If you do not have a set target, left-clicking will cause the Avatar to swing or fire their equipped weapon towards the reticle, regardless of where the cursor is.
Targeting mode has no mouse cursor on-screen. Moving the mouse moves your view in the corresponding direction. You may move normally with the WASD keys or by holding the Right Mouse Button.
Pay attention to the reticle on your screen. The reticle changes depending on what sort of object or creature you are looking at or have targeted.
- White X: No target
- Red Highlight: A hostile NPC or Avatar, in the attack range of your weapon.
- White Highlight: A hostile target out of attack range of your weapon.
- Green Circle: An interactive object or NPC, out of range.
- Green Cog: An interactive object or NPC, in range.
- Harvesting Tool: A harvestable resource node.
Double left-clicking when the reticle is over an object causes the Avatar to interact with it in the appropriate way. Switches will be flipped, doors will be opened or closed, NPCs will be conversed with, and resource nodes will be harvested.
By default, entering combat stance (with the Z key) automatically switches to Targeting mode. This can be disabled from the options menu if desired. When in combat stance, click the left mouse button to make the Avatar swing their melee weapon or fire their ranged weapon.
If the reticle is over a sufficiently close enemy, the Avatar will attack them. The reticle will disappear and the enemy will highlight red if they are close enough to hit. Ranged spells (like Fire Arrow) will be cast at whatever the reticle is over.
To make Targeting mode available, you must open the Options menu, go to the Controls section, and assign a key to the “Toggle Cursor” control. When a key is assigned to the Toggle Cursor control, you may toggle between the two modes at any time by pressing the “Toggle Cursor” key.
Traveling between Scenes and the Overworld
Shroud of the Avatar uses two location scales: scene and overworld. Scenes are where players have adventures, trade with merchants, harvest resource nodes, craft new gear, decorate their homes, and live their virtual lives. Players journey across an overworld area to travel from one scene to another.
Arriving in a new scene or the overworld causes Avatars to glow as the Oracle extends her protection; making them briefly invulnerable. This effect only lasts a few seconds. Attacking monsters or hostile Avatars breaks the effect early. Use the WASD keys to move around the scene.
Exploring the Overworld
The overworld is used to travel between towns and areas of adventure. It’s a large interactive display of the world laid out using an invisible hexagonal grid. Shroud of the Avatar has three overworld areas: Novia, Hidden Vale, and Mistrendur.
There are many places in the overworld that connect to other areas. Often, when you are close enough, the name of such an area will appear over an “Enter” button and an information icon (which appears as an “i”).
Other information may be listed along with the location’s name, including scene difficulty (the higher the tier, the more difficult the enemies) and scene type (e.g. Town for places that include player housing, or Adventuring Area for places to fight enemies and gather resources).

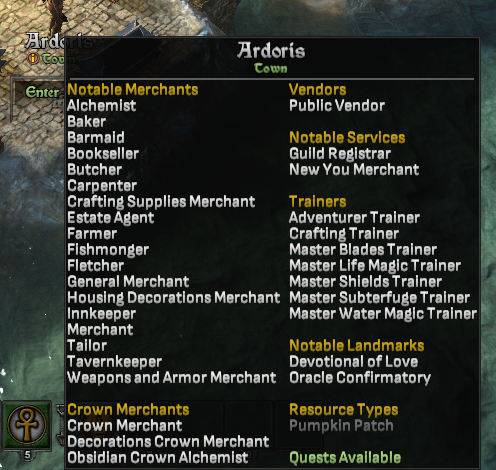
Holding your mouse over the information icon will reveal utilities and other benefits accessible within that scene, including merchants, trainers, types of harvestable resources, a note about quest availability, and more. Resources listed in gray have very few nodes available in that scene.
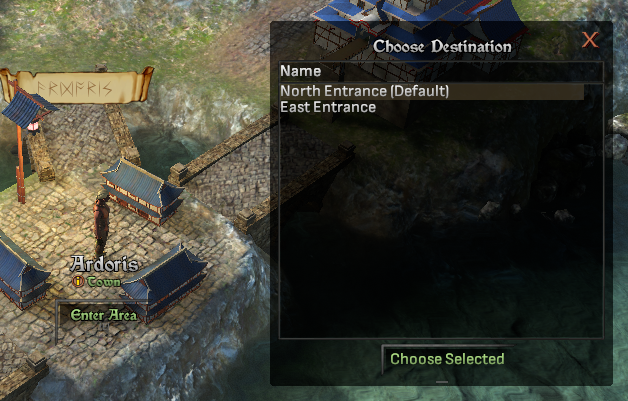
To enter a scene from the overworld, click the “Enter Area” button at the bottom of the screen, or press the E key. Some scenes offer a list of more than one entry location before you enter. The additional locations are unlocked after you explore remote areas of the scene. Select one of the allowed target locations in order to enter the scene at that location.
If you are in a party, the location of your party members will be shown on the overworld. Adventure scenes and large NPC towns that can be accessed from the overworld have a banner with runic text floating over them.
Traveling across the overworld exposes you to ambush from dangerous creatures. If you encounter roving enemies, you may find yourself pulled into a small scene where you must slay your attackers or escape. On leaving the encounter scene, you will find yourself back on the overworld and can resume your travels.
If you try to enter a town under siege, you’ll be given the option to enter the siege, bypass it and enter the town, or cancel and remain where you are. If you choose to enter, you’ll be pulled into a siege scene. Inside the siege, you can return to where you came from or fight your way to town exit on the far side.
Roads are generally faster and safer to travel on, while deep wilderness areas will slow travel and contain more danger.
Scenes
Scenes offer many opportunities for adventure and interaction. In these areas, you’ll explore new wilderness locations, delve into dangerous dungeons, combat fierce enemies, solve puzzles, trade with others, and more.
Most of the time, you’ll enter a scene on it’s edge and next to an exit. Many outdoor scenes have at least one stone archway like the one pictured below. These archways are designed to help you know where the edge of the scene is and how you can quickly exit the scene. You will know if you are about to leave the area thanks to a “fading out to black” effect as you walk through the exit area. Often, a scene will have additional exits along its edge, but you might also find caves, boats, or secret doors that might also send you to a new location.
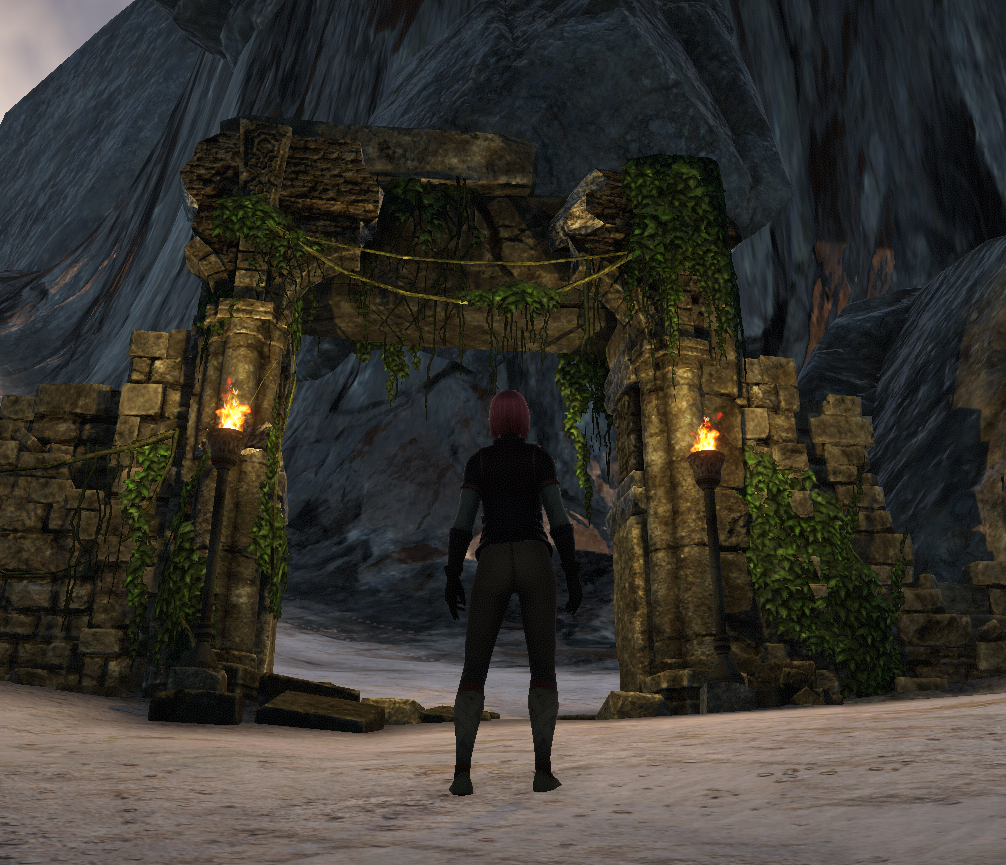
Some areas of the game have entrances to other areas of adventure. For example, entry to the Ravensmoor Dungeon requires navigating through foggy surface ruin guarded by undead and finding the entrance carved out of the rocky shore. Many areas of adventure have similar entrances to discover.
Fast Travel
There are several means to quickly travel from place to place in Shroud of the Avatar.
Fast-Travel Scrolls: Recall and Teleport scrolls allow Avatars to cross vast distances instantly. New player-characters start with three Recall and three Teleport to Friend scrolls, but these scrolls are also created by alchemists.
To use a Recall scroll, Avatars must first bind themselves to a lot or town by interacting with the lot sign or town crier. An Avatar can then use a Recall scroll to return to the last location to which they bound themselves.
Teleport to Friend scrolls move an Avatar to the entrance of the scene of another Avatar in their party, friends list, or guild roster.
Avatars will automatically unlock entrance locations for the scenes they visit and can use Teleport to Zone scrolls to return to these spots. However, note that some locations cannot be unlocked, such as quest-related scenes. If you’d like to craft the scrolls yourself, you can purchase a recipe from Alchemy Merchants. Otherwise, you can purchase Teleport to Zone scrolls from the Crown Store.
All fast-travel scroll types are used from the Utility Hotbar and are consumed on use.
Other Fast-Travel Means: Some areas of the game can be accessed via fast travel.
- The overworld continents are accessible for exploration, adventuring, and settlement.
- Player-Owned Towns exist throughout the game, many of which can be visited while walking across the Novia and Hidden Vale overworlds. These towns often have interconnections with nearby NPC Towns as well as other POTs.
- Large galleons are docked in the overworld outside several NPC towns (e.g. Kingsport, Brittany, Noreach) that allow travel from one continent to another without requiring entering a city.
- There are lunar rifts in Blood River, Brittany Graveyard, Brookside, Etceter, Highvale, Owl’s Head, Solace Bridge, and Westend. All lunar rifts are interconnected and let you travel to any of the connected scenes. However, access to these scenes are linked to celestial events, so precise timing is required when using a lunar rift.
- "Mages of Mystery" can be found in all control point scenes. They’ll charge a small fee for swift passage to the far side of the control point, or a larger fee to teleport you to any other control point.
- Warriors seeking to test their mettle will find a portal to a highly challenging dungeon in the Braemar graveyard. Bring plenty of supplies and friends.
- Underground tunnels have been discovered linking together many caves, sewers, and dungeons. Some of these may be blocked by gates requiring keys to access, which can usually be found on a specific, unique enemy nearby.
- The Verdantis Shardfall can be reached by boat from the northwest Novia coast.
- Some boats, wagons, and balloons can teleport you to another location. If the canvas is a special color, it may teleport you to a location that has special significance or offer a choice of locations.
Avatar Character Management
All character management windows are available via hotkeys, or as a list from the stained glass window icon in the top right menu.
Character Menu
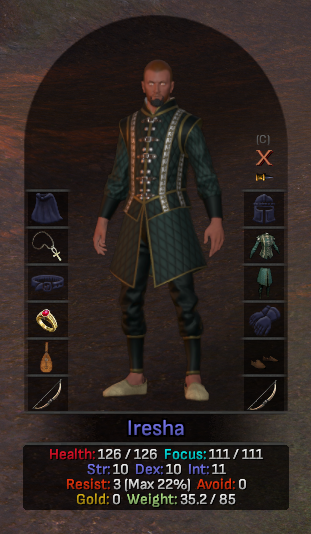
The character menu (C key or Crossed Sword and Shield icon) will bring up your Avatar’s paperdoll and basic character information. You can use this window to add and remove gear for your Avatar.
Journal
The journal (J key) keeps track of information that your Avatar learns through her travels in New Britannia.
If a quest sends you into an area that requires combat (such as a dungeon or hostile area), the journal entry will warn you when the difficulty of the area is more than you can currently handle. As your skills grow in power, the evaluation in your journal will change.
Inventory
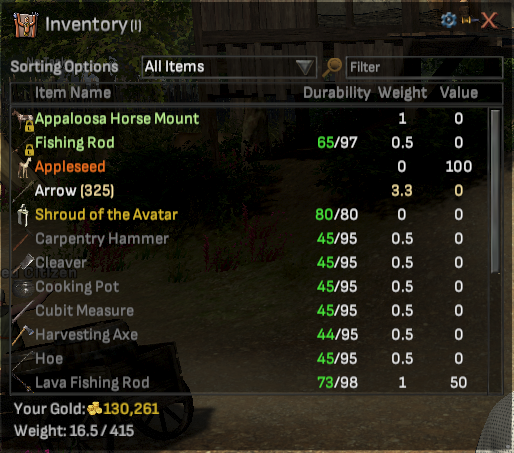
The inventory screen (I key or Saddlebag icon) will toggle opening or closing your inventory. More detail on managing your avatar’s inventory is detailed below.
Character Names and Health Bars
The N key displays the names of other players and NPCs over their head. This is not active by default.
This also toggles NPC health bars and combat damage feedback. If names are hidden, so are health bars and combat feedback.
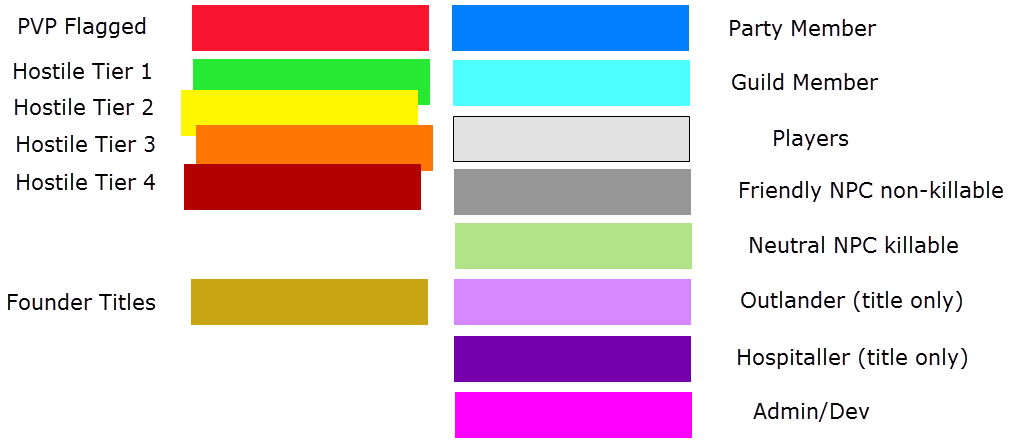
Avatars with green names are friendly and cannot be attacked. In PvP scenes (at present), this will only be party members. Avatars with yellow names are hostile and can attack, and be attacked, by you. Avatars with purple names are Shroud of the Avatar developers. Be sure to give us feedback on the game if you see us!
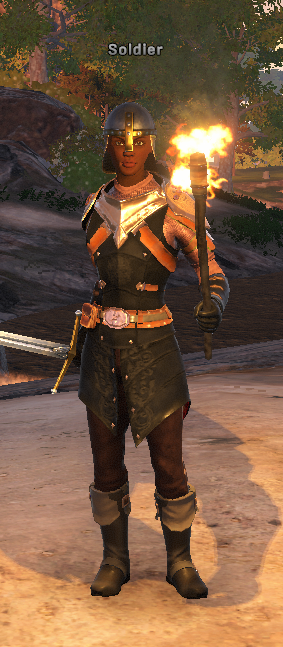
By default, you only see the full name of NPCs that you know; otherwise you will see a descriptive title such as “Guard” or “Shopkeeper.” To learn the names of NPCs, talk to them and ask them their names!
Quest Indicators
NPCs that are currently important contacts for quests you are pursuing will wave to you, have special blue sparkles on their hands, and appear as a point of interest (POI) on your compass. (Similarly, many quest-related locations and items will have a compass indicator, and quest-related items will have a glowing effect, if they relate to a quest you are currently pursuing.) If you hide a task from your current task list, any associated compass icons will be removed from the compass, and will reappear if you unhide that same task.
- Helpful Tip: Items on your compass will indicate if they are above or below you in elevation as you approach.
Emotes
The Emotes menu (O key) opens a list of useful and fun animations that you can perform and others around you will see.
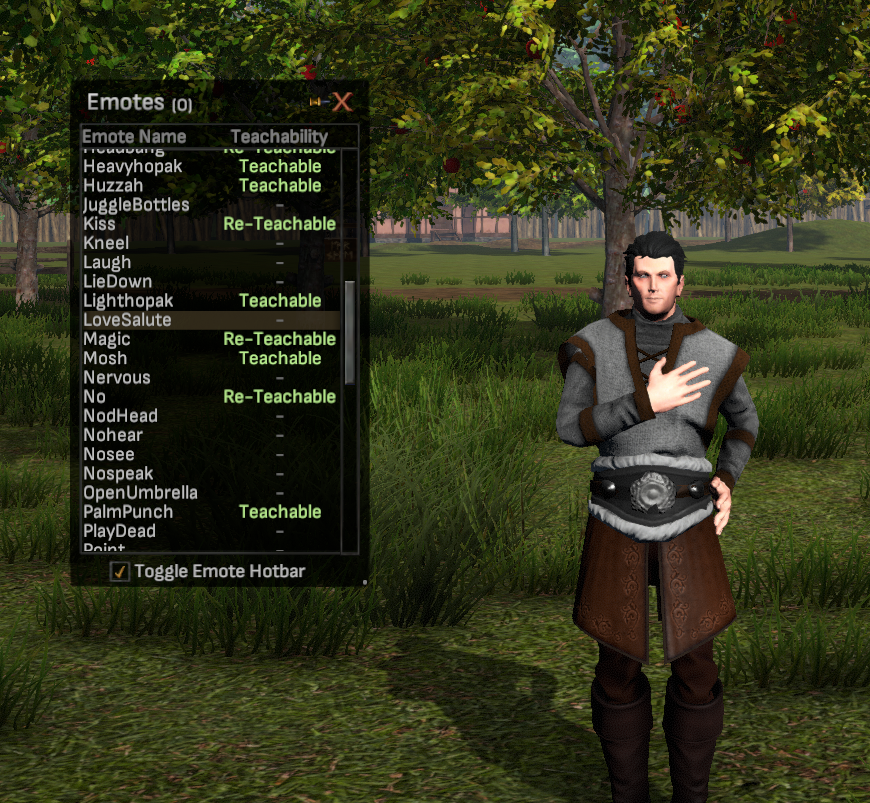
You will begin the game with a small selection of "starter" emotes, along with any Pledge Reward or Add-On Store emotes belonging to your user account. Any learned emotes (via either quest rewards or trade) are added to your user account, such that all future characters created under that user account will have the same emotes.
Many emotes are earned from completing quests. Others can be taught to your Avatar by other Avatars via the trade interface. To offer an emote in a trade window, simply drag any emote listed as “Teachable” or “Re-teachable” from the emotes list to your side of the trade interface. When the other Avatar accepts the trade, they will instantly learn that emote.
As an alternative to the Emotes menu, you can drag any emote listed in your Emotes menu into the Utility Hotbar or Emote Hotbar. Once it’s in either hotbar, you can drag an emote’s icon to any other slot. To remove an emote from the hotbar, right-click the emote’s icon and select “Remove” from the menu that pops up.
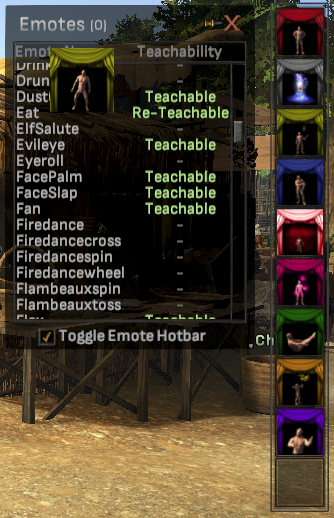
(Note that the Emote Hotbar isn’t active by default, so you’ll need to apply your own hotkey to open and close it. To do so, open the Settings menu, go to the Controls section, and update the “Toggle Emote Hotbar” listing with the hotkey of your choice.)
When your Emote is added to any hotbar, you can hover your cursor over any emote’s icon in the hotbar to see its name. Left-click an icon to trigger its emote for your Avatar.
A small variety of colors are used by the curtains in the emote icons. The colors represent how they were originally acquired, and their meanings are listed below.
- Red: A common emote acquired through normal gameplay, most likely as a quest reward or by conversing with an NPC.
- Gray: A hard-won emote earned from the Obsidian Trials.
- Yellow: Acquired as a Crown of the Obsidians or telethon purchase.
- Blue: A rare emote earned as a pledge reward.
- Iridescent Pink: An ultra-rare emote acquired through purchase of either the Lord British or Darkstarr Reliquary Bundles.
- Hot Pink: Acquired from a purchase in the “Make a Difference” charity section of our Add-On Store. Proceeds for the Juggle Pink Light emote are donated to the Breast Cancer Research Foundation.
- Green: From a partnership with Meretz Gaming Fitness promoting community wellness.
- Gold: A perk acquired through Seedinvest.
- Purple: A special emote with limited distribution, possibly as a gift shared by a developer.
Compass Markers
The compass is at the top-center of your game window.

The name of the town or area you are currently in is displayed underneath the compass, along with the date according to the New Britannian calendar and general time of day. Some points of interest (such as scene exits, merchant shops, and quest-related NPC locations) will display icons on the compass showing their direction once you discover them.
- Helpful Tip: Once you pick up a lot of tasks and points-of-interest, the cardinal directions on your compass can be quickly obscured. You can click-and-hold on the compass so that task and POI icons will temporarily fade so you can see the cardinal directions.
In-Game Map
You can toggle a window with a map by pressing the M key. The source of this interactive map is https://www.shroudoftheavatar.com/map/. More information about maps can be found below.
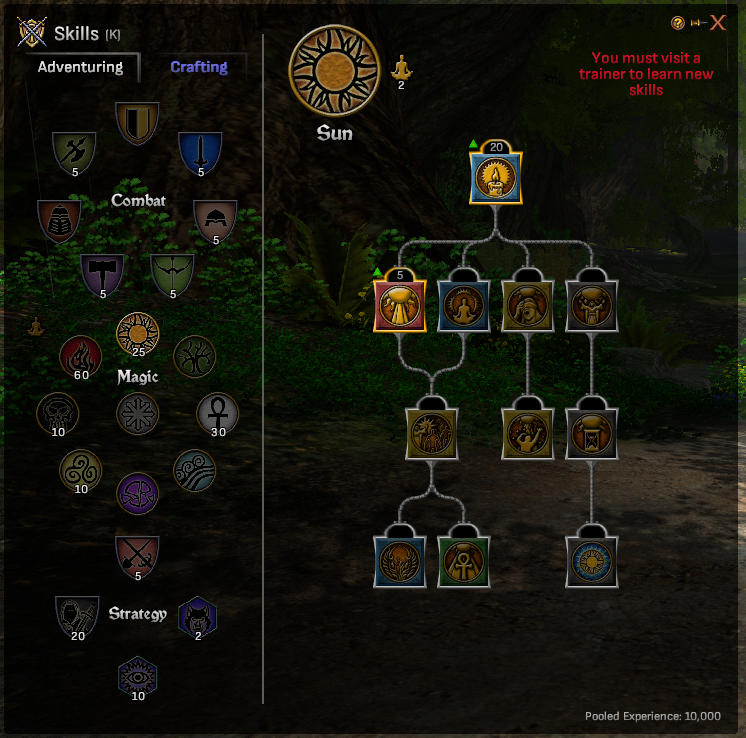
Skills and Skill Trees
Your avatar’s skill trees can be accessed via the K key. Avatars improve learned skills through practice and use. More on skill usage and improvement is detailed below. You must be at a skill trainer NPC to learn new skills, which also costs gold. Skills without icons are not yet implemented. Note that skill trainers will only display skills which they can train. For example, a crafting trainer will only display crafting skills in the skills window.
The Glyphs for active Adventuring Skills your avatar knows and consumable items you possess are accessed from the Glyphs window. From here, you may drag Glyphs to your hotbar for use in the world, or into the deck builder screen for building a combat deck. The Combos tab allows you to review valid Glyph Combos. Note that many Glyphs and Combos may only be used in combat. The interface for combat deck building is opened via the Y key and is detailed below.

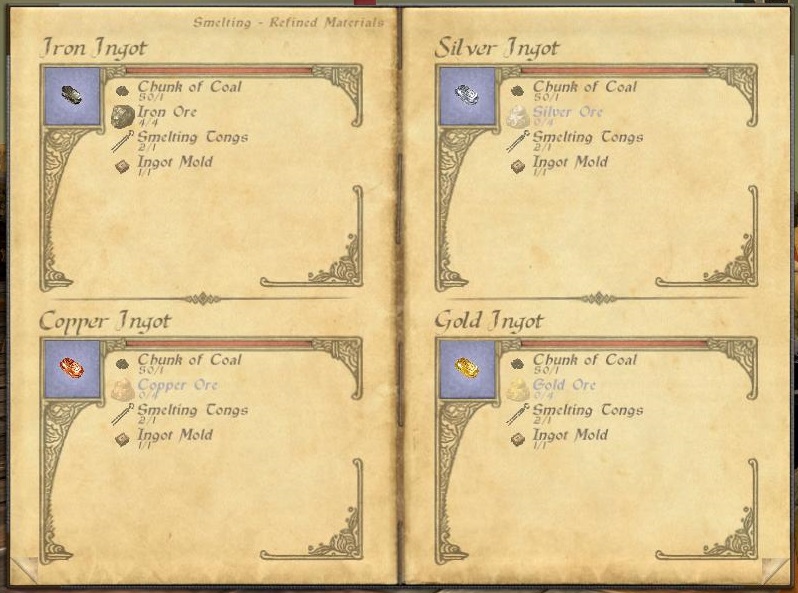
Crafting Journal
The B key opens the crafting journal. You begin already knowing a few recipes, and any new ones that you discover, buy, or are taught are recorded here. The crafting journal is used frequently in crafting, which is detailed below.
Friends, Parties, and Guilds
The F key brings up the Social window where you can manage your friends, party members, and guild (if you are a guild member).
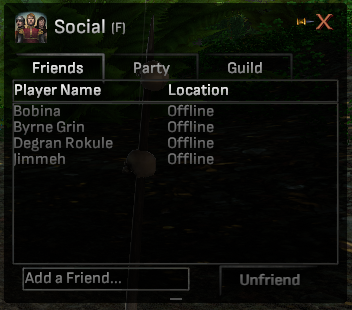
- Add a Friend: In the Friends tab of the Social window, type in a name in the search field followed by the ENTER key to send a Friend invitation to another player. Their name will be listed in yellow until they accept the invite. Friends are account-based, not character-based. If you create a new character, you will keep the friends that you have made (though you may need to re-introduce yourself).
- Friend Request: Friend invitations from other Avatars will appear in green with “Friend Request” next to their name. Accept or decline these invites by selecting them and using the green check or red X icons at the bottom of the Friend’s panel.
- Remove a Friend: Select a friend from the list and left-click "Unfriend" to remove the selected friend.
- Friend’s Online Status: Hovering over the name of an offline friend will display the last time that player was online.
- Teleport to Friend: Avatars must be added to your Friends list, Guild, or Party to enable teleporting to their scene with Teleport scrolls.
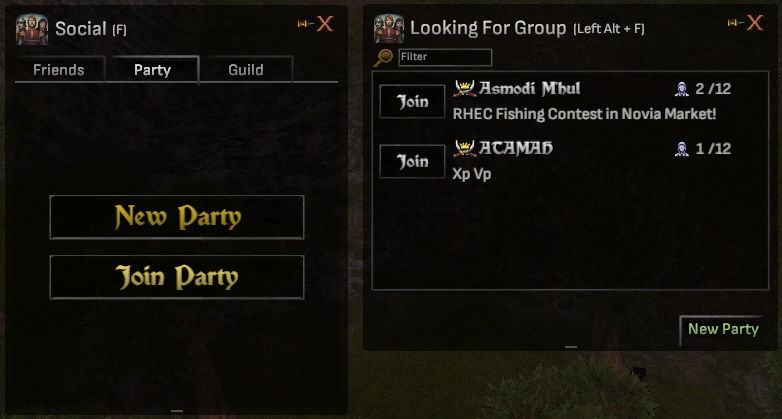
- Party Details: The Party tab of the Social window allows you to create a new party or join an existing one. Once in a party, you can identify the party’s leader, invite other players, promote another player to party leader, kick a player if you are the leader, leave the party, and (if you are the party leader) set the party’s loot mode.
- Looking for Group: In the Party tab, selecting “Join Party” will open up the Looking for Group window.
- The Looking for Group window can also be opened directly using Left Alt + F.
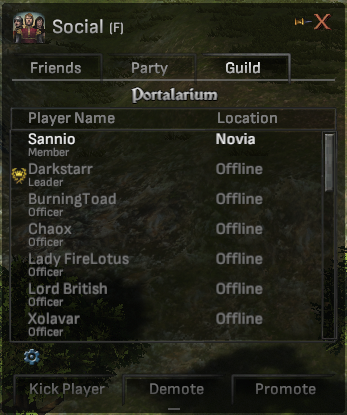
- Guild Details: The Guild tab of the Social window allows you to identify your guildmates’ guild rank and location, view the guild description, toggle the guild name on your nameplate, open the guild’s war list, and leave the guild. Depending on your permissions, you may also remove, demote, and promote guildmates.
- War Details: The Wars window can also be opened using the SEMICOLON (;) key. This window allows you to track the progress of any ongoing wars your guild is involved in.
Blocked Users
The H key will bring up the Blocked users list that will block any users from appearing within your chat window.
- Type in a name followed by the ENTER key to add a user to the blocked list.
- Select a user from the list and left-click Unblock to remove the selected user from being blocked.
Special Interactive Features
The F11 key will take a screenshot of the game and automatically save it to a "SotA" subfolder within your operating system's “Pictures” folder. The exact location of this Pictures\Sota subfolder will vary by operating system.
The Alt-F4 key combo or left-clicking the options menu “Quit” tab will exit the game.
You can close all open interface screens via the ESC key. Pressing ESC with no interface screens open will bring up the options menu.
Typing /AFK puts your avatar in AFK mode. Your avatar sits down and AFK is appended to their nameplate. Moving cancels AFK mode. Note that when an avatar goes AFK while set as PvP or in a PvP scene, they will be disconnected after being AFK for 20 minutes (or 10 minutes after the flag is set).
Keyboards by select manufacturers, like Razer and Alienware, can be set to change colors based on the in-game action by checking the Peripheral Lighting checkbox under Video Options. Appropriately enabled keyboards will shift from green to red as you take damage, highlight keys that form valid combos or are mentioned in tutorials, strobe colors while you /dance, and more.
Select buffs (helpful spells and effects, like the light and night-vision spells) may be removed before they expire naturally by right-clicking on their icon beneath the Health and Focus bars.
Utility Hotbar
You may drag items like potions and select non-combat spells (like light) to the Utility Hotbar at the bottom of the screen. The Utility Hotbar will stay visible during combat (under the combat hotbar), allowing potions, food, and other items in that bar to be used during combat. Consumables used from this hotbar will have the same cool down values that the combat hotbar uses. A small selection of "utility spells" are also usable from here as well, including Light, Night Vision, and Resurrection.
Player Menu and Trade (“Right-Click Menu”)
While adventuring, you can bring up a player menu by right-click on another Avatar. This allows you to perform a variety of interactions with that Avatar, such as inviting them to your party, sending them a whisper, examining their worn equipment, or offering to trade with them.
Trade opens the Secure Trade interface, allowing the exchange of gold and items. To trade place your offer on your side and click “Accept Trade” when you’re happy with the trade. The trade only goes through when both parties click “Accept.” Either person can cancel at any time before then.

The trade window can also be opened by dragging and dropping an item onto another Avatar.
Any emote listed as “Teachable” can also be taught to other Avatars through the trade interface, and “Re-Teachable” emotes can be further re-taught after being learned.
Through this menu you can also add/remove a player as a friend, ignore/unignore them, or block/unblock them.
- Helpful Tip: Use the Universal Trade Channel to find players to trade with. Switch to this channel by typing “/T” (for “Traders”) in your chat window.
Inventory Management
To wear equipment, open the character sheet (C key), drag the equipment onto the display-avatar or corresponding highlighted equipment slot, and release the left mouse button. You may also right-click on items in your inventory and choose to equip them from the dropdown menu. Non-equippable Items will automatically be added to your inventory if they are dragged onto the Avatar within the world.
To move items into a bag, open the Inventory window (I key) and the bag (by double-clicking the bag), then drag the items into that bag.
SHIFT + Left-Click allows you to break up stacks of identical items (like arrows or potions).
CTRL + Left-Click pulls a single item from a stack of items.
ALT + Left-Click loots an item from a chest or other container into your inventory, whether it’s a single item or a stack. This can also be accomplished by double-clicking on an item in a chest.
You can lock an item in your inventory. This will prevent you from accidentally letting the item leave your inventory by selling it to a merchant, using it in crafting (salvage, enchant, masterwork), moving it to a container, or placing it in your bank. You can invoke this command by right-clicking on the item and selecting the “Lock to Inventory” option. NOTE: This does not protect an item from ransom in PvP.
Unwanted items can be deleted by right-clicking on them and selecting the appropriate option from the drop-down menu. Note that items deleted in this fashion are GONE FOR GOOD.
Non-combat items, including consumables like Fireworks and Snowballs, can be used by dragging them from your inventory to a slot on your Utility Hotbar. Then press the appropriate hotkey to use the item. Many items require an appropriate target, like another Avatar (snowballs) or an ore node (mining picks).
Containers and Sub-Containers
You can have multiple containers in your inventory, in your bank, and on a housing lot. You may place containers in containers. The "uppermost" container is sometimes called the "parent container." A "sub-container" within a parent container is sometimes called a "nested container" or "child container."
Items within a nested container count toward the item limit for the parent container. Similarly, the item limit of the nested container is affected by the number of items in the parent container, since the sum of all items in the parent container (including items inside nested containers) cannot exceed the parent container's limit.
For example, a player has two containers: a Small Bag with a limit of 150 items and a Chest with a limit of 300 items. They put the Chest and nine other items into the Small Bag. The Small Bag is now considered the parent container (the Chest is a nested container) and sets the item limit to 150 (and makes the Chest's 300 item limit irrelevant). Because the Chest and nine items are inside the Small Bag, the player may place 140 additional items within the Small Bag, the Chest, or split between both. (150 items, minus one item for the Chest, minus one for each of the nine items, equals 140.)
Continuing the example, the player adds 5 items into the Chest. The player may now place 135 additional items within the Small Bag, the Chest, or split between both. (They started with the 150 item limit set by the parent container, minus the the Chest and nine items in the Small Bag, minus the 5 items in the Chest.)
Note that quest items can only be stored in your main inventory and not in your bank or any sub-containers. Also, quest items do not encumber you. Finally, quest items cannot be traded from one player to another.
Encumbrance
An Avatar may carry weight up to their Encumbrance limit without any penalties. An Avatar may continue to carry additional weight while their Encumbrance limit is exceeded, but cannot gain items from looting or trading when doing so will cause their new weight to exceed three times their base capacity. "Loot" includes items from corpses, adventure chests/containers, resource nodes (excluding agriculture), fishing, and world items.
A character that is encumbered will begin to suffer penalties to movement speed, the dexterity stat, and a constant drain to Focus while moving. The more heavily over-Encumbered an Avatar is, the worse these penalties become.
Your Encumbrance can be tracked on your Character sheet. Becoming Encumbered will also generate a debuff icon (debuffs are spells and effects that are detrimental to the character that they are inflicted upon) below your Health and Focus bars to warn you and inform you of the specific penalty level you have incurred. Increasing your Strength statistic and select skills in the Tactics skill tree can increase your Encumbrance limit.
If Encumbrance becomes a problem, consider selling items to a merchant or storing them at a bank. Completely unwanted items can be deleted by right-clicking on them and choosing the appropriate option from the dropdown menu. Avatars who own property can also place decorations that serve as containers, like chests, and use them to store excess items in their homes.
Banks
The bank is an excellent resource for storing loot, crafting materials, spare equipment, and more. While bank inventory and weight limits are not unlimited, using it can help you manage your encumbrance level and inventory effectively. The default inventory and weight limit is relatively low, but may be permanently upgraded by spending gold in game. Some pledge levels begin with additional bank space.
Bank NPCs are found in major cities. Interacting with a banker opens the Bank window, allowing you to deposit and withdraw items by dragging them to and from your inventory. Banks are “global” in that you can deposit an item into a specific bank and withdraw that item from the same bank or any other bank in the game. You may still see which items you have deposited at different banks, but you may withdraw them from any bank regardless of where they were originally deposited.
Items that cannot be traded (sometimes called “no-trade items”) can be freely stored in the bank without contributing to bank item limits.
If you change the house on your lot or unclaim your lot entirely, all decorations will be routed to your bank. The bank will accept these items even if doing so would overload the item or weight limit, but you will not be able to bank new items until you clear sufficient space or weight. You may also claim the proceeds from vendor sales from in-game mail.
Players can view a list of all items that they have listed for sale on player-owned Vendors throughout New Britannia. This is accessible via the cog context menu button in the bank interface, and should help players locate items that may have moved via the Property Manager. Items in the list may be sent to the bank in order to easily retrieve items that may be placed on a vendor that is currently in storage.
Note that your bank contents are attached to your account, not your character. If you delete your current character, your bank contents will remain accessible to any new characters you create on the same account. It is strongly recommended you store any irreplaceable or valuable items (like house and land deeds) in your bank before creating a new character.
- Helpful Tip: Before deleting any Avatar, you should move any items you wish to keep (and special one-of-a-kind items in general) from that Avatar’s personal inventory to their bank inventory, so that any new Avatar you make can collect those items.
Rewards
When you purchase items from outside the game, those items will be automatically sent to your Rewards interface when you next log into the game. If you are currently logged into the game, they will appear shortly after the purchase transaction completes. An onscreen notice will alert you when rewards are delivered to your Rewards Interface.
Items in your Rewards interface, including any reward items not issued to your Avatar automatically, can be retrieved from the Rewards window. Find the “treasure chest” icon to open the Rewards window in the upper-right corner of the client. To claim new rewards that have not appeared in this window, click the “Claim Rewards” button. Any newly-claimed rewards will then be added to the window and will appear in green.

Backers will find any reward packages included for their pledge level, bundle, or digital store purchase in their Rewards window.
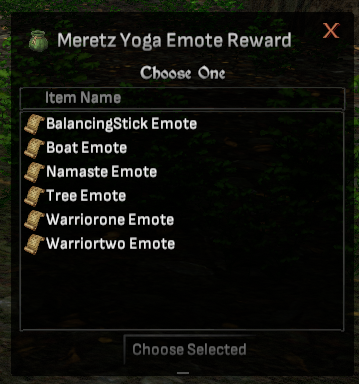
Many rewards require a choice between several mutually exclusive items. If a reward requires a choice between items, double clicking on the “Reward” item will open a window that allows you to select the reward you want. Once you have made your choice the “Reward” item will be replaced in your inventory with the actual usable item. This choice cannot be reversed or undone, so please choose carefully!
If the reward package includes several items but does not require an exclusive choice, simply opening the reward item will deposit all the items into your inventory without requiring further input.
Mystery Boxes
Select backers and patrons of the in-game Crown Store and Add-On Store will find themselves in possession of a general class of items called “Mystery Boxes.” Examples include Cornucopias, the Artisan Box of Plenty, and the Replenishing Snowball Box.
All Mystery Box items periodically generate items for their owner when double-clicked on. While Mystery Boxes can be placed as decorations they are not containers, or able to be opened and closed. When used they simply deposit the items directly into your inventory.
Some Mystery Boxes only generate new items at a particular time. Others generate items daily or weekly. A few Mystery Boxes may generate different items depending on the season or time of year. If you attempt to use a Mystery Box that has already yielded its item(s) for this period of time you will be notified by a message in the chat log.
Maps
Avatars have access to the in-game map as well as hand-drawn maps.
In-Game Map
While playing the game, you can open an interactive map (M key) that will show such things as your current location, exits, special NPCs, and points of interest.
A browser-based version of this map is available at https://www.shroudoftheavatar.com/map/ and it includes several features not available with the in-game version.
- Map Search: You can search maps by name using the search bar in the top left. This feature is available to anyone, even if they are not logged in.
- User Login: When you are logged in with your SotA account, additional map features will become available to you.
- Player-Owned Town (POT) Customization: When you are logged into the website with an account that owns a POT, you can enable editing and modify that POT map. (Note that lot ownership and home information automation is coming as a feature in a future release, so any work on customizing that specific information will be overwritten when those features come online.)
- Personal POI Placement: When you are logged into the website, you can enable editing and place Personal Points of Interest on maps.
Hand-Drawn Maps
Avatars begin play with a few hand-drawn maps. More can be purchased, found, or given as rewards for helping NPCs.
Maps can be used directly from your inventory or dragged to a Utility Hotbar slot and used from there.
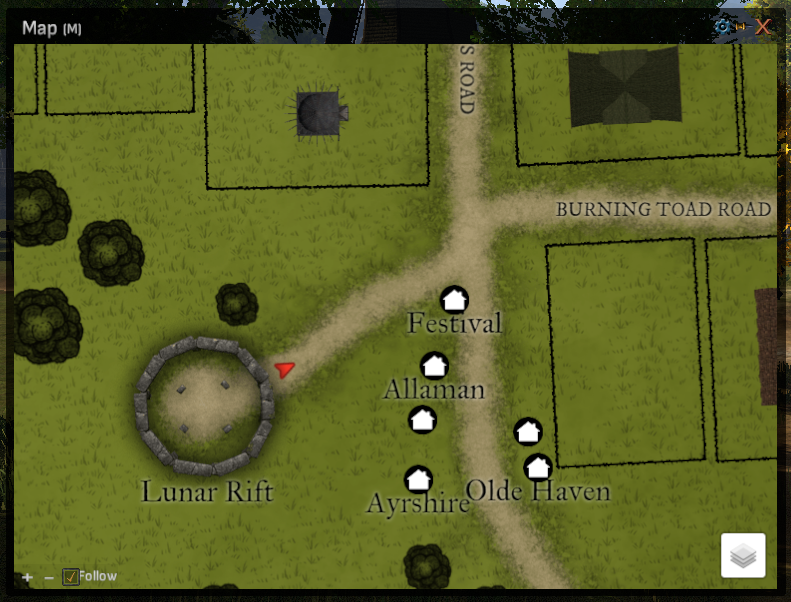
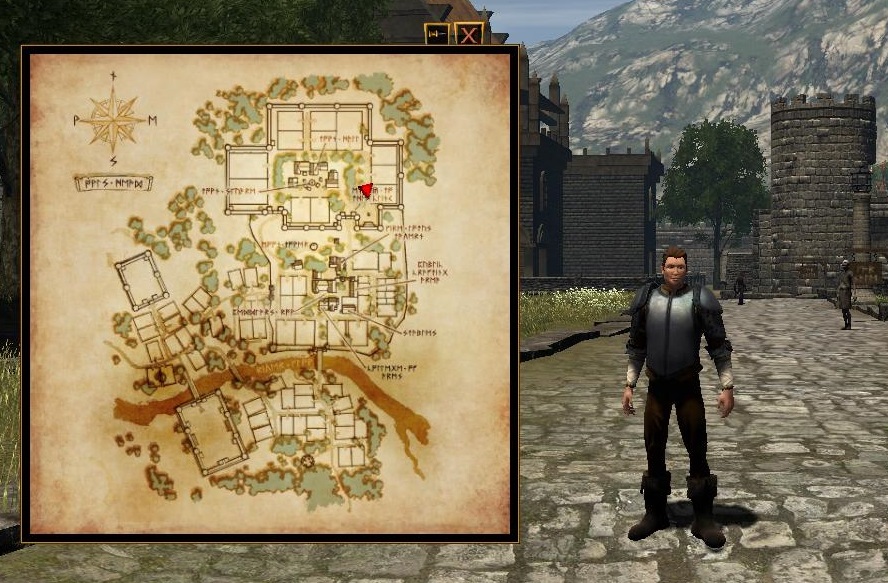
If you view the map for a scene you are currently in you will be able to see your Avatar’s current location and facing, represented as a small red triangle. This can make finding your way around much easier.
Interactive Objects
Interactive objects in the world can either be interacted with by placing the reticle or mouse cursor over them and double left-clicking. Interactive objects turn the reticle and mouse cursor green. Note that some interactions may be blocked while you are in combat mode.
Below are some examples of interactions:
- Doors can be opened and closed.
- Treasure Chests can be opened and looted.
- Helpful Tip: Most treasure chests have multiple visual states. If the chest has treasure, its lid will be closed. The lid will open slightly while being looted. The lid will be mostly open when empty but is awaiting restocking, or fully open when empty and will never be restocked.
- Light sources can be toggled on/off.
- Ladders can be “climbed” (currently a teleport action).
- Objects that can also be used by double-clicking on them (candles, books, etc…) must be looted by dragging them into your open inventory window with the mouse cursor (in Interactive Mode) or holding Alt + clicking on them.
- Switches can be triggered by hand, or from a distance by shooting them with a bow in Targeting mode. With a bow equipped and arrows in your inventory, enter combat stance with the Z key, put the reticle over the switch, and double-click.
- Many objects in the environment can be picked up and looted by double-clicking on them. Lootable world objects can also be grabbed by holding down the left mouse button and dragging them onto the Avatar or into an inventory window. Be warned: taking an object owned by a friendly NPC is considered theft! (Items that are owned by NPCs have a tooltip that lets you know they are “private property” and taking them would be considered theft)
Repercussions for Stealing
While there are no significant repercussions for taking random objects (e.g. food, mugs, books, etc.) found throughout a typical adventure scene, the same can’t be said for law-abiding towns. Containers owned by NPCs show “Steal All” when the act of taking something will be considered a criminal act and “Take All” for non-criminal acts. NPCs may notice when you steal from them and will call for the guards when they do. The justicar guard that arrives to administer justice will impose a penalty for your crimes. Successive crimes within the same town have escalating penalties. “Justicar” guards will invoke decay penalties when the offender has no gold to pay the fines.
Combat
New Britannia can be a hostile place. At some point, you may find it necessary to defend yourself.
The Z key sheaths and unsheathes your equipped weapons and places you in and out of Combat Stance. Even if you do not carry weapons, you must enter Combat Stance to use combat spells.
There are two primary ways to target and attack enemies, Auto-Attack and Free Attack. Each works a little differently, and you may toggle between them at any time by pressing the “Toggle Attack” hotkey (T by default).
Auto-Attack Mode
Whenever your Avatar is in Auto-Attack mode, the sword icon on the Combat Hotbar will flash red.
Auto-Attack mode makes the Avatar constantly attack any enemy they are facing that is also within range of their equipped weapon (provided the Avatar is in Combat Stance). You will continue to attack automatically until you move out of range or leave Combat Stance by pressing the Z key.
Auto-Attack mode does not allow you to charge attacks.
Free Attack Mode
Free Attack is an optional advanced technique option for combat that you can unlock during a conversation with most Adventurer Trainers, including master trainers.
Free Attack mode requires more active engagement in combat. When in Combat Stance, you will attack with your equipped weapon whenever you click the left mouse button. You must aim the reticle at an enemy to make sure your attacks hit.
Free Attack mode allows you to charge attacks for additional damage. To charge an attack, hold down the Left Mouse Button while in Combat Stance. A notched status bar will appear at the bottom of the screen and begin to fill. Releasing the Left Mouse Button releases the charged attack. The more notches are filled, the more damage the charged attack will do. Be aware that you may select a new target while left-clicking when your cursor is not over the target of your charged attack.
Small, light weapons (like daggers) have short charge bars that only contain a few notches. Heavier weapons (like polearms) have charge bars that contain many notches, allowing the delivery of mighty strikes.
Sticky Targeting and assigning a Soft Lock
When in combat stance, the Avatar will target nearby enemies in range of their equipped weapon based on position and distance. A red highlight will “snap” to your target and follow them. You will generally target the closest enemy you can hit, centered in the direction the camera is facing.
If you have multiple targets in range and are using a weapon that can hit multiple enemies at once (such as a halberd) a red highlight will remain over your primary target. If you no longer have any valid targets in range, then the white “X” will return to the center of the screen.
Sometimes you may want to attack something other than the closest enemy, such as an archer or mage in the back of an enemy group. To do so you can assign a “Soft Lock.” Attacks always prioritize your Soft Lock, and you will see their nameplate displayed next to yours in the upper-left of the screen.
You assign a Soft Lock by centering the reticle (or mouse cursor in Interactive mode) over an enemy, and double-left-clicking on them. A distinctive red highlight appears over your Soft Lock target. For as long as they are in range, and you are generally facing your Soft Lock target, projectile weapons and single target spells will alway be aimed at them. If you swing a melee weapon into a group containing your Soft Lock, the Soft Lock target will always be among the targets attacked.
Pressing the “Next Target” key (TAB hotkey by default) assigns the closest target as your Soft Lock. Pressing Next Target again cycles through assigning nearby valid targets as your Soft Lock.
Other Avatars and friendly NPCs can be set as your Soft Lock by holding Shift + left-clicking on them. Hostile creatures need only be double-clicked on.
You may also set party members as your Soft Lock, which is useful if you want to heal or buff them during a chaotic battle. Spells like Healing Ray will always hit a friendly Soft Lock, provided they are in range and you are facing their general direction. You may set party members as your Soft Lock by clicking on their nameplates or pressing F1–F8.
Pressing Escape (ESC) clears your Soft Lock.
Nameplate Colors and Creature Strength
Nameplates hover over the heads of Avatars, NPCs, and Monsters. These can be toggled on and off with the N hotkey. Options to hide your personal nameplate and hide nameplate of NPCs you haven’t met yet exist in the options menu. The option to toggle the size of the nameplate can be found in the Video menu. Note that toggling nameplate size also toggles chat bubble size.
You can learn much about another Avatar, NPC, or monster by observing the color of their nameplate. Creature nameplates will display different colors, depending roughly on how strong they are compared to your Avatar. The weakest creatures have green nameplates, the strongest are dark red, and the dead are gray. The actual difficulty of a given creature can vary depending on your current equipment, skills, and Glyphs deck, but nameplate colors offer a good general guideline.
.
Combat Tips
Defeated enemies that have loot for the Avatar will highlight the cursor and reticle green when hovered over, and can be double left-clicked to bring up the loot window. The party that does the most damage to a monster gets first looting privileges. After five minutes, looting is open to anyone. A lone Avatar counts as a party of one.
Numbers indicating damage dealt and received appear over the Avatar and creature’s heads. These can be disabled with the N key, along with health bars and nameplates.
Focus and Health will each will regenerate slowly while you are in combat (with your weapon drawn) and faster when you are out of combat (your weapon is put away).
Your Focus Bar will flash when you are attempting to use a skill without having the required amount of Focus.
Double-tapping one of the ASD keys in Combat Stance will perform an evasive roll.
Archers should pay attention to their movement in combat. Bow and crossbow wielders suffer significant penalties to their attack accuracy while running. These penalties become moderate while walking, and disappear entirely while standing still. Only archery weapons incur these penalties.
Remaining motionless for sufficient time grants a bonus to the Critical Chance of spells and decreases their Focus Cost. These benefits stack the longer you remain motionless, up to a point. Movement breaks this effect, though attacking and even being attacked do not. Only spell glyphs benefit from this effect, not combat glyphs.
Effects that modify movement speed can only stack to a maximum of two in the stack. Both effects are added together.
Enemies prioritize targets based on a variety of factors, but some skills are more likely to draw their focus than others. Armored warriors attempting to hold a monster’s attention will be well served by the Shield Bash and Body Slam skills, while more lightly protected mages should take care with spells like Root and Lightning.
It is possible to dual wield one-handed weapons, but be aware that the Avatar will only attack with their main-handed weapon. Attacking with an off-hand weapon requires skills found in the Tactics tree.
Some creatures are extremely resistant or even immune to certain damage types. For example, Air Elementals aren’t bothered by lightning spells or attacks.
Being behind cover decreases the amount of damage a target will take during combat. Cover is considered any object that blocks, or partially blocks, direct line-of-sight between an attacker and a target.
For each piece of unbroken (i.e. greater than 0 durability) armor you wear that matches the “light” or “heavy” quality of your torso armor—excluding your torso armor—you will gain a 2.5% bonus to the skill tree associated with your torso armor. This bonus applies to the effectiveness of many of the skills in each tree.
- Example 1: You are wearing leather armor (light armor) on your torso and cloth armor (light armor) on the five remaining armored locations. You receive a bonus of 10%.
- Example 2: You are wearing plate armor (heavy armor) on your torso, a plate helmet (heavy armor) on your head, and cloth armor (light armor) in the remaining four armored locations. Because your plate helmet is the only heavy armor piece that matches your heavy armor torso piece, you only gain 2.5% bonus.

A note on battling the undead: Undead magi and their Lich masters can use their dark powers to reanimate slain undead. Scholars have noted that undead slain by spells seem more difficult to reanimate, and theorise that hostile magic disrupts the necromantic enchantments holding them together.
Magic and Fizzle Chance
As any veteran mage can attest, magic is a difficult and sometimes temperamental art. Many things can interfere with the complex combination of gestures and words required to cast a spell, causing a spell to fail and “Fizzle.” Any Avatar hoping to wield magic in combat should be aware of their Fizzle chance, which represents the percentage chance a spell will fail. Combat skills are not affected by Fizzle chance, only Magic spells.
When a spell Fizzles it costs the normal amount of focus, but the spell is not actually cast. Reagents are not at risk of being consumed. Glyphs dealt into your hand are not consumed or discarded and you can attempt to cast them again. Locked Glyphs do not enter cooldown when they fizzle.
Fizzle is affected by several factors, explained in more detail below.
- Movement
- Held Equipment
- Armor
- Spell Tier
- Skills
The most basic factor affecting Fizzle Chance is movement. Fizzle chance increases while walking and running and decreases while standing still. Low tier spells are inherently simpler and easier to cast, even while moving, and suffer less Fizzle chance penalty from movement.
It is harder to cast spells with your hands already full. Mages wielding swords, bows, shields, and other conventional weapons will suffer a higher Fizzle chance. Magic staves, wands, and other magical foci do not inflict this penalty.
Heavier armor can help protect an Avatar in combat, but is difficult to cast spells in. This is represented by the Fizzle attribute on each piece of armor. Some schools of magic (like Life and Earth) are less affected by Fizzle Chance from armor. Other schools (like Death and Air magic) are affected even more than usual. Heavy armor like chainmail and plate generally has a drastic Fizzle chance penalty.
Higher tier spells are significantly more difficult to cast, requiring complex words and gestures. As such the higher the tier of the spell the higher the base Fizzle chance. As your skill in a spell improves so does your mastery of it, reducing the fizzle chance of that spell. Skills that mitigate some Fizzle Chance for all spells can be found in the Focus tree.
The percent (%) chance that any spell will cast successfully is displayed on the Glyph on your hotbar. If no percent chance is displayed on the spell glyph then it does not have a chance to Fizzle. This information updates in real time. Factors like spell tier and individual skill rank mean that different spells may have very different Fizzle Chances.
Death and Resurrection
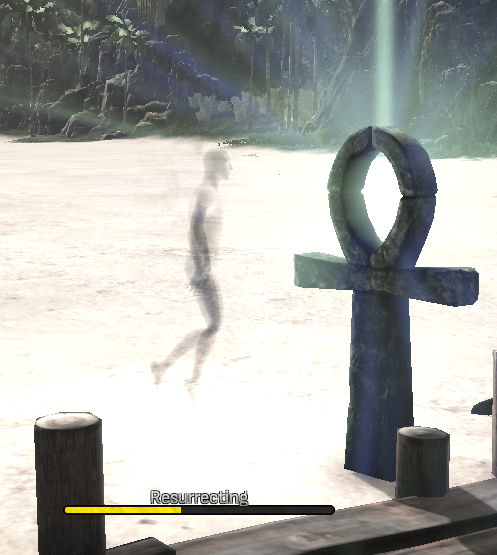
If the Avatar drops to 0 Health, they will be slain and rise as a wandering spirit. Ghosts cannot communicate or interact with the word of the living, and other creatures simply appear as motes of light. A slain avatar has several options for returning to life.
One option involves an Avatar seeking out one of many mystical glowing Ankhs scattered across the world. These special Ankhs are visible only as a ghost. The locations of these Ankhs are visible on the compass only when your character is dead. Ankhs glow bright blue/green immediately after death, fading slightly towards gray as time passes and the Avatar approaches automatic resurrection. Moving next to an Ankh will resurrect the Avatar at that spot at full Health after thirty seconds. Approaching an Ankh will display a progress bar of how much time remains before you can be resurrected. Dying repeatedly over a short time increases the time it takes an Ankh to resurrect you.
There are rare Chaos icons in the world that are similar to these Ankhs, although they glow red instead of green and send you to a random location in the same scene when they resurrect you. Be wary of resurrecting at a Chaos icon!

Other Avatars with the appropriate spell may resurrect a slain Avatar at the site of their death. Resurrected Avatars return to life at low Health and Focus, but may resume adventuring where they left off.
Avatars will not remain ghosts indefinitely. When players die, a timer appears to show how long before automatic resurrection will be triggered. If no other action is taken, a slain Avatar will eventually, automatically be resurrected at the entrance to the current scene. This is extremely taxing to mind and body, especially to Avatars who have been in New Britannia longer. A veteran Avatar who is automatically resurrected in this fashion will not only return to life with low Health and Focus, but with a sizable temporary penalty to their stats. The physical shock of resurrecting in this fashion inflicts a 5% durability damage penalty to all equipped items.
- Helpful Tip: If you’re dead and able to move to a new scene, you’ll be resurrected as you enter the new scene. However, when you resurrect in this manner, you’ll receive the Death Penalty debuff! This debuff affects strength, dexterity, and intelligence for a limited time. It’s best to resurrect before leaving a scene whenever possible.
Durability and Repair
Combat wears down weapons and armor, represented by an item’s durability ratings.Resurrecting without the benefit of an Ankh or a Resurrection spell will inflict durability damage on all equipped items. When an item’s current durability is exhausted, it confers no benefits; broken weapons inflict no damage and broken armor offers no protection. The monetary value of equipment decreases as it wears out.
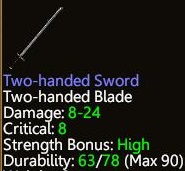
Durability has two discrete ratings: current durability and maximum durability. For example, an item with a durability of 63/78 has 63 points of current durability and 78 points of maximum durability. Current durability may not exceed max durability. The (Max 90) after the durability ratings shows the highest possible rating the item can have for maximum durability. In this case the max durability cannot be increased over 90.
Current durability wears out much more quickly than maximum durability. It can be restored “in the field” through the use of repair kits, simply by dragging the appropriate kit onto the desired item in the character sheet or inventory. This requires no special skill or training but is not influenced by, or helps to train, any repair skills. Repair kits repair less current durability on more expensive items, due to the rare and exotic materials used in their construction.
It is more effective to repair items at a crafting table with the appropriate tool and repair kit. This repairs more points of current durability than using a kit in the field, further improving as your relevant repair skill improves. Repairing items at a crafting table helps train your relevant repair skill.
Item Type | Crafting Table/Tool | Repair Skill |
Metal Weapons and Armor | Blacksmithing Table/Hammer | Blacksmithing Repair |
Cloth and Leather Armor | Tailoring Table/Scissors | Tailoring Repair |
Wooden Items (Such as Bows) | Carpentry Table/Hammer | Carpentry Repair |
In addition to a repair kit that specifically repairs tools, there are three different types of skill-themed repair kits (one for each skill used for repair), and the right kit must be matched to the right item type. You cannot, for example, repair cloth gloves with a Blacksmithing repair kit. Select merchants sell repair kits, and skilled craftsmen can create their own repair kits for use or sale.
Maximum durability drops very slowly, representing long-term systemic wear and stress to an item. Metal can only be beaten back into shape so many times before it starts to degrade. Maximum durability can only be recovered through the use of the rare and powerful Crowns of the Obsidians. Founder items and other backer rewards and Add-On Store purchases do not lose maximum durability.
Crowns of the Obsidians are highly sought after relics, although almost any creature in the world has a small chance of yielding one up when slain. Placing 250 Crowns of the Obsidians on the crafting table with an item and hitting Repair will restore an amount of maximum durability and the highest possible current durability to the item. The amount of maximum durability restored is initially high, but each additional repair will reduce the amount restored. The first repair restores 100%, the second restores 66%, the third 50%, then 40%, then 33%, and so on. By the twentieth repair, only 10 points will be restored to the item’s maximum durability. The Crowns of the Obsidians are consumed by the repair process. This requires no repair skill to perform.
Crafting and harvesting tools require the use of special Tool Repair Kits to repair. These recover both the tool’s current and maximum durability and do not require a crafting table to use. Note that this applies only to equipable tools and not the tools used for recipes such as molds and chisels.
Stealth
A few skill trees (notably the Moon magic and Subterfuge trees) contain Glyphs that allow Avatars to enter stealth. Hostile creatures do not attack stealthed Avatars from as far away, and enemy Avatars see stealthed Avatars as a shimmering blur. Stealth is potentially quite powerful and useful, but has a number of limitations and complications worth keeping in mind.
- Stealth Glyphs only work when no enemies are aware of you, and you are not being attacked. They will fail if you try to use them in the heat of combat.
- Attacking and/or using a glyph from your hotbar will remove you from stealth.
- Magic items that generate light, as well as torches held by your avatar, prevent you from using stealth Glyphs.
- Glyphs that let you move around in stealth (like Silent Movement) are weaker than those that require you to stay still (like Camouflage).
- Hostile creatures can still detect you in stealth, but they must be much closer. If you are detected any stealth abilities in effect will be removed.
- Remember creatures are easier to sneak past (or up on) from behind.
- Stealthed Avatars appear as a faint shimmer to hostile Avatars. Stealthed Avatars are easier to see when in motion.
- Stealthed Avatars can still be hit with weapons, arrows, and spells.
- A few spells can remove stealth from nearby enemies, including enemy Avatars.
- Pickpocket works while in Stealth.
Player vs. Player Combat (PvP)
Some of the deadliest monsters are human—other players who seek the challenge of defeating like-minded players in combat. This is called Player vs. Player combat (usually abbreviated PvP). Shroud of the Avatar has an active PvP community and development continues on creative ways to maim and wound your friends.
In general, the Oracle protects players from being attacked by other players, but there are several situations where players can forgo this protection and engage in combat with other players. The methods to engage in PvP are described below.
While your character is in PvP mode, players you can attack (and be attacked by) will have yellow names. Party members will have green names.
- Helpful Tips:
- Jumping consumes Focus but attempting to jump has a chance (20%) to break stun and root effects.
- Receiving damage also has a chance to break being rooted or mesmerized. (But not stunned)
- Attacks from behind an Avatar will do slightly more damage.
PvP Scenes
General Player-versus-Player combat is restricted to select scenes. While in these scenes, the protection of the Oracle is temporarily removed. Avatars entering an open-PvP scene from the overworld or an adjacent scene are routed to a random location within that PvP scene. Only members of the same party will arrive at the same spot.
There are several PvP scenes available. Examples include the town of Brave Coast (accessed from Kingsport through a ferry on the dock), Verdantis Shardfall (reached by a boat along the northwest coast of Novia), and Grunvald Shardfall (reached by trekking across the Grunvald Desert in eastern Novia). Finally, some Player-Owned Towns permit open-PvP within their borders. Travelers are advised to familiarize themselves with local customs and laws (Provided any exist).
Most PvP scenes currently work as “Free-for-All” situations. You may attack and be attacked by any Avatars not in your party. Spells and weapons work on Avatars just like they do on monsters.
You may review your performance (And that of allies and enemies) under the PvP stats screen, accessible through NumPad 0 by default and only visible in PvP scenes. Note that the names of hostile Avatars will not show up on this window until you have targeted them. Once you have fought an enemy Avatar, they will remain visible on the PvP Stats window until one of you leaves the scene.
PvP Duels
The most casual and consensual form of PvP combat is a duel. You may right-click on another Avatar at any time and challenge them to a duel via the drop-down menu. They are free to decline or accept. If they do not respond within a certain amount of time the duel invitation will expire.
Once a duel begins both Avatars can freely use weapons and skills on one another. The duel persists until one Avatar is slain, flees the scene, or forfeits. Either Avatar can forfeit the duel by right-clicking on their opponent and selecting the option from the drop-down menu.
Party PvP
All players in a party will have the same PvP flag. When a group is formed, the party leader's flag determines the PVP setting and anyone who joins afterwards is flagged accordingly. Changing leaders after party formation will not change the flag.
Avatars not flagged as PvP that join a PvP-enabled party will temporarily flag as PvP. Leaving that PvP-enabled party will return an Avatars to its previous status (PvP or non-PvP). An Avatar who joins or leaves a PvP-enabled party that causes their PvP flag to change will be stunned for 30 seconds. A PvP-enabled Avatar who joins or leaves a non-PvP party will be stunned for 30 seconds (and be flagged as PvP for the duration of the stun).
Being in a party allows you to use beneficial skills on one another (like healing) and prevents you from harming party members with Area of Effect abilities (like Fireball). You may heal, buff, and resurrect party members, even in an open-PvP scene.
Arena PvP
There are several PvP arenas in New Britannia. For example, the Owl’s Head open-PvP arena is accessible through a door in the wall around uptown Owl’s Head, near The Clink. There’s also a team-based PvP arena in Ardoris that can be accessed through a set of steel double-doors near the Oracle Confirmatory and crafting pavilion. The Obsidian Trial is located in Novia near the eastern entrance to Nightshade Pass.
Team Areas: Team combat arenas work a little differently, pitting teams on the sides of Virtue (Blue) and Chaos (Red) against one another. Upon entering the arena you will be able to choose your team by running through the appropriate portal, which will take you to your team’s preparation room. If one team significantly outnumbers the other the numerically superior team’s portal may temporarily close, routing new players to the team that needs them.
You do not need to be in a party with your team members, though inviting them may help coordination in combat. Team matches last ten minutes, and the team with the most kills at the end of this time wins. After the match ends, all Avatars will be teleported back to the team selection lobby.
Arena-based PvP areas (but not open world areas like Quel Shardfall or the Brave Coast) allow for non-combat spectators. Spectators cannot harm or help combatants, or each other. In the team combat arena, spectators enter the stands through the portal with the Oracle Eye symbol over it, and are restricted from entering the arena floor. In the free-for-all arenas, spectators may enter the area floor and become combatants. Don’t forget to root for your favorite champions!
The Obsidian Trial: This is a “deathmatch” arena with several special qualities. Play sessions begin every 10 minutes with one minute of preparation time between matches. During the match, a poisonous boundary that deals extraordinary amounts of damage rapidly reduces the amount of playable area. If you are caught in the lethal boundary, you will die quickly.
Players that enter the scene, or die within the scene, will be sent to a “lobby” where they can prepare for new matches and replenish supplies from a merchant.
While in the Obsidian Trial, your skills will be capped at a maximum of 100. This cap will be removed when you exit the scene.
Any kills you make during a match will reward you with Obsidian Skull Coins. Each time you win a match that includes at least five players will earn you an Obsidian Medallion. You can trade these coins and medallions with a special merchant in the lobby of the Obsidian Trial
The Obsidian Trial has a custom PvP scoreboard that displays the timer for the match, shows how many players are in the match, and announces the winner of each match.
Open-PvP
With the exception of specific PvP scenes (Shardfalls, arenas, PvP Player-Owned Towns, etc) the power of the Oracle both protects Avatars and prevents them from attacking one another. Avatars may choose to forsake this protection, allowing them to freely attack and be attacked by like-minded individuals.
To enable open-PvP, an Avatar must go to an Oracle Confirmatory and specifically request that the Oracle’s protection be withdrawn. Confirmatories can be found in towns like Brittany, Ardoris, and Kingsport. Note that Avatars who have enabled open-PvP can only freely attack other Avatars who have also enabled PvP (because they enabled open-PvP, are in a PvP-enabled group, or by being in a PvP scene). They may not attack those who choose to keep the Oracle’s protection (unless they are in a PvP scene, which enables PvP for everyone in it).
Avatars who have not enabled open-PvP may not initiate attacks against open-PvP Avatars.
With open-PvP enabled, you may attack (or be attacked by) other open-PvP Avatars at any time. This includes while fighting monsters, harvesting resources, shopping in town, and attempting to enjoy a pint at the local tavern. Guards do not interfere with Outlander-on-Outlander violence.
Party members are protected from one another’s attacks even if both party members have open-PvP enabled. This protection ends the moment the party is dissolved.
Some scenes are set to open PvP. Players that enter an open PvP scene may encounter other players, regardless of the chosen matchmaking mode (Open, Party, or Private). While in an open PvP scene, other players can engage you in combat, but as you leave that scene you will maintain your previous mode of Open, Party, or Private.
The Oracle’s protection can be restored by visiting a Confirmatory and asking her to restore it directly. Only the Oracle can remove a “permanent” PvP flag from an Avatar. This can be worth keeping in mind if you are tempted to attack a PvP flagged Avatar, but are far from the nearest Confirmatory.
PvP and Ransoms
When an Avatar is slain by creatures or the natural forces of New Britannia, their equipment and inventory usually follow them back and forth across the boundaries of life and death. However, things work a little differently when one Avatar slays or pickpockets another, as the Oracle enforces a ransom for the event. Ransoms are currently enforced any time one Avatar kills another (whether in a duel, in a shardfall, in a town that permits PvP, or due to both Avatars having enabled open-PvP battle anywhere) or one Avatar pickpockets another.
You will get an on-screen notification when you have lost an item through PvP or pickpocketing. If the item is lost through pickpocketing, there is a 5-minute delay before a ransom icon appears to you. You will also get a warning about a ransom when logging out, if a ransom is still pending.
An Avatar slain in open-PvP leaves behind an Oracle Marker. Anyone in the party that slew the Avatar (based on damage inflicted) may double-click on this marker to claim the ransom.
Ransoms consist of three items:
- A trophy body-part.
- A randomly-selected equipable item. This can include equipped armor and weapons. (Disabled in scenes flagged as “no ransom.”)
- A random non-equippable item. (Disabled in scenes flagged as “no ransom.”)
- Note that multiple stacks of one type of item are considered one item for the purposes of ransom checks. (Therefore, splitting stackable items into multiple item stacks will not affect the odds of which item types are randomly selected or a ransom.)
Ransomed items can only be drawn from the slain Avatar’s current inventory. Items in the bank or in chests on their property will never be ransomed. Quest items, pledge rewards and purchased items from the Add-On Store, Stretch Goal Store, and Make a Difference Store cannot be ransomed.
Once a ransom is claimed, the original owner of the items has several options in the Price of the Oracle UI. (Accessible from the list of options under the stained glass window icon in the upper-right.) If they choose to do so, the original owner has up to 24 hours to pay off the ransom in gold and have the items immediately returned to their inventory. The remaining time to pay off the ransom is displayed in the UI. The original owner may also forfeit the ransom to immediately send the items to the claimant.
If the original owner does nothing, the ransom will be sent to the new claimant after two hours. After that two-hour period has passed, the ransom is considered “resolved” and the claimant then has 30 days to take the items from the resolved ransom. If the ransom is not claimed after 30 days, it is deleted from the game.
Once a ransom has been paid, forfeited, or expired, the claimant may claim their gold or items from the Oracle UI.
Avatars can also double-click their own Oracle Markers to regain their ransomed items at no cost, provided it has not been claimed in the time it took them to return to life and return to the spot where they were slain. These Oracle Markers vanish if they are not claimed within five minutes. If a marker times out and vanishes, the owner can recover their ransomed items for free from the Oracle UI.
Pickpocketing
Note that Pickpocketing is currently disabled, as it cannot occur in scenes that are not flagged to allow ransom.
When enabled, the Pickpocketing skill (from the Subterfuge skill tree) allows Avatars to steal from one another without resorting to violence. Both the Pickpocketer and their potential victim must be flagged for PvP or in a scene that permits it. You may not attempt to pickpocket party members. A Pickpocket attempt requires being close to the victim and takes several seconds.
A successful Pickpocket attempt steals a random item or (stack of items) from the victim’s pack, as well as worn/equipped items. Stolen items can be ransomed or surrendered by the victim, and claimed or returned by the thief, from the “Price of the Oracle” UI. Note that the Oracle UI does not identify successful Pickpockets by name.
Soft Locking your reticle to a Pickpocketer during an attempt (by placing the reticle over them and holding Shift + Left-click) interrupts the process and stuns them for a significant amount of time. Pickpocketing works with stealth skills and spells.
Leaderboards
Shroud of the Avatar has several leaderboards: PvP Kills, PvE Kills, Fish, and Consumables. Both PvP Kills and PvE Kills include the highest ranked players based on “Kills,” “Deaths,” and “Kill-Death Ratio”—the former for “player-versus-player” combat and the latter for “player-versus-environment” (i.e. versus non-player characters). The Fish and Consumables leaderboards display items related to their respective category alongside names of players who have caught or consumed the most of each.
You can access this window by selecting “Leaderboard” from the Window Selection list.
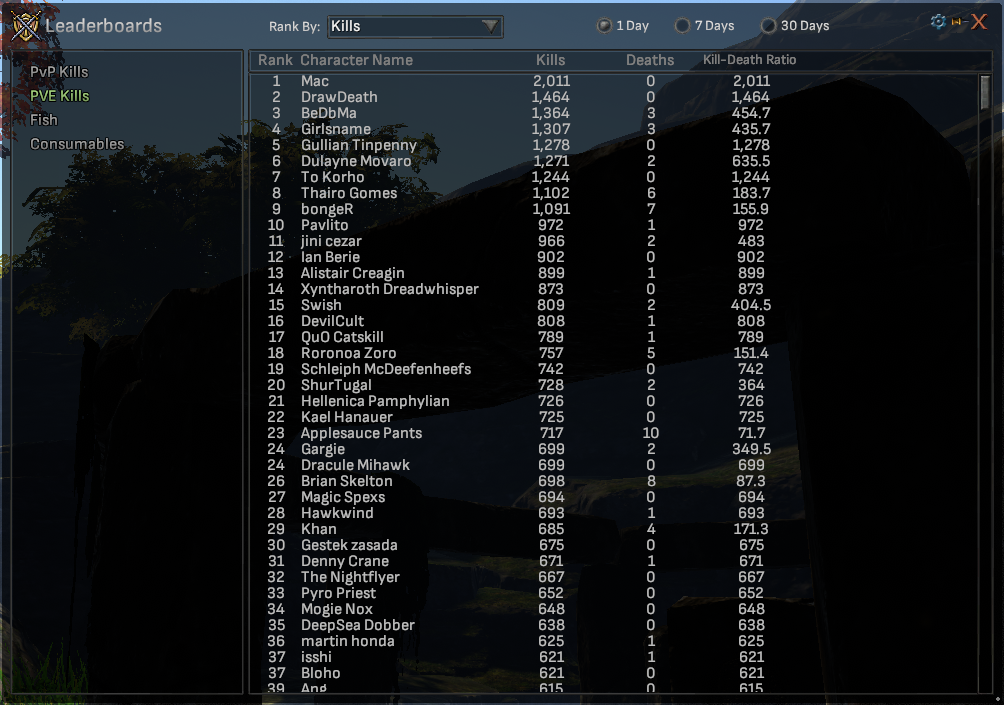
Character Progression
Avatars begin their journey through New Britannia relatively weak, but have the potential to grow mighty and skilled. Like most people Avatars learn by doing. Using your magical and martial abilities to battle monsters, harvest resources, craft items, and complete quests all help advance the related skills used.
For example, an archer who hunts with a bow will find their general Ranged Combat skill improving. If they use the Aimed Shot skill to bring down tougher prey, they will increase the Aimed Shot skill’s rank at the same time they continue to improve at general Ranged Combat. As the skill levels up, the archer will unlock additional copies of the Aimed Shot Glyph to use in their deck and do more damage with each aimed shot.
Active Skill Rank | # of Glyphs Available |
1 | 1 |
10 | 2 |
20 | 3 |
40 | 4 |
80+ | 5 |
As our archer skins beasts slain by their arrows, they will increase their Field Dressing level, as well as any other learned skills in the Field Dressing tree. If they choose to butcher the meat and tan the leather they harvest they will improve the appropriate refining skills.
As a skill increases in level, it will begin to take steadily more time and experience to increase. A skill’s progress towards the next rank is displayed as a small green bar beneath the icon in the Skill Tree.

Skill advancement requires the availability of Pooled Experience. A mage who spends all day throwing fireballs at training dummies will eventually find they have depleted their Pooled Adventurer Experience and be unable to further advance Adventurer skills. Your available pooled Experience for Adventuring and Production skills is displayed in the bottom-right of the appropriate skills tab.
As a bonus, every day that you log into Shroud of the Avatar will earn the characters you play 10,000 experience points for the initial character and 2,500 for each additional character on the same account. These points will be added to the shared pooled adventuring EXP. Note that your Offline character and Online characters are each allowed to receive their own daily experience point bonus.
Avatars that elect to play with others will receive additional bonuses to experience received from combat. Players that play in Open mode will receive an additional 10% to combat experience received. Going further, players that are flagged for PvP while in Open mode will receive a bonus 25% to combat experience that stacks with their Open mode bonus. There is no bonus for being flagged for PvP in any mode other than Open.
In Online play modes, your character has a “soft cap” on the amount of experience points that can be earned from combat. Once your experience gained during combat exceeds 15,000,000 experience points per hour, you will acquire a debuff that limits your experience gained from combat. This debuff will increasingly reduce the amount of experience gained through combat, as well as limit your experience gained through combat to a maximum of 30,000,000 experience per hour. (For as long as you are at this experience maximum, you cannot gain experience from combat.) The progression toward this soft cap is called "attenuation." After achieving the soft cap, your character is "attenuated." The debuff is automatically removed when your hourly experience gain drops to 15,000,000 experience points or fewer. This debuff will be visible on screen, next to the pooled experience displayed in the skills UI. Note that this only applies in Online mode; Offline mode has no soft cap on experience.
Generally speaking, your character earns Adventuring Experience by slaying monsters while harvesting resources and crafting items earns Producer Experience. Completing quests for the people of New Britannia usually grants Adventuring Experience, Producer Experience, or both. Your character’s Adventurer and Producer levels are displayed in a tooltip that can be seen while hovering over the character's name in the character sheet.
Learning a new skill requires the services of a trainer. To learn a skill from a trainer, you must pay a fee in gold and meet any prerequisite skill levels. Trainers can be found in most major towns and cities, but not every trainer offers training in every skill.
Learning the most powerful skills will require seeking out master trainers found throughout the world. Each skill tree has its own master. Most skill masters will require you to complete a quest or favor for them before they will teach you a skill tree’s most powerful skill.
There are limits to how fast a mind can assimilate new knowledge. Avatars attempting to train in a large number of skills at once will find advancement slow, especially in passive skills. Training in a skill can be toggled in the upper-left of every skill icon in the skill tree. Focusing on only a few skills at once can help ensure regular progress.
A skill that can only be learned after first obtaining a certain value in one or more other prerequisite skills is known as a “child skill,” and these prerequisite skills are known as “parent skills.”
A skill can be forgotten when it is at, or below, level 20 and the character does not know any of its child skills. To forget a skill, open the Skills window, right-click on the icon of the skill you want to forget, and choose “Forget Skill” in the menu.
If you have a child skill, its parent skill cannot be Unlearned below that child skills’ required skill level. For example, the Bladed Combat skill will not unlearn below level 40, as child skills like Riposte require Bladed Combat to be at least that level.
Training: The skill will advance each time a relevant skill is used, consuming EXP from the appropriate pool.
Not Training: The skill will never consume EXP.
Unlearning: The skill will never consume EXP. The skill will quickly lose experience as other skills gain experience. A portion (normally 50%) of the experience deducted from the skill will be refunded back into the Experience pool.
Another way to "unlearn" a skill is with a "Obsidian Item of Unlearning" book, purchasable from the in-game Crown Store. Such an item can reduce a skill down to the minimum level while recovering 100% of the experience points used to obtain its current level. Recovered experience points are returned to your experience pool and can then be used to increase other skill levels.
Passive skills (by definition) cannot be used or practiced. Most learned passive skills advance when other adventuring skills of the same tree are used. For example, fire magic passive skills will improve when active fire skills are used. All learned mining skills will see improvement when the Avatar mines ore nodes and crystals. The notable exceptions to this are passive skills from the Focus, Tactics, and Subterfuge trees, which will improve whenever general Adventuring active skills are used, as these trees contain core attributes and eclectic active skills.
Skills
Press the K key to bring up the Skills menu. Skills are divided into Adventuring and Crafting tabs. The remaining pooled experience for that skill type is displayed in the bottom-right of the panel. Right now, some Crafting skills are less developed than Adventuring skills, but more are planned to be filled out in later releases.
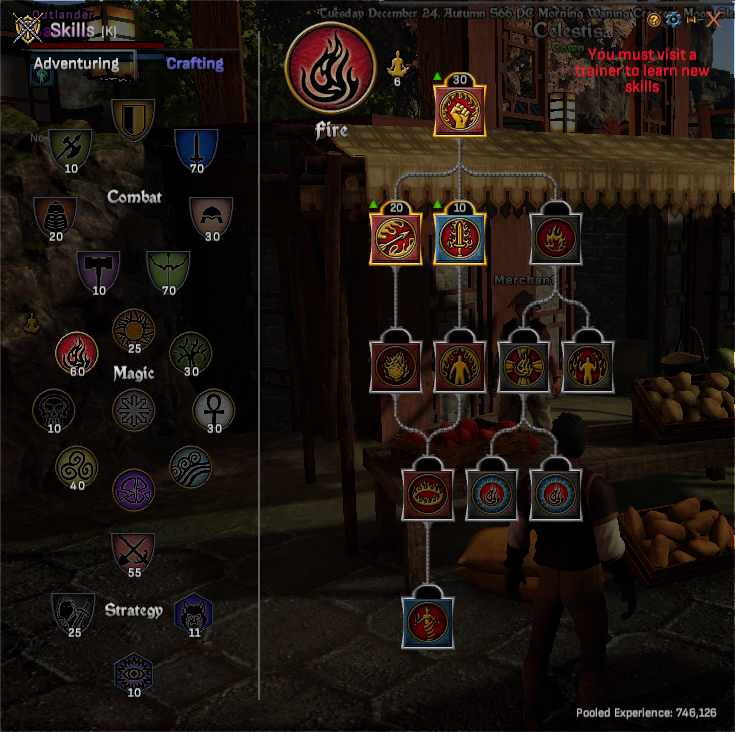
Adventuring Skills are further divided into Combat, Magic, and Strategy Skills. Select the skill school icon to see the entire skill tree displayed. Each icon also displays the number of total levels you have in skills from that school.
Red skills are active offensive abilities used on enemies. Blue skills are short-term self buffs and are usually defensive in nature. Green skills heal or restore the target and can be used on yourself and allies. Yellow skills are crowd control and debuffs. Gray skills are innate upgrades that do not need to be used and are always in effect. Purple skills are miscellaneous abilities that don’t fit neatly into a specific category.
Skills that do not have an icon are not finished or usable.
Leveling up a skill makes it stronger and decreases Focus penalties for locking it as a Glyph. See “Locked Glyphs” below for more information.
Most skills cost an amount of Focus and require the correct equipment to use. For example, “Crushing Blow” requires a bashing weapon. Your equipped chest armor determines what armor skills can be used. Cloth and Leather clothing is light armor. Chainmail and Plate is heavy armor.
Heavier armor can cause spells to fizzle. Combat skills never fizzle.
Skills, Glyphs, and Hotbars
You can drag a skill into your hotbar from the Skills or Glyphs windows (accessible from the Window Selector), as well as from one hotbar slot to another. Glyphs are skills and objects that can be added to your hotbar. Specifically, any Glyph can be added to your Combat Hotbar but only utility, summoning, and healing skills (like Light and Healing Touch), as well as potions, can be added to your Utility Hotbar.
Each slot in a hotbar can only be occupied by one Glyph, but the Glyph in each slot is up to you. If the new Glyph came from the skills window, the original Glyph will be replaced. If the new Glyph came from another slot on the hotbar, the two Glyphs will swap places.
Attunement
As an Avatar becomes more proficient with a school of magic they become increasingly Attuned to that element. Higher Attunement makes spells from that school more powerful and grants the Avatar some resistance to negative effects from that element. High attunement to an element has no penalties.
Attunement to an element is based on the average total levels of your Active skills in a particular magical school.
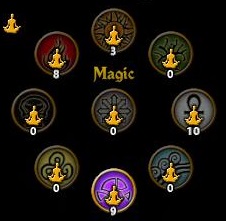
You may view your attunement in all magical skills on the Skill screen by clicking on the meditation icon, to the upper-left of the Magic skill section. Attunement is also displayed at the top of each magic skill tree.
When performing a combo, the higher attunement of the two spells used to create that combo will be used.
Summons, Tamed Creatures, and Companions
Avatars have several ways to obtain NPC companions and creatures that will accompany them in their travels and may even aid them in battle. Regardless of how the creature was obtained, an Avatar can only have a single NPC companion in play at a time. Calling or summoning a new companion replaces the current one.
Skilled mages can summon Elementals, Undead, and other creatures to assist them in combat. A summoned creature may be re-summoned immediately if dismissed or slain, provided the summoner has enough Focus. Summoning spells can be added to a deck, locked into a slot, and used from the Utility Hotbar.
The effort of maintaining control over a summoned creature (or tamed beast) occupies a certain amount of the Avatar’s Focus; the more powerful the creature, the more Focus is required. This Focus cannot be used to power other glyphs and will not recover through rest or potions until the creature is dismissed or slain. The exceptions to this rule are summoned undead, who suffer constant heath decay instead. Summoned creatures are fickle and will depart when you change scenes.
Avatars can also tame wild beasts to serve as pets and allies in battle. Taming a beast is a bit more complex than summoning a magical minion. First, basic training in the Tame Creature skill is required. The skill can be found at the top of the Taming tree in the Strategy skills menu.
Next, a prospective tamer must obtain the proper equipment: a Taming Collar (or several, to be safe) and a Taming Necklace (which must be worn). These items can only be obtained through crafting and requires the services of a tailor, carpenter, and alchemist. Note that the “Animal Collar” and “Animal Whistle” items are components of the finished Taming items, not the finished items themselves. The Recipes for these items and their components can be obtained in the general store in Ardoris near Sequanna Square.
Once properly equipped and trained, the prospective tamer may locate a tameable beast and use the Tame Creature skill on them. Taming is not guaranteed to succeed and stronger or more willful beasts are more resistant to it. Stronger beasts are also more likely to consume a taming collar during an unsuccessful taming attempt. Each successful taming attempt always consumes a taming collar. Injured beasts are easier to tame, so it may be desirable to wear down an animal before attempting to tame it. If the process succeeds the beast will vanish and can be called to your side via the Summoning skill.
Note that a specific beast is tied to the exact Taming Necklace you were wearing when you tamed it, and the name of the necklace will change to reflect the beast it calls. You must be wearing a necklace with an associated beast to use the summoning skill. You can tame as many beasts as you have Taming Necklaces, but remember you may only have a single beast called at a time.
Tamed beasts need time of their own to rest and hunt. After being called, there is a significant cooldown before a tamed beast can be called again, although increasing your Refresh skill will reduce this timeframe. Unlike summoned creatures, tamed beasts will follow you from scene to scene and across the overworld.
Tamed beasts will also not fight to the death, fleeing when badly injured. This is not without reason, as tamed beasts remain dead when slain and cannot be called again. If a tamed beast is slain this frees up it’s necklace to be used to tame another beast. Note that a slain tamed beast may be resurrected with an appropriate spell up to 5 minutes after their death, but afterwards they are beyond recovery. Slain beasts may not be resurrected, even by their master’s allies, while their master is slain.
Most natural beasts are tameable, even some exotic ones like the giant “corpions” of New Britannia. Many domesticated and “barnyard” animals can be tamed, although some creatures may not make effective combatants or have any fighting abilities at all. Horses can be tamed and, with the help of a “horse specialist,” can be converted into a rideable mount. A list of those specialists is below.
- Nob - The stableboy in Owl's Head.
- Bodan Koren - The Master Taming Trainer in Braemar.
- Corsten - the Master Tactics Trainer in Desolis.
- Falcon - An animal trainer in Aerie. Her stables are outside the gates near the main entrance.
- Oakley - A stablegirl in Brittany Fields. Her stables are south of the gate to Central Brittany.
Adventuring Skills that aid in the taming process and improve the capabilities of tamed beasts, can be found in the Taming, Tactics, and Focus trees in the skill menu.
Tamed beasts can be assigned names through the right-click menu. These names will be remembered for the duration of their lives. Summoned elementals can be assigned names if you wish. Horses that receive training from a horse specialist may also be renamed.
While playing in Offline mode, it is possible to recruit certain NPCs to serve as Companions. Some Companions are happy to accompany you if you ask, others may require you to complete a quest or offer some kind of payment first. Once recruited, a Companion will offer you an item that can be used to call them to your side. (If a companion dies during combat you can use the summoning whistle to bring them back to life.) See below for a list of Companions.
- Ariel Rosehaven, one of Novia's most learned scholars, can be found in the Merchant Plaza in the city of Aerie.
- Fiona Fitzowen the bard entertains herself and others in Peladjar's Tavern in the city of Ardoris.
- Conrad Dupre, Knight of Norgard, stands guard outside the Hall of Valor in the fortified garrison of Resolute.
You may be accompanied by a Companion and a tamed or summoned creature at the same time. Companions are only available when playing in Offline mode.
Summons, pets, and companions will normally stay near you and assist in combat, but it is possible to give them more specific orders. Right-clicking on them will allow you to order them to stay put, adjust their aggression level, call them to your side, or dismiss them. These commands can also be issued by right-clicking on their nameplate, beneath your own on the left side of the screen. Right-clicking on an enemy allows you to direct your pet to attack that specific target.
Avatars (especially backers and patrons of the in-game Crown Store and Add-On Store) may also come into possession of a specific class of pet called Decoration Pets. When dragged to your Utility Hotbar and then used from there these call a pet or servant to your side. These pets will follow you about and can be given limited commands by right-clicking on them or their nameplate, much like other summoned creatures. Decoration pets have no combat abilities and cannot assist you in battle.
Decoration pets may also be placed on any lot you own, counting against the NPC limit for that lot. Right-clicking on the placed pet allows you to set its behavior or recover it to your inventory. Decoration pets may be summoned an unlimited number of times without a cooldown, even if the creature is slain or becomes lost. This does not have a focus or reagent cost.
Skill Specialization
Each adventuring skill tree has one innate Specialization skill named after its tree. For example, the Bludgeon skill tree includes the Bludgeon Specialization skill.
Each Specialization skill requires you to be at least skill level 80 in its respective parent skill(s) to learn that Specialization.
You can learn all Specialization skills, but only one can be learned at a time. One Specialization skill can be set to Training, one to Maintaining, and all others will be automatically set to Unlearning. The state of your Specialization skills is important, because only those set to Training or Maintaining will grant benefits to skills in their respective trees. Some notable benefits are listed below but specific skills could also gain could include attack bonuses, casting time reduction, increased duration, parry bonus, or other benefits.
- Extra Glyphs: Upon reaching 80 Specialization in a skill tree, you receive one extra Glyph for every skill in that tree and the amount a skill can be charged will be increased.
- Attunement: Every 10 levels in a magic skill tree will give you +2 attunement in that tree and -2 attunement to the opposing magic tree. Chaos magic is an exception: For every 50 levels in the Chaos magic tree, you'll gain chaos attunement and lose 1 point of magic resistance in all other schools.
- Taming: Specialization in the Taming skill tree will dramatically increase the power of your pet.
Grandmastery
Achieving a level of 100 or more in a skill makes an Avatar a Grandmaster in that skill. Anyone in a party with a Grandmaster will advance in the skill(s) the Grandmaster has mastered much more quickly. The Grandmaster’s party members must still have learned the mastered skill and have set that skill to “Training” in the skills tab to gain any benefit.
Grandmasters display small yellow shields with little green triangles on them next to their nameplates. Hovering over this icon will display what skills they have Grandmastered.
Innate skills set to train benefit from Grandmastery automatically, but Active skills also only benefit when used. Adventuring in a party with a Fireball Grandmaster will only help advance your Fireball skill more quickly if you actually cast the spell. Note that Grandmastery does not affect how quickly you earn experience, just how quickly experience from the appropriate pool is consumed to advance the Grandmastered skill.
Resetting Skill Points
Players that wish to reset their skill points can purchase an Obsidian Item of Unlearning from the in-game Crown Store in the “Other” category. This magical scroll can reduce all skills in one skill tree down to their minimum levels and recover 90% of the experience points used to level it. An Obsidian Item of Greater Unlearning will recover 90% of the experience points used for all skills within a category. These points are returned to your experience pool so they can be used to increase other skill levels.
Decks and Deck Building
When you create a new character, several default combat skills will be locked to your Combat Hotbar that are suitable for new players. However, as you grow more powerful and gain more skills, you will want to customize how you use your skills in battle. In Shroud of the Avatar, this is done through the Deck system.
Decks and Deck Building may seem intimidating for new players, but note that you can jump into the game without learning what is described below. Discussion with other players on our forum might also be helpful; there you can find suggested deck builds, help on which skills work best with each other for a given combat style, and so on.
Deck Building is an optional advanced technique for combat that you can unlock during a conversation with most Adventurer Trainers, including master trainers. Once you have unlocked this feature and wish to build and equip a new deck, access the Decks window with the Y key.
Deck Creation
Select “New Deck.” Drag or double-click on skills in your Glyph list on the left side of the deck builder UI to populate your deck list on the right.
A deck may not contain more Glyphs of a skill than you have ranks in that skill (maximum of 5). A newly-arrived Avatar has a minimum deck size of 10 cards, and this minimum size increases as the Avatar grows stronger and more experienced. Decks smaller than their minimum number of Glyphs will fill out the extra slots with blank “Slug” Glyphs. Slugs do not help you in combat, though they can be discarded (like all Glyphs). It is recommended that you fill out your deck.
The maximum deck size is 24 for non-subscriber, 48 for subscriber. In general, you may find it useful to concentrate on specific skills and combinations to assure that they are available when you need them. New players and low level Avatars may find it easier to lock their Glyphs (discussed below) while they build up their skills and Glyph selection.
Glyphs can be reused between different decks. For example, you can put all five of your Fireball Glyphs in Deck A, and all five will still be available to add to Deck B. Innate skills cannot and do not need to be added to your deck. They always are in effect for your Avatar.
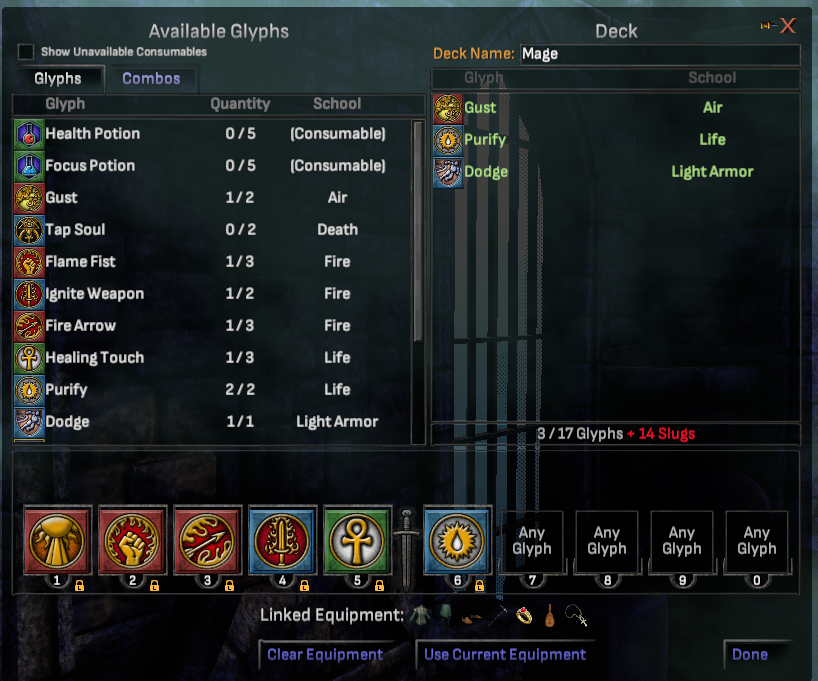
Hand and Hotbar Customization
When your character exits the Isle of Storms, all Glyphs in the Combat Hotbar are "locked." This means when a Glyph is used, the slot will remain empty until it's Glyph is available again, and no other Glyph can appear in that slot. This can change later, after you learn about "Deck Building." (See "Locked Glyphs" for more information.)
Eventually, you can talk to nearly any Adventure Trainer about "deck building" and unlock the ability to customize your deck and Combat Hotbar. Until you unlock this advanced technique, the interface to customize your deck will not be available. Once this feature is unlocked, you can choose to keep Glyphs locked or unlocked.
When a Combat Hotbar slot is unlocked, any Glyph can be dealt to that slot. Greater control over where a drawn Glyph is dealt can be achieved by dragging the icon for that Glyph down to a slot in the Decks window.
Assigning a Glyph in this fashion means that, when that Glyph is drawn, it will always be dealt to that assigned slot first. (Provided the slot is open.) If the slot is currently holding a Glyph, then the assigned Glyph will simply be dealt to the next available slot, if there is one. Multiple skills can be assigned to a single slot and the same skill can be assigned to multiple slots. Note that no matter how many slots you assign a skill to, you cannot be dealt more copies of the Glyph for that skill than exist in your deck.
Assigning Glyphs to specific slots allows a high degree of control over the deck system and lets you focus more on the unfolding action than on your hand. For example, you could assign all your healing spells to one slot, ensuring that whenever you are dealt a healing Glyph you know where it will appear.
A slot can be cleared of assigned skills by right-clicking on it in the deck builder interface.
Assigning Glyphs is discrete from locking Glyphs to a slot, described below.
The utility hotbar is a second hotbar that will appear below your combat bar. This additional hotbar will become available automatically after leaving the Isle of Storms. The utility hotbar can hold “non-combat” skills and items, such as bait for fishing and any food item.
Once you have access to both hotbars, the combat hotbar will always be present during combat while the utility hotbar will be present at all times by default. Entering combat mode (by pressing Z or using any combat skill) will make the combat hotbar appear while exiting combat mode will make it disappear.
Note that when you unlock deck building and the utility hotbar, you do so for your character and not for your account. If you create a new character, you will need to unlock these advanced techniques again for that character.
Decks and Inventory
The Linked Equipment section lets you associate a set of armor and weaponry with a deck. Equipping that deck will also equip that set, provided the items are still in your inventory. Note that armor and clothing can only be changed during combat by linking them to an associated deck.
Equipping and Swapping Decks
A deck must be equipped before it can be used in combat. Select your finished deck from the list, and use the Equip button. Decks may not be created or modified in combat, though you may still swap between already created decks. If you cannot modify a deck, make sure to sheath your weapon.
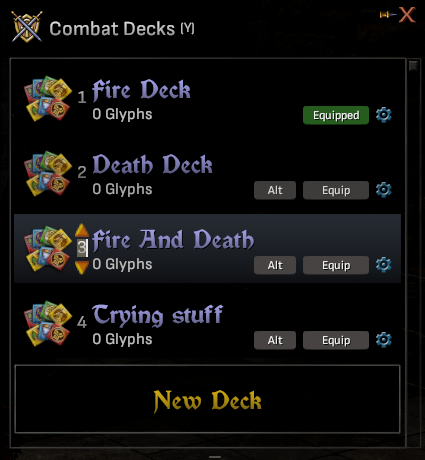
The deck interface allows you to set an alternate deck (including its own linked equipment) and swap between your equipped and alternate decks with the X key or the Swap Deck icon at the bottom-right of the screen. Also, you can assign up decks to hotkeys to quickly swap decks (See Options). This can be useful for chaotic battles where you might need to switch from ranged to melee combat, or go from healing allies to defending yourself.
Swapping decks clears your hand. Swapping decks costs 10% of your maximum Focus, but can be performed while moving. If you intend to swap between two different decks, remember to link your desired equipment set to each.
Hotkeys that are set to swap deck use the deck order position shown on the left of the deck name. When you select a deck, you have options to move that deck order either by using the arrows up and down or clicking the number and changing it for another deck currently in the list.
Locked Glyphs
You may lock a Glyph by right-clicking on a Glyph already assigned to a particular slot in the Edit Deck window. Locking a Glyph to a slot clears any other Glyphs assigned to that slot. Locking a Glyph in this fashion also occupies a potential Glyph that could otherwise be put in that deck.
Unlike assigned Glyphs, Locked Glyphs are always available in their numbered slot on your hotbar. They are not drawn and dealt out at random and do not count towards the minimum cards in your deck. Unlike Glyphs dealt from a deck, locked Glyphs start on cooldown when you enter combat and have a cooldown before they can be used again.
Locked Glyphs also cost a base +100% more Focus to use, increased by casting successive casting and decreased based on your level. The more you cast the same Glyph successively, the more Focus will be required with each casting. A locked Glyph will require less Focus to cast the higher your level in that skill.
A locked Glyph will always be more expensive than a randomly dealt copy, but becoming proficient in the relevant skill can mitigate much of the cost of locking a Glyph.
A new Glyph can be dragged to an already locked slot on the combat hotbar without going into the deck-builder interface. Simply drag a Glyph from the Glyphs list (Y hotkey) to the desired locked slot. Glyphs in locked slots can also swap places simply by dragging one locked Glyph over the other. Only slots on the combat hotbar with an already locked Glyph can be swapped out this way.
Using Decks in Combat
In combat, Glyphs from your deck are randomly dealt to your hand where they can be used. If one or more Glyphs have been assigned to a specific spot in your hand remember they will be dealt there first. Using a Glyph removes it from your hand and places it back in your deck. Unused Glyphs are eventually replaced by fresh Glyphs.
You may discard a Glyph without using it by right-clicking on it.
Experiment to build a deck that matches your play style. Don’t be afraid to adjust your Glyph composition, what Glyphs are assigned to what slots, or your locked Glyphs. Remember you can have more than one deck.
Spells and Reagents
More powerful spells (Third tier and above) require additional power to cast. This power comes from a class of consumable items called Reagents. A mage requires at least one of each necessary reagent in order to cast a spell. Each cast of the spell has a chance to consume one of the required Reagents, so carrying spares is recommended.
A spell’s Reagent requirements are listed when you hover over the spell in the Skills window, Glyphs window, or Hotbar. You can also see the remaining number of sets of reagents for that spell you have in stock by looking at the spell’s icon on your Hotbar.
Reagents can be bought from select merchants (like alchemists), looted from slain enemies, harvested in the wild, and grown via agriculture. Combat skills do not require Reagents.
Consumables in Decks
Consumable items (like Health and Focus potions) appear in your Glyph list with your other Glyphs. Like other Glyphs, consumables can be placed into your deck to be dealt at random, assigned to a slot, and locked to a slot.
The “Show Unavailable Consumables” checkbox allows you to view and equip the Glyphs for consumables you do not currently own. Note that you will still need to obtain the actual consumable in your inventory for it’s Glyph to be usable.
Consumables can be used any time out of combat by dragging them to your Utility Hotbar. Note that food does not create glyphs and can only be used from the Utility Hotbar.
Combo Glyphs
The Combo Glyph system allows two Glyphs to be combined during combat into a potentially more powerful Glyph. Combining Glyphs is also called “stacking.”
There are two types of Glyph combos. The first are unique combos, where two different Glyphs are combined into a new Glyph for a skill not otherwise available. These unique combination Glyphs often have the effects of both skills used to create them. They cannot be learned as normal skills, and can only be used by combining Glyphs. Check the Combo tab of the Glyphs panel for more details.
Second, two Glyphs of the same skill can be combined into a more powerful and efficient Glyph of the same type.
Benefits of Glyph combos include decreased Focus cost, additional damage, and more. As many copies of a Glyph as you have in your deck can be combined into a single Glyph, and the stacked Glyph becomes more powerful with every copy combined.
Glyphs can be combined by dragging and dropping compatible Glyphs onto one another with the Left Mouse Button, or by hitting the R key and hitting the hotkeys for the two Glyphs you wish to combine. Locked Glyphs can be used to create combos by combining them with Glyphs drawn from a deck.
Combo Glyphs may be discarded and will eventually expire like normal Glyphs. However, locked Glyphs can be “powered up.” Pressing and holding, or clicking and holding, a locked skill’s Glyph will charge it up and give it the same results as stacking.
Player Housing
Player housing is one of the most impressive ways to make your mark on the world. Players can stake their claim to lots that appear in the world to everyone, and build and decorate dwellings ranging from humble cottages to towering island castles.
Claiming a Housing Lot
To claim a lot, you need a Lot Deed in your inventory. In Offline mode, Lot Deeds are generally for sale from or near the same merchants who sell house, basement, and dungeon foyer deeds (such as those who work upstairs in many banks throughout New Britannia). Certain pledge levels will also begin with appropriate Lot Deeds already in the Rewards section of the bank.
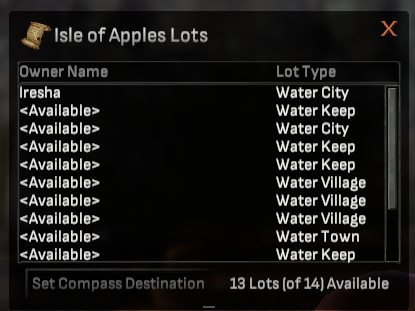
When in a scene with player lots, you can ask town criers or guards how many lots are available by asking them “how many houses are free?” Town Criers will display a list of all lots in a scene and allow you to set a compass waypoint to any specific lot. Town Criers may also bind you to a town on request, which sets that town as your Recall point for Recall scrolls. This can be handy if you do not own a lot to bind to.
Holding down the P key will send out a visual “flare” beacon from any available lots nearby.
To claim an available housing lot, walk up to the “For Sale” runic sign or marker stone and double left-click the sign. Click the “Claim Lot” button to bring up the Lot Deeds panel and choose which Deed to associate with this specific Lot. While Lot Deeds can be expensive, associating a Deed with an unclaimed Lot does not cost gold.

Deeds can be associated with any Lot their size or smaller. For example, a Town Deed can be used to claim a Town or Village Lot, but a Village Deed cannot claim a Town or Castle sized Lot. Although once limited, anyone can claim water lots. However, the only water deeds available for purchase or upgrade are limited to POTs. (Some pledge deeds are exceptions in that they are allowed to be placed anywhere, including water lots, and are tax free.)
Deeds may also be Tax Free, Player-Owned Town, or both. Both modifiers work as you would expect. You will not need to pay taxes on any lot claimed with a Tax Free deed (although ownership of a lot used by a Tax Free deed can still expire—see Lot Expiration, below). Player-Owned Town deeds only work on lots in a Player-Owned Town.
From smallest to largest, lot sizes are as follows:
- Market < Row < Village < Town < City < Keep < Castle
Once a Lot Deed is associated with a lot, it will vanish from your inventory. If you unclaim the lot (or ownership expires) the Lot Deed is returned to your inventory and can be reused. Unless you sell or destroy the Lot Deed, you do not need to buy a new one. Lot Deeds are not consumed on use.
Right-clicking on a deed in the Lot Deeds list allows you to pay taxes or unclaim that lot.
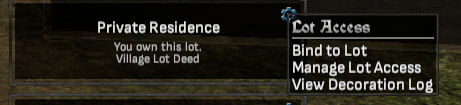
You may use the cogwheel dropdown menu to Bind to any lot you own. Avatars may also bind to any lot where they have Guest access or better. Using a Recall scroll returns you to your bound location. You may only be bound to one location at a time. Binding to a new lot or town overrides the old bind point.
You may own as many Lot Deeds as you can afford; players can claim unlimited numbers of lots within NPC Towns or Player-Owned Towns.
Lot Expiration
Lot ownership expires if you owe more than 60 days worth of taxes on a lot. You are responsible for taxes on all lots you own.
When a lot expires, all contents of that lot are sent to the avatar’s Property Manager.
Lots used by tax free deeds will become unclaimed if the lots are not interacted with after the number of days shown in the list below.
- Citizen: 150 days
- Edelmann: 180 days
- Knight: 210 days
- Knight Marshal: 240 days
- Lord: 270 days
- Lord Marshal: 300 days
- Baron, Baron 2, Baron 3: 330 days
- Duke: 360 days
- Lord of the Manor, Lord of the Manor 2: 390 days
- All others: 120 days
The lot ownership expiration timer resets when the lot owner's account is logged into or someone with permission interacts with the lot (i.e., an item on the lot is moved, modified, removed, or added to the lot).
Upgrading a Deed
If you want to permanently upgrade a lot deed that is not currently in use, you can choose to do so by right-clicking on that deed in your inventory or a container you have appropriate permissions on and choosing “Upgrade item for…” You will be given a list of upgrade options that may be incomplete: the menu shows the next ten available upgrades. You can always upgrade again to reach a desired size/type combination.
Lot deeds cannot be upgraded when they are in use.
Upgrading a deed costs a number of Crowns. Note that not all deeds can be upgraded to all sizes and types. Generally, deeds can be upgraded between different types (excluding Founder deeds) as long as the value of the new deed is larger than one being upgraded.
The prices in this image are illustrative only and may change in the future, including when sales are active.
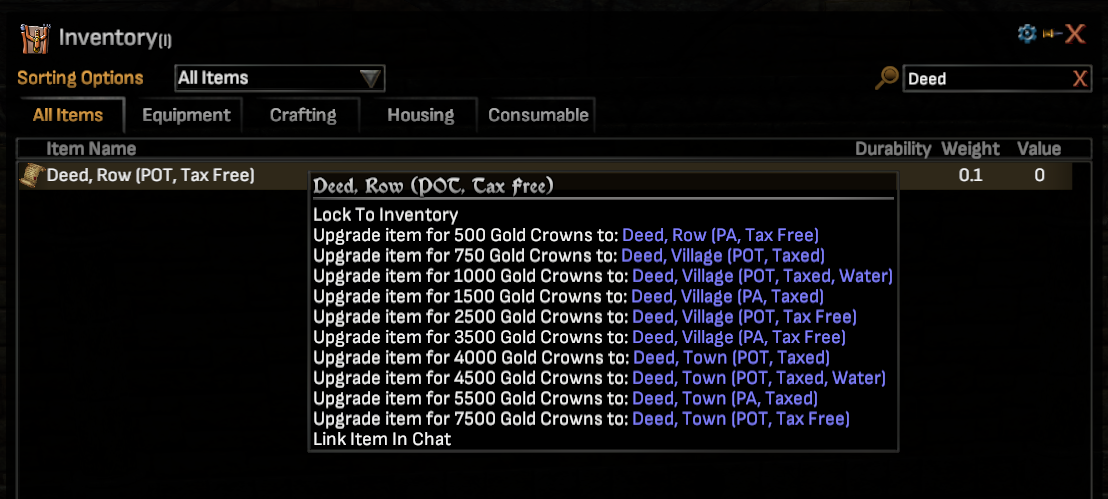
Deeds and Homes
Homes are not the same as Lot Deeds. You may own a Lot Deed and claim a Lot without having a home.
To place a home on a claimed lot, or to change from the default home on a row lot, you must own that home. Homes are available for sale from the merchants in or near most bank buildings (often upstairs), in the Crown Store, or from other players. Also, homes may be crafted. Placing a home once you already have it costs nothing.
You may freely switch between your different homes by accessing your lot’s sign and using the left and right arrows. The lot sign will only display homes appropriate for its lot. For example, you cannot place a City-sized home on a Row lot. Smaller homes may be placed on larger lots. Only water homes can be placed on water lots.
Like Lot Deeds, homes are inventory items that can be sold and traded. When you place a home on a lot, that home is removed from your inventory. If you change homes, that home will be restored to your inventory. Changing homes moves all placed decorations to the bank. If you unclaim a lot, the placed home and all its decorations will be moved to the bank, unless you put the lot’s contents in the Property Manager before unclaiming it. If you lose a lot claim for taxes, or are evicted, that home will be with the rest of the lot's contents in the Property Manager.
There is no limit to the number or types of homes or lots you may own.
Taxes
When you claim a lot you are responsible for paying taxes for that lot (unless you claim the lot with a deed with Tax Free status). You will be informed of the daily taxes for a lot during the process of claiming it. The exception is lots claimed via Tax Free Deeds, which obviously do not owe any taxes.
Taxes can be paid from the Lot Deeds panel (U hotkey). The Lot Deeds panel displays how much tax is past due for a specific lot, and how many days remain before ownership of that lot expires due to non-payment. You may pre-pay up to 180 days in advance worth of taxes on a Lot. Pre-paid taxes are refunded if you are evicted or unclaim the lot, pre-paid taxes applied to the lot are refunded into the player's Tax Credit pool.

Taxes are owed based on lot size, not the deed used to claim the lot. (Except for Tax Free Deeds) If you claim a Village Lot with a Castle Deed you will only pay Village Lot taxes for that specific lot. Choice of house, or other decorations on a lot, do not affect taxes.
Lot Size | Taxes (in “gold per day”) |
Market | 250 |
Row | 250 |
Village | 500 |
Town | 1000 |
City | 2000 |
Keep | 3000 |
Castle | 4000 |
Tax Debt is accumulated when you lose ownership of a lot while owing any taxes on it. This can occur if you unclaim a lot, if you are evicted, or if taxes on a lot become past due for too long. Owing any amount of Tax Debt prevents claiming additional lots until you pay off the debt. Tax Debt is account wide, and can be monitored and paid from the Lot Deeds panel.
Crowns of the Obsidians can be used to pay or prepay lot deed taxes. Do this via the Deed List UI by spending Crowns to add credit to your account. You can then use the credit to pay taxes for an individual lot. One Crown applies a value of 300 gold toward lot taxes (rates are sometimes adjusted). Note that if you pre-pay taxes with Crowns and are then evicted, you will be refunded your tax credit in normal in-game gold, not in Crowns.
Creating and Setting Permissions For A House
Once a housing lot is claimed, the owner may choose which house occupies the lot from among those in their inventory using the “Change House” button.
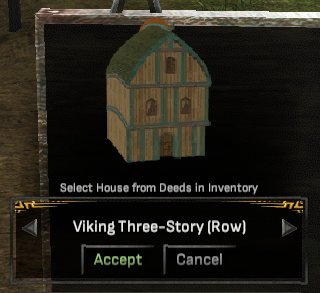
To adjust permissions for a lot, select the cogwheel dropdown menu and choose to “Manage Lot Access.”

- Guild Chapter House: Enabling “Guild Chapter House” grants all fellow guild members Kindred level permissions for that lot. Guild officers are granted Trustee privileges for that lot.
- Block Doors: When enabled, players must have “Guest” access (or better) in order to pass through doorways, or gain entry to a basement or dungeon.
- Strict Deco Move Permission: When enabled, a player must have permission to take a decoration in order to move it.
Permissions can be set on individual doors to allow access to an area of a house for specific players. Players who have Co-Owner permissions or better may modify the properties of any door on your lot. Players with Tenant or higher permissions may modify the properties of a specific door on a lot when their name appears on that door's access list.
Players added to your Banned list are blocked from passing through doorways, and are prevented from entering your basement or dungeon. Banning a player does not prevent that player from being able to walk onto your lot.
You may add other players to your lot permissions list as Guests, Tenant, Kindred, Trustees, or Co-Owners.
- Guests can enter your house when the doors are blocked.
- Tenants have Guest access and can add decorations. Tenants may only move or take decorations that they placed.
- Kindred have all of the Tenant permissions and can take any decorations marked for Kindred access.
- Trustees and Co-Owners have all of the Kindred permissions and can modify the access level for other players.
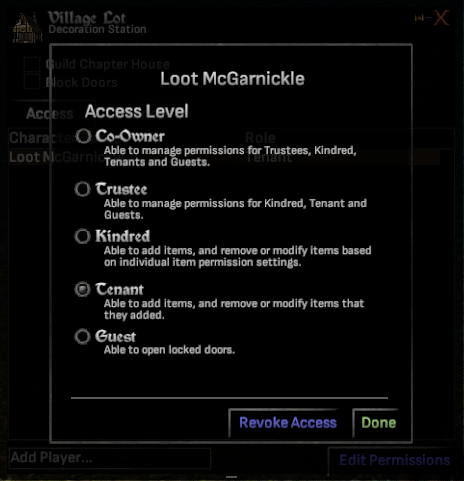
Separate permissions exist for each item on a lot. By default, permission for each item placed on your lot will be set to Kindred level. An item marked as Kindred can be modified or taken by any player that has Kindred access or above. Once an item is placed, you can right-click on it to change the permission settings for that single item.
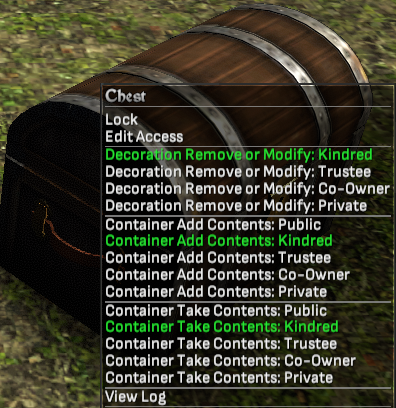
Here is a breakdown of how the per-item permissions work:
- Decoration Remove or Modify: If a player meets the access criteria, they can either change the permissions for this decoration, move it around, or take it. If they do not meet the set criteria, they may still be able to interact with the decoration in other ways.
- Container Add Contents: This setting controls the level of access required to add an item to a container on a lot.
- Container Take Contents: This setting controls the level of access level required to remove items from the container.
- Vendor Add Listings: This access level is required to be able to add listings on a player vendor or to place “buy” orders. Players that do not meet the access criteria can purchase from the vendor but not add new listings.
- Decoration Move: Setting this to “Public” allows any non-banned player the ability to move this decoration within the lot, but not take the item.
Here are the permission levels you can choose for each item on your lot:
- Kindred, Trustee, Co-Owner: When you select one of these levels, players will need to have this level of access in order to carry out the action.
- Public: This permission level grants access to that item to all non-banned players.
- Private: This restricts access to that action to only the player who placed the item. This permission level can only be set by the player who placed the item.
The Decoration Placement Settings window shows the permissions assigned to the decorations you place on your lot. Changes to these settings do not affect decorations that are already placed. Open this window by pressing the default hotkey Numpad *, or by using the Window Selector icon in the top-right of your UI. These settings are saved in your local machine preferences like other game options.

Ownership for decorations that you place on a lot is shared among the players who have access to that lot. By default, other players who have the appropriate access can take decorations that you have placed on a lot. You can prevent other players from taking any decoration that you have placed by changing the “Decoration: Remove or Modify” setting it to “Private” (right-click that item to open the context menu).
- IMPORTANT: Keep in mind that when you are decorating a shared lot (a lot that you don’t own), the decorations that you place become shared property. It is possible to lose access to the items that you place on a shared lot. For example, if the lot owner bans you from that lot then you will lose access to any decorations you placed on that lot. Share your decorations with players you trust!
The owner of a lot may choose to move the entire lot contents to the bank. When this happens, all of the decorations on the lot are sent to the respective banks of the players who placed the items. For example, if you place an item on a lot and the owner decides to send the lot contents to the bank, your item will be waiting for you at the bank.
A table showing permissions for each level is below.
Lot Access Permissions | Owner | Co-Owner | Trustee | Kindred | Tenant | Guest | Banned | None |
Walk on lot | Yes | Yes | Yes | Yes | Yes | Yes | Yes | Yes |
Pass through blocked doorways | Yes | Yes | Yes | Yes | Yes | Yes | No | No |
Access basement, dungeon | Yes | Yes | Yes | Yes | Yes | Yes | No | Yes |
Move decorations you placed | Yes | Yes | Yes | Yes | Yes | No | No | No |
Move decorations someone else placed | Yes | Yes | Yes | Yes | No | No | No | No |
Place decorations | Yes | Yes | Yes | Yes | Yes | No | No | No |
Access remote banking devices | Yes | Yes | Yes | Yes | Yes | Yes | No | No |
Take decorations you placed | Yes | Yes | Yes | Yes | Yes | Yes | No | Yes |
Take decorations someone else placed | Yes | Yes | Yes | Yes | No | No | No | No |
Place vendors | Yes | Yes | Yes | Yes | Yes | No | No | No |
Participate in agriculture | Yes | Yes | Yes | Yes | Yes | No | No | No |
Modify access level for other players | Yes | Yes | Yes | No | No | No | No | No |
View interaction log | Yes | Yes | Yes | No | No | No | No | No |
Send a decoration to the bank | Yes | Yes | No | No | No | No | No | No |
Access the property manager UI | Yes | No | No | No | No | No | No | No |
Decorating a House
There are a wide variety of decorations available to personalize your home. You can acquire decorations as you adventure, some can be crafted, and others can be purchased from decoration merchants (often located in banks, such as those in Ardoris, Aerie, Resolute, and Owl’s Head).

- Decorate from Within Your Lot: To decorate, make sure the avatar is within their claimed housing lot (lots are denoted by a runic sign post and only the owner of the lot may decorate) then left-click + drag objects from the Avatar’s inventory into the world and release the left mouse button when the object is green to place it in the world. A red object will not be placeable.
- Rotate Decorations: The Q, E, and R keys will rotate the object during placement.
- Holding the LSHIFT key while using Q and E to rotate will slow down the rotation for precision placement.
- Holding the CTRL key while tapping Q or E snaps the decorations rotation 45 degrees forward.
- Tapping R while moving a book or block decoration flips its axis by 90 degrees. This only works with books and blocks.
- Holding the LALT key while using X and Z will scale the decoration up and down, to a maximum change of 20%. Note that decorations that already have a scale factor (such as for trophy fish) and many items that are interactive (crafting stations, beds, chairs, etc.) cannot be scaled.
- Tapping N while moving a decoration other than a book flips its axis by 90 degrees. This only works with works with a limited number of decorations and is not available on most items.
- Remove Decorations: To remove decorations, left-click and drag an item from within the world back into the Avatar’s inventory.
- Decorations will be automatically removed when changing houses on a lot or unclaiming it. These decorations are routed to the bank where they may be claimed when convenient.
- Decoration Limits: There are limits to how many decorations of different types (lights, containers, etc.) can be placed inside and outside a house on a lot. As you place objects, the decoration UI appears. Bars will show how close you are to meeting the maximum limits permitted for various decoration types. This UI will vanish intelligently when you are no longer placing decorations, but can be pinned and dragged like other UI windows. For more information, see the House Decoration Limits chart, below.)
- Decoration UI:
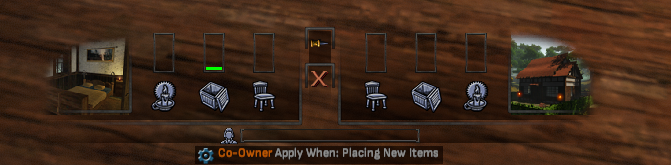
- Placing Your Own NPCs: Select NPCs can be placed on a lot if you own a contract for their services, accomplished by dragging their contact to the spot where you want them to stand. At present, this is just player vendors. Anyone with Kindred or higher permissions for the lot may sell items from a lot’s player vendors. Just like other decorations, there is a maximum number for NPCs allowed on a lot, displayed as part of the decoration UI.
- Naming Chests: Chests can be given a specific name by their owner via right-clicking on them your inventory. Note that they will still appear under their original item name in the trade window.
- Chest Logs: Lots and chests track all items that are placed inside them and removed, and by whom, in their internal logs. A chest’s log can be opened by right-clicking on it. (You must have Modify/Take permission on the chest in order to view this log.) A lot log can be reviewed from the cogwheel dropdown menu on the lot sign.
- Locking Containers: Containers (e.g. chests) may be locked so that the general public cannot inspect the contents of the container. When a container is locked, only players with Remove/Modify access to the container and those players on the container’s access list may open the chest.
- Decorations with Unique Properties: Some decorations don’t fit into other categories and have their own special properties and rules. For example, the Aether Vibration Amplifier Console plays music for nearby players. However, it doesn’t automatically broadcast a selected station to other nearby players; each player can independently select a channel to listen to.
- Helpful Tip: Doors on your lot will be closed by default. However, right-clicking a door on your lot and choosing to keep it “Always Open” means that door will open immediately and remain open. Select “Allow Close” to allow the door to be closed. You can similarly change the default states of lights, capacitors, and battle banners on your lot.
Decoration Palette: This tool is a special window listing all items assigned to a housing lot. It can help you and friends find, place, and move the decorations assigned to a housing lot. Players with proper permissions can “hide” an item in the decoration palette, meaning it only appears in the palette and not on the lot itself. Players with proper permissions can “unhide” an item in the decoration palette by moving it from the palette onto the lot. Hiding or un-hiding an item to/from the deco palette is treated the same as moving it, in terms of permissions.
You can find the decoration palette window listed under the Window Selector icon.

Note that the decoration palette works with both tradable and “No Trade” items. No Trade items are special in that they can be placed on a housing lot but cannot be collected by anyone except that item’s owner. However, anyone with proper permissions can move a No Trade item assigned to that lot. This can be useful when you want to collaborate on the decoration of a house using No Trade decorations.
House Decorations Limits
The chart below shows the decorations limits for house lots.
Lot Size | Exterior Objects | Exterior Lights* | Interior Objects | Interior Lights* | Containers | NPCs | Basements | Player Dungeons |
Market | 100 | 4 | 0 | 0 | 20 | 1 | 0 | 0 |
Row | 200 | 8 | 600 | 80 | 75 | 2 | 1 | 1 |
Village | 475 | 16 | 675 | 120 | 88 | 4 | 1 | 1 |
Town | 800 | 24 | 1000 | 180 | 112 | 6 | 1 | 1 |
City | 1125 | 32 | 1325 | 260 | 164 | 8 | 1 | 1 |
Keep | 1750 | 40 | 2350 | 310 | 220 | 10 | 1 | 1 |
Castle | 2200 | 64 | 3400 | 370 | 260 | 12 | 1 | 1 |
Basements
A basement functions as an expansion to a lot that exists independently of any house on that lot. You may have a basement without a house and vice-versa. Like house deeds, basements are restricted by lot size. You may not place a Castle-sized basement beneath a Village-sized lot, for example.
To place a basement on a lot you need two things: A Basement Hatch Entrance and a Basement Deed. Both of these can be purchased from the deed and decoration vendors in, or near, the banks of most towns throughout New Britannia for gold or from the in-game Crown Store.
Basement Hatch Entrances are placeable decorations that can be deployed on the ground anywhere there is room on your lot. This includes inside or outside your house. Hatches are extremely cheap, but will not function without a Basement Deed.
Basement Deeds function much like house deeds. To connect your hatch to a basement, you must have the deed to that basement in your possession. The “Enter Basement” button allows you to actually change scenes into your selected basement.
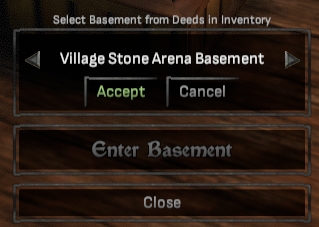
Of course, your Basement Hatch is more than just a convenient entry point. With a Basement Deed in your inventory your Basement Hatch functions much like the sign outside of a lot, allowing you to change your selected basement (if you have multiple deeds), and adjust the permissions of who can change your decorations.
Basements can be freely decorated in the same way houses and outside lots can. The “Store Items” button clears all placed decorations from your basement, storing them in your bank until you claim them.
Basements can be set to allow for open-PvP, which is worth being aware of before following a stranger into their basement.
All basements contain Resurrection Ankhs.
Basement Decorations By Size: The chart below shows the decorations limits for basements. Note that these limits are based on the basement size, not lot size. So, a row basement placed on a village lot still has row-based limits.
Basement Size | Exterior Objects | Exterior Lights* | Interior Objects | Interior Lights | Containers | NPCs |
Market | NA | NA | NA | NA | NA | NA |
Row | 0 | 0 | 2000 | 60 | 250 | 2 |
Village | 0 | 0 | 2375 | 100 | 330 | 4 |
Town | 0 | 0 | 4000 | 200 | 420 | 6 |
City | 0 | 0 | 5625 | 250 | 615 | 8 |
Keep | 0 | 0 | 10750 | 300 | 825 | 10 |
Castle | 0 | 0 | 16000 | 350 | 950 | 12 |
Player Dungeons
Lot owners can attach their own player dungeon to their lot. A dungeon is different from a basement, but does share some similarities. For instance, it’s like a basement in the sense that a dungeon is an expansion to a lot that exists independently of any house on that lot; you may place a dungeon entrance on your lot even if that lot doesn’t have a house on it, and vice-versa.
You’ll need two things in order to place a dungeon on your lot: a Dungeon Entrance and a Dungeon Foyer. You can buy recipes to craft them for gold from bookseller merchants (located in some large NPC towns, such as Aerie, Ardoris, Brittany Estates, and Kingsport). You can also buy foyers from the in-game Crown Store. You can reshape your crafted entrance with patterns available from the in-game Crown Store or as loot in game.
Dungeon Entrances are placeable decorations that can be deployed on the ground anywhere there is room on your lot. This includes inside or outside your house, including the upper floors. Dungeon Entrances will not function without a Dungeon Foyer Deed.
Dungeon Foyer Deeds function much like basement deeds. To connect your dungeon entrance to a dungeon foyer, you must have the deed to that foyer in your possession. To enter a player dungeon, double-click the dungeon entrance object and click the “Enter Dungeon” or “Enter Sample Dungeon” button. If a dungeon is available, you’ll be sent to that scene.
In addition to being an entry point for your dungeon, your dungeon entrance is also a tool that allows you to change the associated dungeon foyer and adjust the permissions for those who can enter your dungeon, much like the sign outside of a housing lot.
The Lot owner can expand the dungeon beyond the foyer by adding additional hallways and rooms. They can also place decorations and add encounter rooms with dangerous enemies!
Player dungeons, like basements, can be set to allow for open-PvP. Be cautious when entering a player dungeon!
Every dungeon foyer contains a Resurrection Ankh near the entrance.
- Helpful Tip: If you’re an owner or steward, enter the “/slew” command into your chat window to enter “free camera” mode and fly around your dungeon. Change your speed with your mouse wheel. Turn off this mode by entering “/slew” in the chat window again or pressing ESC twice.
Player Dungeon Encounters
Some player dungeon rooms have the ability to spawn enemies within them. Such rooms are “encounter” rooms "with spawns."
When an encounter room with spawns is initially placed, its enemies are not yet enabled. While in Design Mode, an authorized player can place a totem in the encounter room. While in Adventure Mode, an encounter room with a totem will spawn appropriate creatures.
Create a totem by collecting "Essence" items related to the encounter room's enemies (e.g. Lich Essences for liches, Elf Essences for elves, Kobold Essences for kobolds, etc.) and combining them at a Smelting crafting station. For example, 100 Lich Essences can create a Tier 1 Lich Totem that will upgrade a Lich "with spawns" encounter room into a Tier 1 Lich encounter room.
You can use the Smelting crafting station to combine multiple lower-tier totems to create a higher-tier totem. Higher-tier totems produce enemies with higher threat levels. The chart below indicates how many lower-tier totems are required to create a higher-tier totem.
Combine these totems... | To get this totem... |
Four Tier 1 totems | One Tier 2 totem |
Four Tier 2 totems | One Tier 3 totem |
Four Tier 3 totems | One Tier 4 totem |
Two Tier 4 totems | One Tier 5 totem |
Two Tier 5 totems | One Tier 6 totem |
Dungeon Point Limits
Dungeon pieces can have different point values depending on their size. In general, an 8x8 piece will be one dungeon point. Dungeon point limits start with a base value based on the size of the lot that the dungeon is built on. They will be able to be increased by purchasing additional points for your account, via both gold and Crowns of the Obsidians.
Lot Size | Dungeon Points |
Market | NA |
Row | 50 |
Village | 100 |
Town | 150 |
City | 200 |
Keep | 250 |
Castle | 300 |
Moving a Decorated Lot or Basement
You can use the Property Manager window to store a fully-decorated lot or basement and unpack it to either that same lot or another empty lot of the same size that you have claimed in any scene. You can also store player dungeons in the Property Manager. Dungeon points are based on the lot size that the dungeon is started on. Using the Property Manager to move a player dungeon to a larger lot will not recalculate that base.
You can access the Property Manager window from the Stained Glass menu icon, the Lot Deeds options menu, or from any lot sign in any scene. The left side of the window shows your available slots and their current storage status. Each player is given 5 storage slots. You may purchase additional storage slots with Crowns of the Obsidians. The right side of the Property Manager window shows all of your claimed lots. Each lot includes the name of the deed used to claim the lot, the location of the lot, and the size of the lot. Each lot also has two slots: one for the primary contents of your lot (including the house), and one for the basement and its contents.
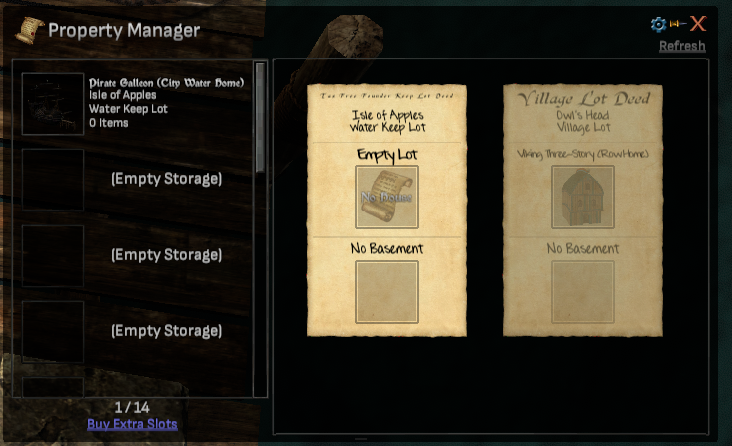
Hovering over a slot will display a tooltip that includes an item count. If the number of items placed on a lot changes, click the “Refresh” option in the top-right of the Property Manager window to ensure the item count is up-to-date.
Packing the Contents of a Lot or Basement into Storage: To store the contents of a lot or basement, drag the contents from one of the slots into any “(Empty Storage)” slot in the left side of the Property Manager window.
The storage is immediate and includes all decorations within that slot.
If you drag a storage icon to an occupied slot, you will simultaneously move your new lot into storage and unpack everything from the slot to your lot. You can also swap live and stored basements in the same way.
Unpacking a Stored Lot or Basement: To unpack a stored lot or basement, drag the stored item from a storage slot in the left side of the Property Manager window into an empty slot in the right side of the window.
A stored lot can be unpacked only onto any lot of the same size as the original.
A stored basement can be unpacked only onto any lot, as long as the stored basement is not larger than the lot that it is being unpacked onto.
A stored basement can only be unpacked on a lot that is in the same town in which the basement was originally stored. Also, the stored basement cannot be larger than the lot that it is being unpacked onto.
Unpacking a stored lot or basement on a lot in the same town in which it was originally stored is free. Unpacking a stored lot or basement into a town different than its original will cost Crowns of the Obsidians to complete the move. (If a lot or basement move requires a special fee, you will be asked to pay that fee when you attempt to unpack your lot or basement or cancel the action.)
Once unpacked, the contents of the unpacked lot or basement will become immediately available. Also, any decorations that were packed up with that lot or basement when it was stored will reappear in their original locations at the time that they were stored.
Note that you can only unpack one lot or basement every 30 seconds. An unpacking cooldown timer will appear at the top of your Property Manager window when you unpack a stored lot or basement.
Renaming a Lot or Basement within the Property Manager: Each lot and basement listed in your Property Manager window will have a default name, but you can rename them at any time. To rename a lot or basement, right-click on it’s icon in the Property Manager window, fill in the new name, and click “Submit.” You can also use the “Set to Default” option to rename the lot or basement to its default name. You can also rename stored lots and basements.
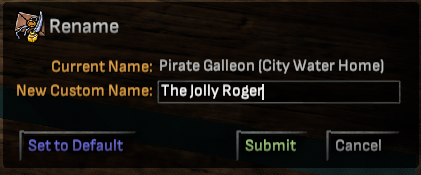
Sending Stored Lots and Basements to Your Bank: You have the option to send all of the contents of a storage slot to your bank. To do so, right-click on a storage slot and select the “Send to Bank” option.
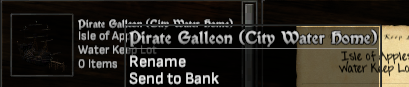
Unclaiming a Lot: Unclaiming a lot does not move a lot or basement into a Property Manager storage slot. Rather, unclaiming a lot moves all associated items into your bank.
Storage Slots are Tied to Your Account: It’s important to note that Property Manager storage slots are connected to your game account and not to a specific character. This means that, for example, if you store a lot, delete your character, and create a new character, that new character will have immediate access to the lot that was placed into storage.
Player Vendors
Player Vendors are placed directly onto lots by Avatars who own a contract for their services. They are similar in function to Public Vendors, but have a few differences. A player must have at least Kindred access on the lot in order to place items for sale at a Player Vendor or have been specifically added to the permission list for the vendor itself. Items placed with a Player Vendor do not expire. The Player Vendor stocks the item indefinitely unless another Avatar buys it or it is manually removed.
- Helpful Tip: If your Player Vendor has listings on it from another player that you want to remove and return the items to, ban the player from your lot. This will automatically clear their items. You can unban them again as soon as the listings are gone!
Player Vendors obtained through Pledges and Bundles do not require a fee to list an item for sale, nor will they take a commission for sales. Player Vendors whose contracts were bought with in-game gold will charge a commission to sell items. The commission is charged only when the Player Vendor sells an item or fulfills an order. This commission comes from the proceeds of the sale. (Revenue is equal to the price of the sale, minus the commission.) In the case of a Purchase Order, the commission is deposited along with the price offered by the player for the fulfillment of the order. This deposit is refunded if the player removes the listing.
- Helpful Tip: Public Vendors (different from “Player Vendors”) will charge a fee (but not a commission).
Player Vendors may not hold more than 200 items for sale at one time. Any passing Avatar who can reach the Player Vendor may purchase the items listed for sale.
Each Player Vendor has an access list that can be found using the right-click menu on that vendor. You can add other players to this list to allow them to add their own listings.
Vendor Listings In Zone
When you’re in an NPC Town or Player-Owned Town, you can bring up the “Vendor Listings in Zone” window for a listing of items available on Player Vendors within that town.
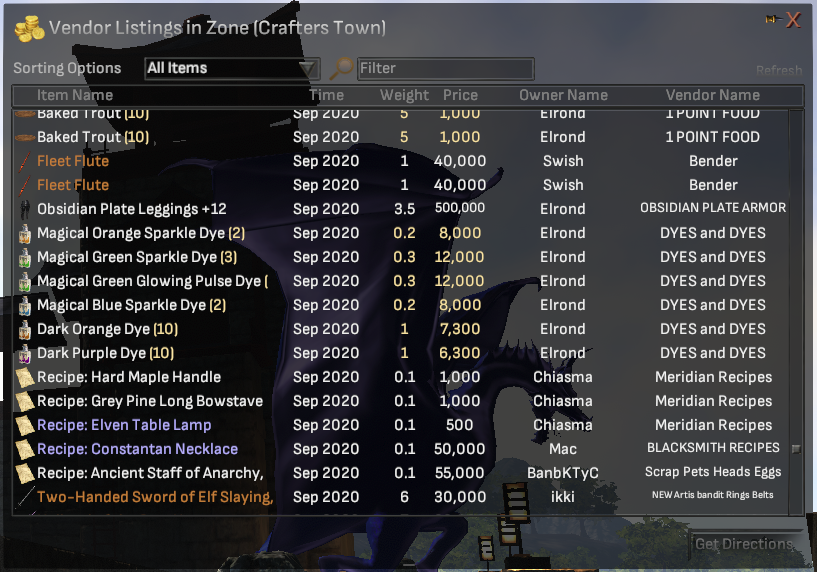
If you find an item you’d like to buy, select the item and press the “Get Directions” button. This will put a special green marker on your compass that will lead you to the Player Vendor with that item. The compass marker will remain until you arrive on the lot with that vendor or leave the town.
Custom NPC Dialogue
Some Decoration Pets can be given custom dialogue in the form of an Ink source file. Ink is a scripting language used to create stories. Click here for more information about Ink.
To import custom dialogue, right-click on an eligible Decoration Pet (such as an Automaton Decoration Pet), and select Edit Dialogue from the context menu. In the Edit Dialogue window, click the Import Content button, select your Ink source file from the list, and click Import.
Edit Dialogue window | Custom Dialogue “source file” window |
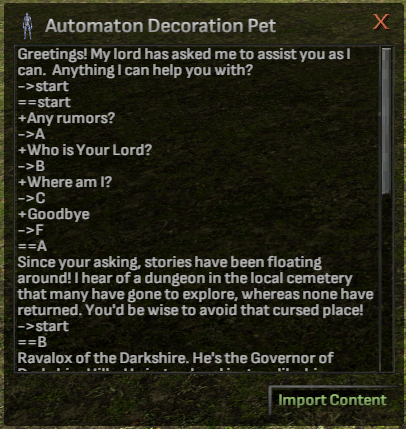
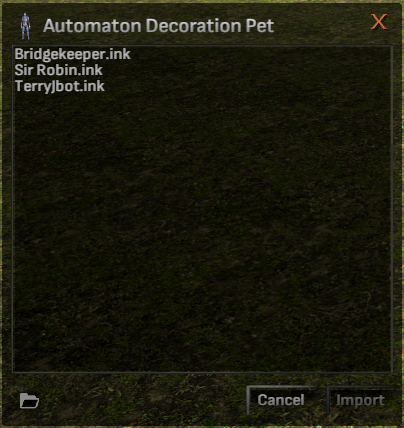
In order for Ink files to be shown in the list, they must be placed in a particular directory on your computer. To open the correct directory, click the folder icon in the bottom-left corner of this “source file” window.
Player-Owned Town Management
Avatars who have purchased one will ultimately find themselves owners and Governors of a Player-Owned Town (POT).
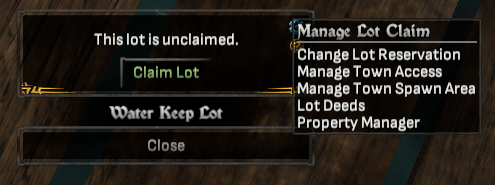
Ownership of a town is displayed next to the town name for all to see. Town ownership comes with a number of additional privileges and responsibilities, most notably control over who can claim what lots within the town. General permissions for the town can be managed from any lot sign, though the “Manage Town Access” option in the Manage Lot Claim dropdown menu.
Residents can claim any lot not specifically set as restricted. Stewards can adjust restrictions on specific lots, evict Avatars from a lot, and grant Avatars resident privileges. Only the town owner can promote someone to Steward, and Stewards cannot affect the owner’s permissions or privileges.
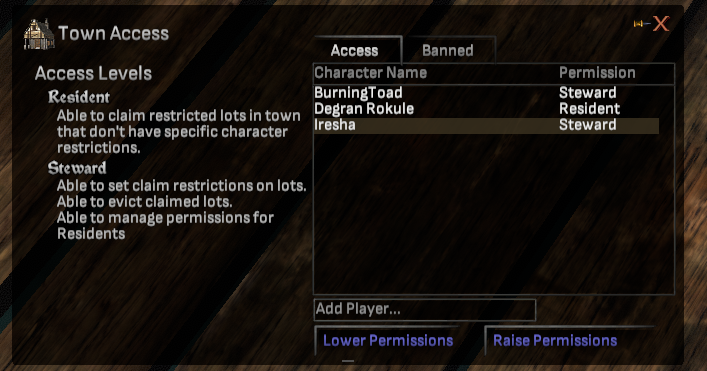
Undesirable individuals can be prevented from entering the town entirely via the Banned tab. Banned Avatars are immediately kicked to the overworld and are unable to re-enter the town. Note that individuals cannot be banned from open-PvP Player-Owned Towns.
Some Player-Owned Towns do not begin with their lots placed. The town owner will find a selection of Property Markers in their bank. These Property Markers may be placed in any sufficiently flat spot in the owner's town, becoming property lots.
Only the town owner and their Stewards may place, move, or remove Property Markers. If a placed lot has already been claimed then the current lot owner must be evicted before the Property Marker can be reclaimed or repositioned. Player-Owned Towns also have a maximum amount of square feet that can be covered by lots, which is displayed on the decoration UI while placing a Properly Marker. Town owners receive the maximum number of Property Markers of each type that will fit in a Metropolis, even if they own a smaller town. Municipality owners are an exception to this, as they will receive some additional markers.
Town owners and Stewards can also set privileges on a lot-by-lot basis via the “Change Lot Reservation” option on the Manage Lot Claim dropdown menu. A lot can be locked so that only residents or a specific Avatar can claim it.
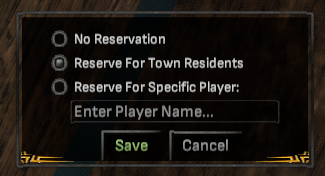
The current holder of the lot can be evicted from the Manage Lot Claim dropdown, returning any deeds to their inventory and any placed decorations to their bank. Inhabitants of a Player-Owned Town should remain aware that their continued lot ownership is dependent on the permissions of the owner and their Stewards.
POT Decorations
Governors of Player-Owned Towns and their Stewards can place select types of decorations anywhere there is sufficient space, much like they can place lots via property markers. This includes a variety of NPC shops and buildings, and other cosmetic decorations like fences, trees, fountains, banners, and statues. Player-Owned Town governors will find markers for their NPC buildings in their bank. Other Player-Owned Town features include generally placeable NPCs and street lights.
POT owners receive a large allotment of special tree and grass remover blocks as an automatic reward that they can claim in their bank. The blocks come in a variety of sizes and are visible while in decoration mode, but invisible otherwise. Their purpose is to remove flora from wherever they are placed in the POT. Some removers eliminate trees while others remove both trees and grass. Once a remover block is placed, other decorations can be placed over these removers.
Governors can place special Broadcast versions of the Phonograph decoration in their town. These Broadcast versions can be loaded with wax cylinders and set to play music like a normal phonograph, but will override the default music for the scene and play the Governor’s selected music for the entire town. Broadcast Phonographs can hold more wax cylinders (songs) in larger Player-Owned Towns.
- Helpful Tip: If you’re an owner or steward, enter the “/slew” command into your chat window to enter “free camera” mode and fly around your POT. Change your speed with your mouse wheel. Turn off this mode by entering “/slew” in the chat window again or pressing ESC twice.
POT Decoration Limits
As with normal lots, there are limits to how many decorations of various types can be placed in a Player-Owned Town. The decoration UI appears when placing a Property Marker, NPC building, or other decoration in your town, filling in appropriate bars to show you how close to your allotted limit you are. Larger Player-Owned Towns allow more NPC Buildings and other decorations.
Town Size | NPC | NPCs | General | Lights | Containers | Wax Cylinder |
Holdfast | 2 | 2 | 200 | 45 | 1 | 2 |
Hamlet | 4 | 4 | 250 | 60 | 2 | 3 |
Village | 6 | 6 | 380 | 75 | 3 | 4 |
Crossroads Village | 8 | 8 | 470 | 90 | 4 | 5 |
Town | 10 | 12 | 600 | 120 | 5 | 6 |
City | 12 | 20 | 750 | 150 | 6 | 7 |
Metropolis | 20 | 30 | 950 | 195 | 7 | 8 |
Municipality | 28 | 40 | 1200 | 240 | 10 | 9 |
Megalopolis | 35 | 50 | 1500 | 300 | 12 | 10 |
Gigapolis | 42 | 60 | 1800 | 360 | 15 | 11 |
Teralopolis | 55 | 70 | 2100 | 450 | 18 | 12 |
Changing a POT’s Default Spawn Point
Every POT has a default spawn point, which is where players appear when they enter that POT. Owners and Stewards of dynamic Player-Owned Towns can set the spawn point for their POT to a different location.
To change your POT’s spawn location, you (or any player with proper permissions) should access any lot sign within your POT, open its Options menu, and select “Manage Town Spawn Area” to open the “Town Spawn Selection” window.
In the Town Spawn Selection window, your POT’s current spawn point will be selected in the dropdown list and appear on the map as a blue gate icon. Each time you select a different spawn point in the dropdown list, the blue gate icon will appear at a new target location. You can change your POT’s default spawn location by selecting a new spawn target from the dropdown list and then clicking the “Save Selection” button. If you change your mind, you can return to this window, select a different target, and save your new choice.

Player-Owned Town Chat Window Commands
POT managers can set a Message of the Day (MOTD) for their town. POTs that have a message will display in the chat windows of players who enter their town.
There are 3 chat "slash" commands associated with this feature:
- /getpotmotd Displays a Player-Owned Town’s current (or expired) message of the day to the chat window and copies the text to the clipboard.
- /setpotmotd <message> Sets the message of the day for the current Player-Owned Town. To set this message, you must be the owner or steward of the town.
- /unsetpotmotd Expires a Player-Owned Town’s current message of the day. The message will no longer be shown to players when entering the scene, but can still be retrieved via the /getpotmotd command.
Player-Owned Town Owner FAQ
If you’re a current or future POT owner and would have additional questions, or would like to make changes (such as altering its name, biome, or location), please visit the following forum post for an official FAQ.
Crafting and Harvesting
In Shroud of the Avatar, the economy is in the hands of the players. Avatars who aspire to wealth and fortune will be able to gather raw materials in the world, refine and assemble them into all manner of useful items and equipment, and sell them to other players. The process of harvesting and creating these items is commonly referred to as “crafting.”
Much of crafting is left for you to discover through experimenting with how items work with each other. You can share your discoveries with other players, either in the game itself or online, on Shroud of the Avatar’s official message board or on sites run by Shroud of the Avatar fans such as sotawiki.net.
Harvesting
Resource nodes (like trees, herbs, ore, crystals, and more) throughout the world can be harvested with the appropriate tools. If you approach a resource node and mouse over it, the cursor will turn into an image of the specific harvesting tool you need. Double-clicking on the node will automatically attempt to harvest it, provided you have the necessary tool equipped.

Harvesting (and other crafting) tools must be equipped in profession-specific slots in the skills menu (K). If you wish to use a specific crafting or harvesting tool (perhaps because you have a tool that does not wear out or provides a higher chance of success), make sure your preferred tool is in the “Equipped Tool” slot. Crafting tools may also be equipped from the inventory by right-clicking on them.
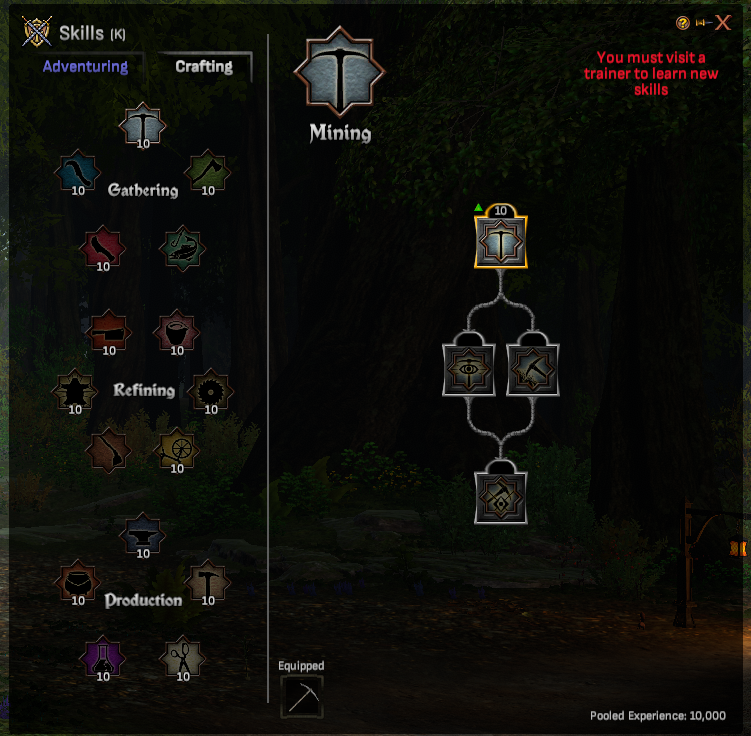
Using a harvesting tool slowly wears it down and depletes its durability. Harvesting tools will eventually need to be repaired or replaced. There are on-screen indicators, cursors, and special feedback at crafting stations that will alert you when you have damaged or broken tools.
Harvesting tools can also be improved through the use of Engraving Kits crafted by alchemists. Engraving a tool permanently reduces its maximum durability.
Most resource nodes are time consuming to harvest, though you can interrupt the process at any time. Harvesting time can also vary dramatically from node to node. It’s recommended you clear nearby hostile creatures before attempting to harvest a node.
Not every harvest attempt will be successful, although you may attempt to harvest the same node again at no penalty. Your chance of success is dependent on a combination of your relevant harvesting skills, the quality of the harvesting tool, and the difficulty of the individual node. Successfully harvesting a resource node not only allows you to loot the contents, but awards a small amount of Crafting Experience. Skills that can improve the speed and success ratio of harvesting different resource types can be found in the Gathering section of the Crafting Skills menu.
Fishing
Fishing works slightly differently from most gathering professions. In order to fish you need four things: a fishing pole equipped, training in the Fishing skill, a supply of bait (e.g. worms), and a place to fish (such as a lake, river, or ocean).
For a typical fishing experience, add your bait (e.g. worms) to your Utility Hotbar and click it. (Alternatively, you can right-click your bait and select “Use Item” while it is still in your inventory.) This changes your cursor to a targeting circle, much like with spells like fireball. Move the targeting circle over the water. A red targeting circle means fishing is not allowed on that spot. Whenever your targeting cursor is blue, you can left-click on that spot to begin fishing. After you cast your line, wait for the progress bar to fill. Do not move while the progress bar is filling. Once the bar completes, you will reel in any caught fish or other items.
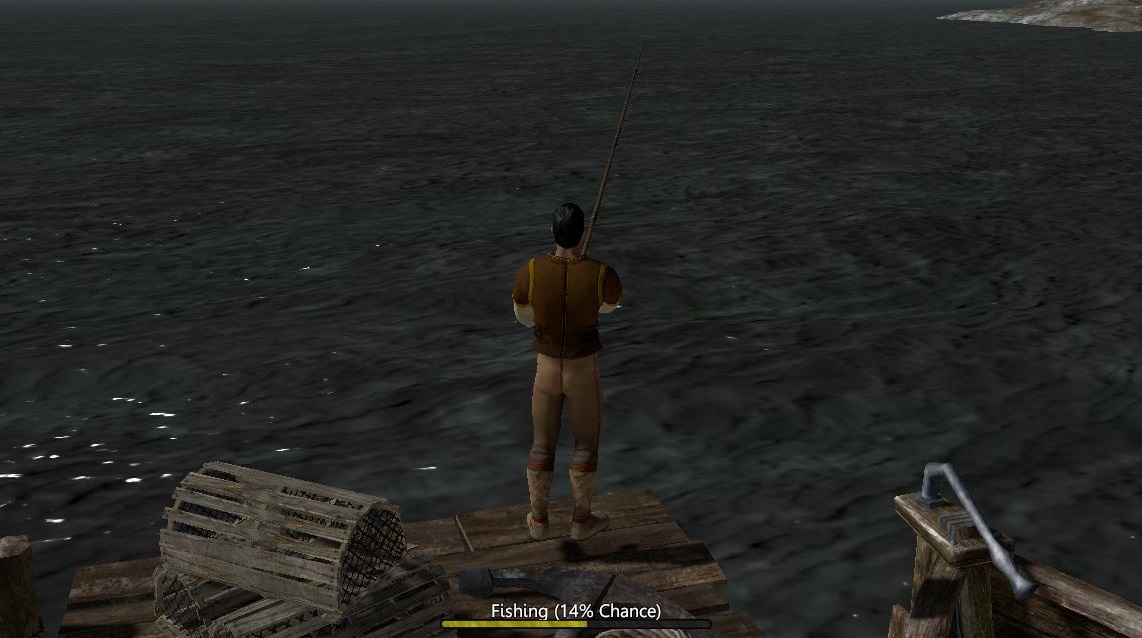
While you can fish and catch fish in almost any open water deep enough to swim within, skilled anglers can spot fishing nodes near docks and coasts. These appear as groups of ripples on the water’s surface. Fishing in these nodes can improve the quality of your catch.
Some fishing nodes may be out of reach of novice anglers, but know that your casting range steadily increases as your fishing skills improve. Repeated casts will deplete fishing nodes, although they will eventually restock themselves given time.
There are three different types of water in Shroud of the Avatar: fresh, salt, and fetid. Fresh water is found most often in lakes and rivers, bays and coves are often salt water, and swamps and stagnant pools have fetid water. Each water type has different types of fish. If you’re looking for fishing trophies, make sure to fish in all types of water.
In addition to water, expert anglers can fish in some deep lava pools and rivers! Once you’re proficient in fishing in the three water types, equip your favorite Lava Fishing Rod, grab some gem lures for bait, and start fishing in molten magma.
Time of day influences the chance to catch a fish. In the mornings, the chance to catch fish is highest. The evening also gets a bonus to catch fish but not as great as the morning. Afternoon and night have the normal baseline fish chances.
Agriculture
Avatars who own a housing lot can use their property to plant seeds, grow plants, and harvest resources from the plants they’ve grown (which could include useful cooking ingredients and magic reagents). All of these things can be done without any special skill training. However, learning agriculture skills will help you become better at planting and nurturing your plants.
Training
You can train in Agriculture skills at many crafting trainers. To train, follow the steps below.
- Locate an NPC that can train you in agriculture. (For example, Marianne Cooke in Resolute.)
- Talk to the agriculture trainer. In the “Trainer” window that appears, select the "Crafting" tab. In the "Refining" section, click the "Agriculture" category icon and the agriculture skill tree will appear. Click the "Water Plants" skill icon at the top of the tree and obtain your skill.
As you use your "Water Plants" skill, its score will increase. When it increases enough, you’ll get the option to unlock "Sow Seeds Bonus" and “Harvest Plants” skills at a crafting trainer.
Preparing
Before you can begin growing plants, you’ll need several things: a hoe in good condition, at least one bucket of water, at least one seed, and a planting box.
Hoe: A hoe in good working order needs to be equipped in your agriculture tool slot. If your hoe becomes too worn to be useful, you’ll need to replace it. You can buy a new hoe at a crafting supplies merchant.
Bucket of Water: Although you can buy buckets of water from some shopkeepers (e.g. Farming Supplies Merchants and Grocery Merchants), you can also collect your own water at many wells and fountains.
When next to a well or fountain, double-click it (or press the “E” key) to collect a bucket of water. You can do this multiple times to collect several buckets of water.
Seed: Some shopkeepers sell seeds. These merchants may have titles like Farming Supplies Merchant or Grocery Merchant. Shopkeepers like these can be found in towns like Central Brittany and Kiln.
Planting Box: Planter boxes (sometimes simply called “planters”) can come in various sizes, from planting barrels to large planting beds. Larger planters contain space for a greater amount of plants. These items can be purchased from shopkeepers.
Planting boxes must be placed on a housing lot before they can be used. Anyone with the proper permissions can use a planting box. (Once placed, the owner of the lot can right-click on the planting box and change its permissions, if desired.)
Planting Seeds
Farmers have two options for planting a seed in their planter: manually planting one seed at a time or sowing several seeds at once (a.k.a. “batch planting”).
Planting One Seed: Once you have prepared all your supplies, stand next to your planter. Hover your mouse over your planter and look for “Unused soil,” an unused spot where your cursor turns green. Double-click that spot (or press “E”) to make the “Crafting” menu appear. In that menu, note the “Sow Seed” recipe and its requirements. Double-click the recipe to fill the inventory of the planter box with a bucket of water and the desired seed. If desired, change the seed type. Press the menu’s “Plant” button, which should now be green, to plant your seed. A new plant will appear in your planter, named “Growing Sprout (Plant Name).” At the same time, the seed and one bucket of water will be removed from your inventory.
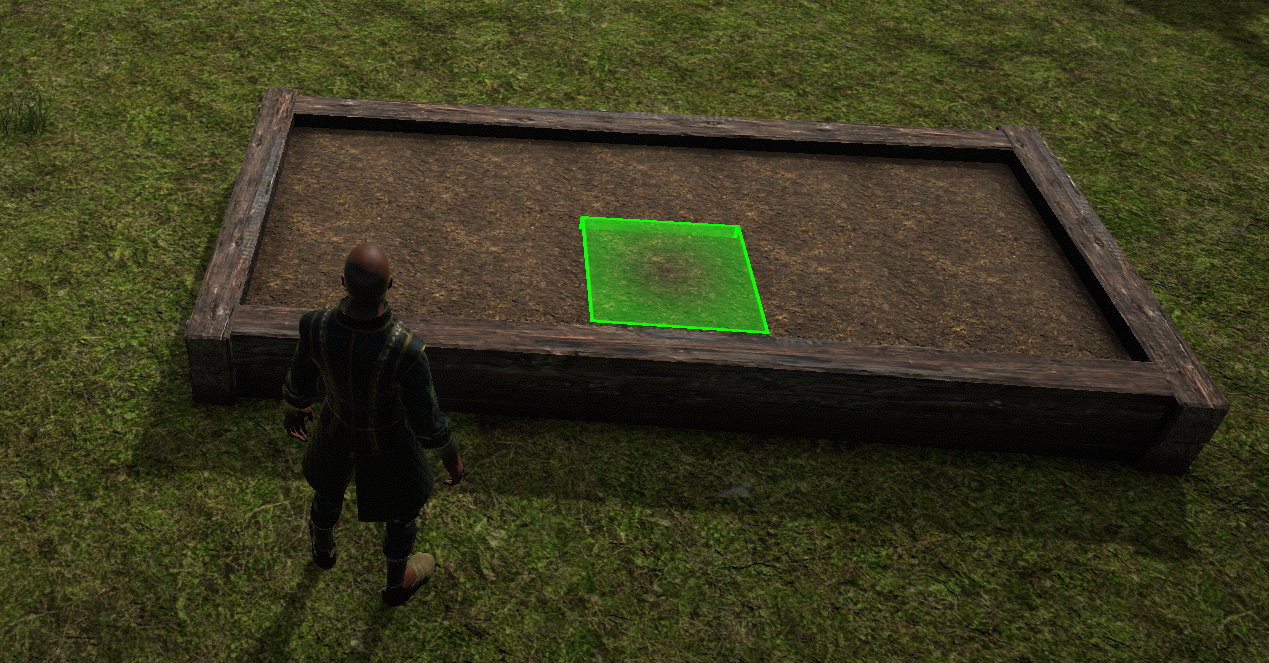
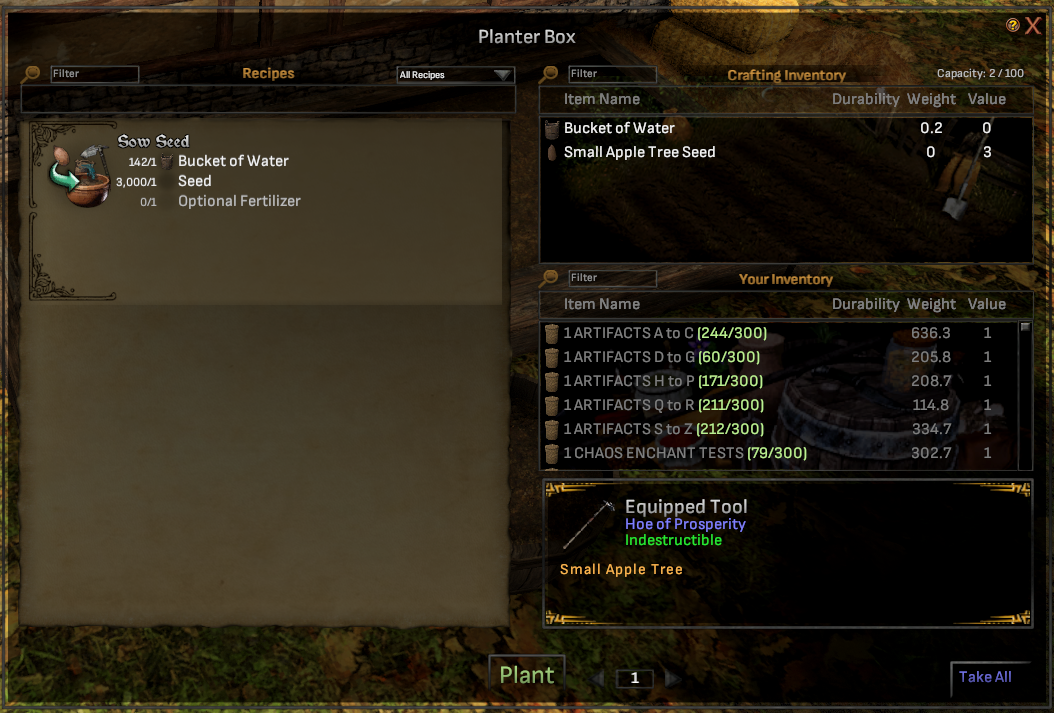
Planting Multiple Seeds: Your “sow seeds batching” capability is modified by your Sow Seeds skill (in the Agriculture Skill tree). To batch-plant multiple seeds of the same type, ensure you have several buckets of water, drag a seed stack into your Utility Hotbar, and left-click that seed icon in your hotbar. A targeting circle will appear in the world attached to your mouse.
Move the targeting circle over multiple planting spots and left-click to plant seeds from your stack. You’ll plant as many seeds within that targeting circle as allowed by the number of seeds in your stack and buckets of water in your inventory. If any planter spots are already in use, those will not change and remain unaffected. Also, they will not count against the number of seeds or water buckets consumed.
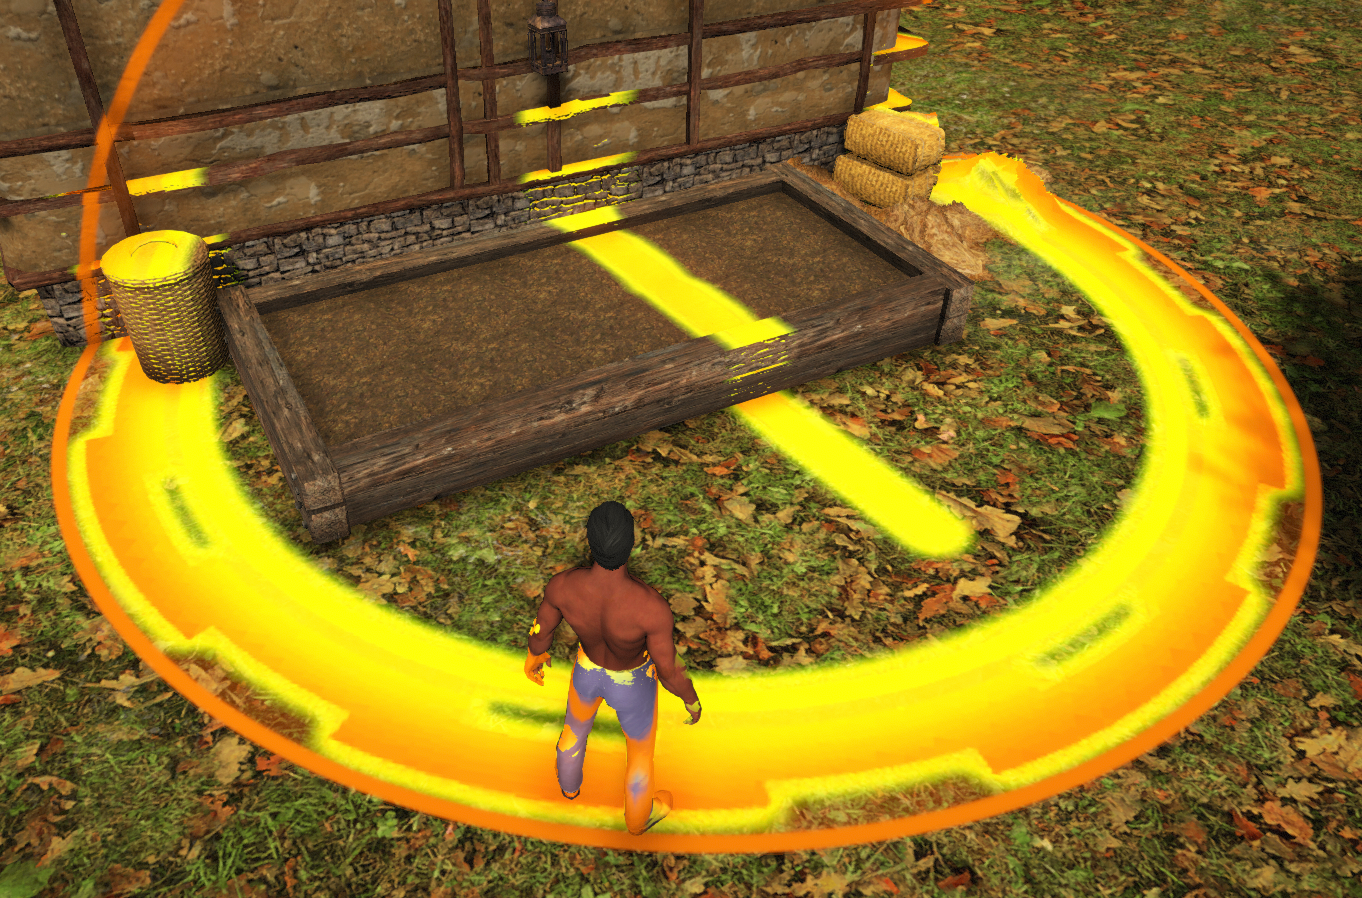
After the seeds are planted, sprouts will immediately appear.
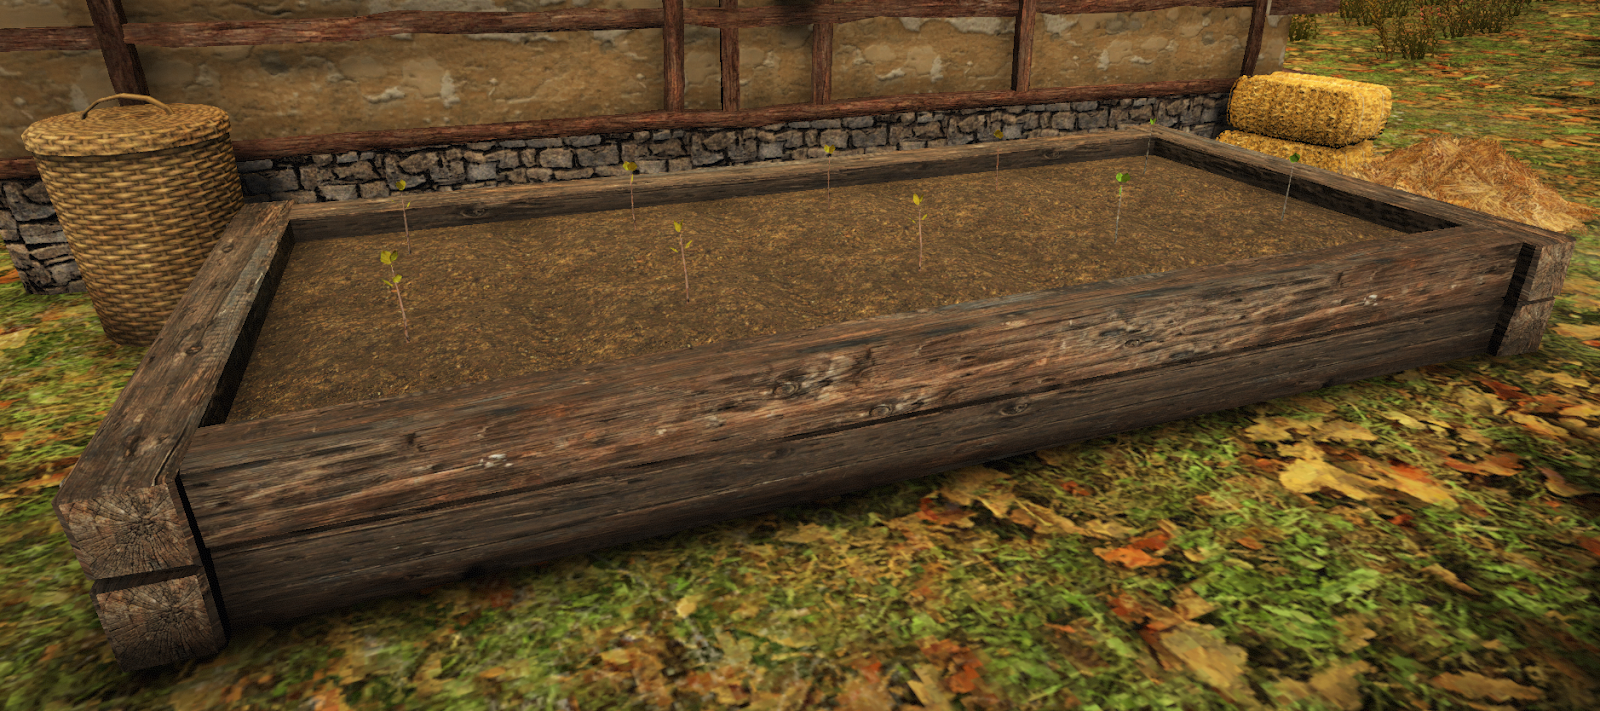
Growing Plants
Not all seeds/plants have the same growing periods. Growing periods can be 8 Earth-hours, 16 Earth-hours, and 24 Earth-hours. At the end of three growing periods, the plant will be fully grown.
Watering: Your plants need water to grow. The first watering occurs simultaneous to the initial planting. Additional water is not required, but you’ll only receive a minimal harvest from your plant if you don’t water it again. To obtain optimal yields upon harvest, plants should be watered a total of four times--once within every growing period. The second watering can occur immediately after the sowing process. The third and fourth waterings should occur during the third and fourth growing periods, respectively.
Farmers have two options for watering a plant in their planter: manually watering one plant at a time or watering several plants at once (a.k.a. “batch watering”).
Watering One Plant: To water your plant, ensure you have a bucket of water in your inventory, target your plant, and double-click it (or press “E”). You’ll get a message asking, “Would you like to water this plant (Name of Plant)?” Click the “Yes” button to water your plant. Each time you water your plant, there is a chance the bucket of water will be used and removed from your inventory. Once a plant is watered, its base will look wet.
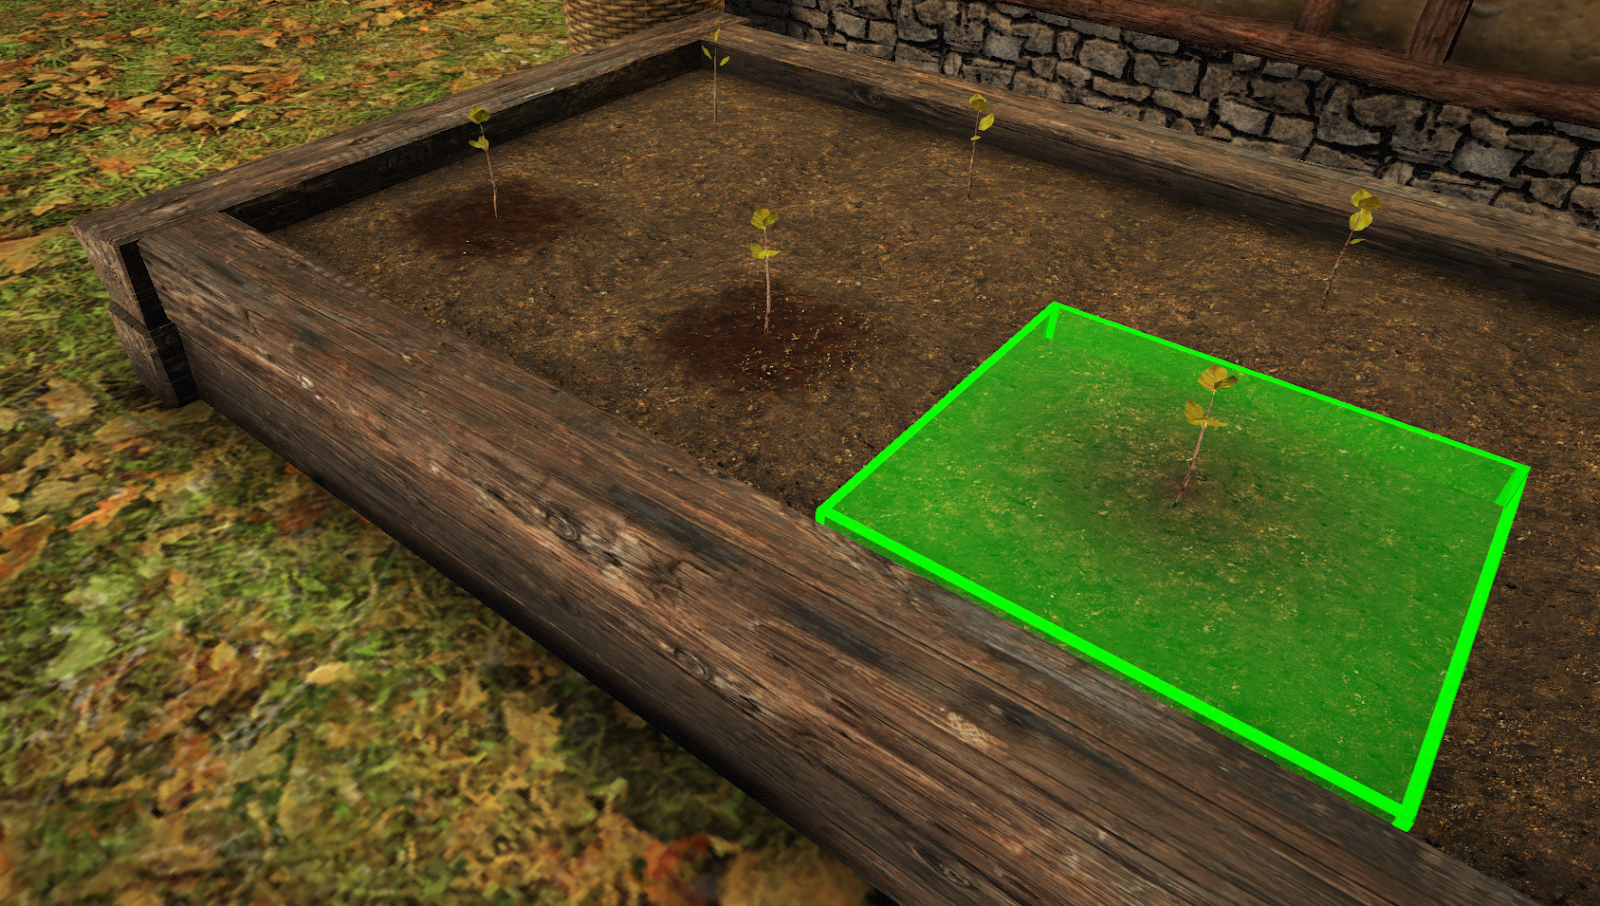
Watering Multiple Plants: Your ability to water multiple plants at one time is modified by your Water Plants skill (in the Agriculture Skill tree). To batch-water multiple plants of the same type, ensure you have several buckets of water, drag the Water Plants skill into your Utility Hotbar, and left-click that skill icon in your hotbar. A targeting circle will appear in the world attached to your mouse.
Move the targeting circle over multiple planting spots and left-click to water plants within that circle. You’ll water as many plants within that targeting circle as allowed by the number of buckets of water in your inventory. If any plants within the targeting circle have already been watered within the same watering period, those will not be watered and remain unaffected. Also, they will not count against the number of water buckets consumed.
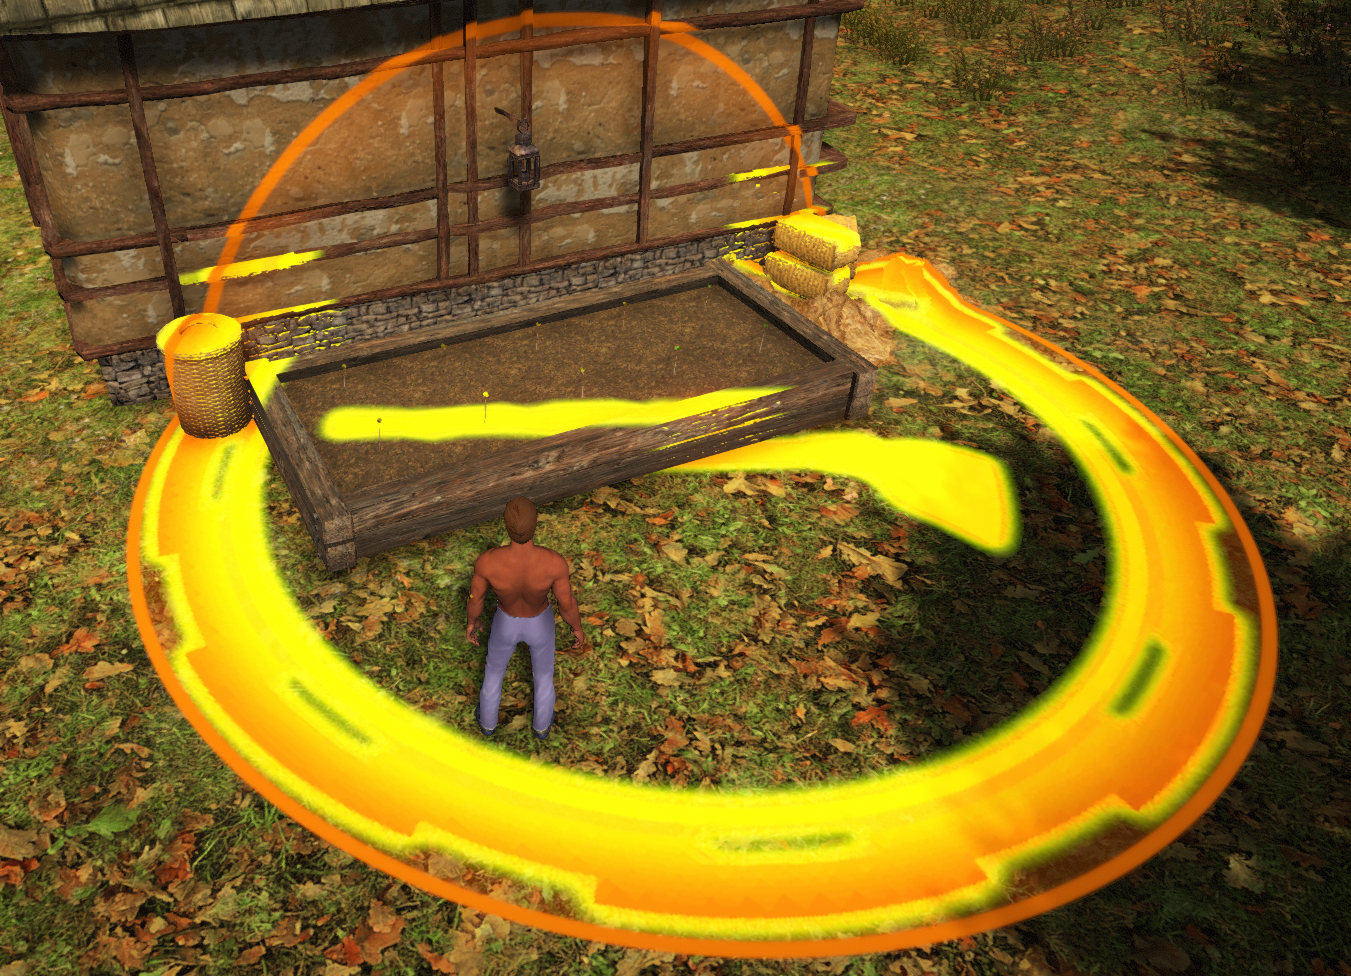
Show Unwatered Plants Nearby: You can easily see which plants need watering near you. Press CTRL and W (default key) to show a misty vertical stream above the plant(s) needing water. This is especially useful to see where you missed watering near-mature plants that may hide the "wet" look under the plant. You do not need to have access permissions to the lot to see this, so you can tell other farmers when their plants are dry. Note that it may take a few minutes for this feature to "settle down" and show correctly after entering a scene, basement, or dungeon and after watering the plants. This works for planter beds, pots, and barrels.
Growing Periods: A seed’s first growing period begins as soon as that seed is planted. The length of each growing period is affected by a seed’s growth rate and the location of that seed’s planter.
The chart below shows the growing periods for each growth rate, as the number of hours after planting.
Seed Growth Rate | First Growing Period | Second Growing Period | Third Growing Period | Harvest |
Quick | 0–8 hours | 8–16 hours | 16 to 24 hours | 24+ |
Medium | 0–16 hours | 16–32 hours | 32 to 48 hours | 48+ |
Slow | 0–24 hours | 24–48 hours | 48 to 72 hours | 72+ |
Growth Rate Examples
Quick Growth Rate | Medium Growth Rate | Slow Growth Rate |
Pumpkin Plant Seed Carrot Plant Seed Garlic Plant Seed Lettuce Plant Seed Pepper Plant Seed Potato Plant Seed Tomato Plant Seed Blue Rose Bush Seed Orange Rose Bush Seed Pink Rose Bush Seed Red Rose Bush Seed Yellow Rose Bush Seed | Banana Tree Seed Barley Plant Seed Corn Plant Seed Cotton Bush Seed Hops Plant Seed Lemon Tree Seed Mandrake Plant Seed Nightshade Plant Seed Onion Plant Seed Red Grape Plant Seed Wheat Plant Seed White Grape Plant Seed | Coconut Plant Seed Small Apple Tree Seed Tea Leave Seed |
Planter Location Examples: Planting indoors, in a basement, or in a dungeon changes the growth rate to 10% the normal rate. Planting in a greenhouse increases the growth rate to 200%.
Harvesting Plants
When a plant has finished growing, its name will change to “Mature Plant (plant name).” A plant that has finished growing can be harvested. If the plant was watered in all three growing periods, it will offer an optimal number of rewards. Sometimes a reward will include another seed!
Farmers have two options for harvesting from their planter: manually harvesting one plant at a time or harvesting several plants at once (a.k.a. “batch harvesting”).
Harvesting One Plant: Stand next to your planter, target a mature plant, and double-click (or press “E”) to harvest that plant. Once a mature plant is harvested, the yield from the harvest will appear in a loot window.
Harvesting Multiple Plants: Your harvesting capability is modified by your Harvest Plants skill (in the Agriculture Skill tree). To batch-harvest multiple mature plants, drag the Harvest Plants skill into your Utility Hotbar then left-click that skill icon. A targeting circle will appear in the world attached to your mouse.
Move the targeting circle over multiple planting spots and left-click to harvest mature plants within that circle. Only mature plants will be harvested; plants that are targeted but not yet mature will remain unaffected.
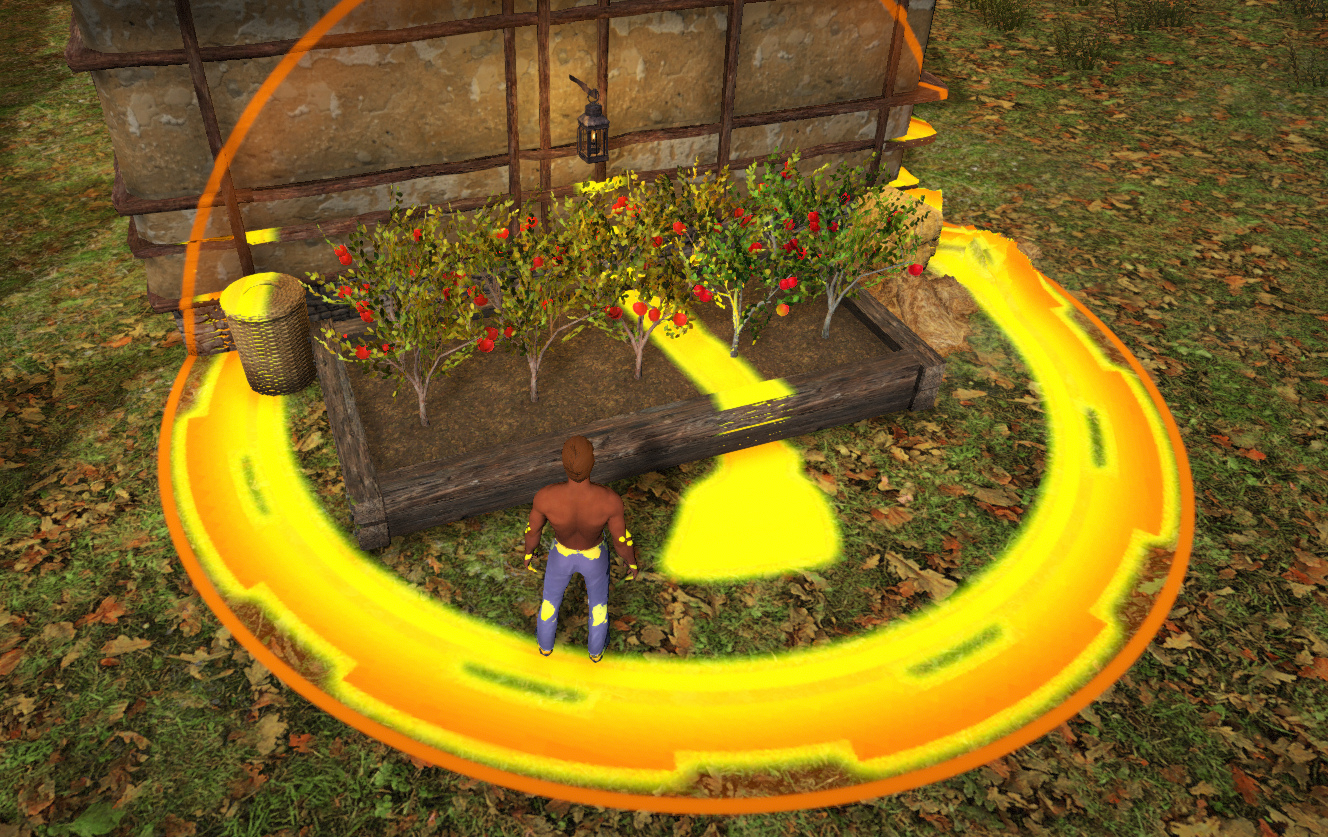
Tips
Seed Cost: Some seeds will take longer to grow than others. The ones that do tend to cost more than the ones that grow quickly.
Growth Rate: Plants that grow outside grow at a standard rate. Plants that grow inside grow at one-tenth the standard rate. Plants that grow within greenhouses grow at twice the standard rate.
Growth Time: Plants with 8 Earth-hour growing periods take 1 Earth-day to finish growing. Plants with 16 Earth-hour growing periods take 2 Earth-days to finish growing. Plants with 24 Earth-hour growing periods take 3 Earth-days to finish growing.
Removing Plants Early: You can right-click a growing spout or fully-grown plant and choose to “Remove Plant,” but choosing that option will permanently destroy the plant and its seed.
Water After Planting: Immediately after you plant a seed, apply a new Bucket of Water.
Four Buckets of Water: For the best planting experience, each seed/plant will need four buckets of water.
Crafting
To craft an item, you will need to find a crafting station for the category of item that you are creating. Crafting stations can be purchased for placement in houses and public crafting stations are available in major cities like Ardoris and Owl’s Head.
The categories of crafting are as follows:
- Smelting: allows you to refine raw materials from mining.
- Butchering: allows you to refine raw meat.
- Milling: allows you to refine materials from wood.
- Textiles: allows you to refine materials from plants.
- Tanning: allows you to refine materials from animal hides.
- Alchemy: allows you to create potions, gems, and enchant equipment.
- Blacksmithing: allows you to create metallic arms and armor.
- Carpentry: allows you to create weapons and decorations from wood.
- Cooking: allows you to create food.
- Tailoring: allows you to create clothing and leather armor.
Crafting items will require resources you find in the world—from hills you can mine, trees you can chop, animals you skin for hides, etc. Most recipes also require an ingredient (such as a chunk of coal) that you must purchase from a merchant. Handac, the merchant in the Owl’s Head public crafting pavilion, is an example of a merchant that sells most crafting ingredients that cannot be harvested in the game world.
Crafting an item for the first time helps an Avatar advance their general crafting skills considerably. Creating the same item over and over teaches slightly less each time.
New crafting recipes can be discovered through experimentation or purchased from select merchants (such as those in a shop off the Owl’s Head Market Row, behind the Skills Trainer). Also, players can teach some recipes to other players. Purchasable recipe items are consumed on use as you paste the page into your crafting log. Using the recipe permanently teaches you how to make the relevant item.
You can see available recipes via your recipe log, available via pressing the B key. The recipe log tracks which crafting recipes you have learned. As you discover and learn new combinations of items to craft, they will appear here. If you do not have enough raw materials to create an item in a recipe, the title and the missing ingredients will appear in grey in the recipe log.
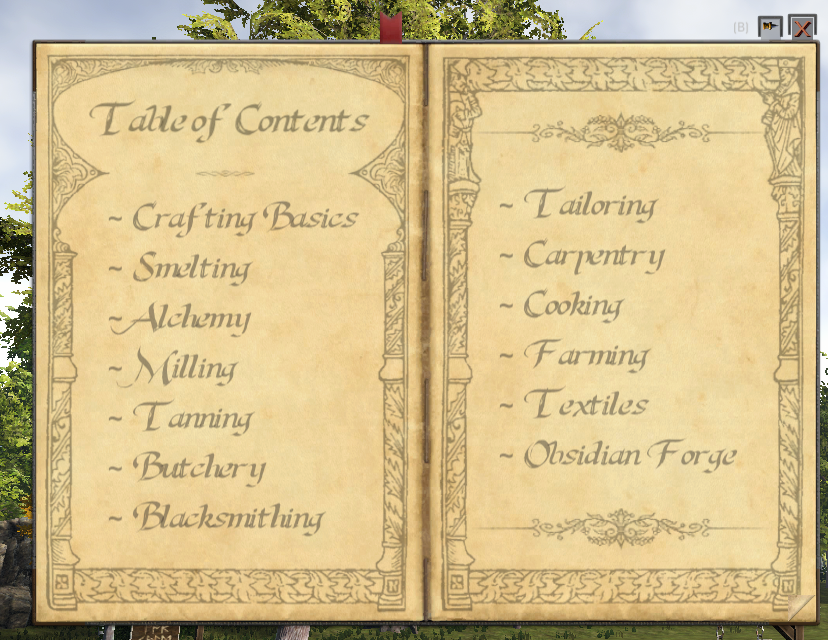
If you are at a crafting station, you can double click a recipe entry to automatically load items into the station and create the item. This is by far the easiest and quickest way to craft an item. You can always create an item manually (and will need to do so the first time you discover how to craft an item) by dragging the ingredients from the player inventory to the crafting station, along with the crafting tool required, and then clicking the CRAFT button on the crafting station.
The “Craft” button will only light up when items that are used in a valid recipe have been loaded into the station. Click the “Craft” button to create that item and, if not already present, to save that item’s recipe into your recipe log.
Skill requirements for recipes are displayed in the recipe book, at merchants, when teaching a recipe, and in the recipe list at crafting stations if you do not meet the skill level requirements of the recipe.
When discovering new recipes, you have to use the exact amount of ingredients necessary to create the item. If moving items from a stack of your inventory into the crafting station, you can use the CTRL key to grab a single item from the stack. Just moving a stack of items from your inventory will bring up a dialog asking how many you want to move.
All items can be removed from a crafting table by left-clicking the “Take All” button. This is helpful when cleaning up items after you are done with a specific recipe.
All crafting requires that the appropriate kind of crafting tool be equipped. If you do not yet have a tool equipped in the appropriate slot in the skills menu, you can drag the tool to the Equipped Tool slot in the crafting table UI. Crafting tools can also be improved through the use of Engraving Kits crafted by alchemists.
You may attempt to craft multiple copies of an item (provided you have the raw materials) by adjusting the number to the right of the Craft button. It is possible for you to get critical successes—with corresponding benefits—when performing any batch crafting operations. For example, achieving a critical success when batch-crafting armor will result in exceptional (higher durability) armor.
When you actually hit the Craft button there are several possible results, influenced by factors such as your crafting skills, the type of item you are trying to craft, and the quality of the crafting tools and station used. The station UI will display your chance of success for a recipe when you have the appropriate ingredients loaded into the crafting station.
- A crafting attempt can Fail. This consumes fuel resources (like coal) and inflicts extra durability wear on the crafting tool. No item is created, but material components survive and can be used again.
- A crafting attempt can fail but allow for a Recovery. This allows the crafter to spend additional fuel resources to salvage the attempt and create a basic version of the item as per a normal Success. Declining to spend additional fuel will result in a normal Failed attempt. Note that a Recovery cannot happen during a batch crafting attempt.
- A crafting attempt can Succeed normally. This consumes all materials and fuel, inflicts minor durability wear on the crafting tool, and produces the item.
- Skilled and lucky craftsmen can enjoy a Critical Success. This earns extensive additional Producer Experience in addition to producing the item. Armor and weapons produced by a Critical Success are considered Exceptional items, and have considerably more durability. Both batch crafting and single-item crafting have an equal chance to produce an Exceptional item.
In many recipes, parts made of different materials can be used interchangeably. For example, an Iron Hilt or a Bronze Hilt can both be used to make a Longsword, but the attributes of the finished weapon will change. Weapons and armor are heavily affected by the materials used to create them. Don’t be afraid to experiment with different types of materials to discover their useful properties.
Items can also have different cosmetic appearances depending on what materials were used to craft them. For example, plate armor made from Meteoric Iron sheets will have a different appearance from plate armor crafted from normal Iron.
Some armor can be further customized through the use of dye, which is available via crafting and the in-game Crown Store. Dye is applied simply by dragging the dye onto the armor in your inventory or character sheet. You will be able to choose between applying the dye to the item’s primary or secondary color If an item cannot be dyed, you will receive a notification message and the Dye will not be used. Most crafted armor can be dyed. Dye remover will restore a clothing item to its original color and can be purchased from the in-game Crown Store.
Completed items have a “Maker’s Mark” that includes the name of the Avatar who crafted them.
Below are some example recipes to get you started.
- Dagger (Blacksmithing)
- 1 Smithing Hammer (not consumed)
- 3 Chunk of Coal
- 1 Metal Dagger Blade
- 1 Metal Hilt
- Dagger Blade (Blacksmithing)
- 1 Smithing Hammer (not consumed)
- 1 Dagger Blade Mold
- 2 Metal Ingots (Of the same type)
- 1 Chunk of Coal
- Metal Hilt (Blacksmithing)
- 1 Smithing Hammer (not consumed)
- 1 Chunk of Coal
- 2 Metal Ingots (Of the same type)
- Metal Ingot (Smelting)
- 1 Smelting Tongs (not consumed)
- 1 Ingot Mold
- 1 Chunk of Coal
- 4 Metal Ore (Of the same type)
- Chair (Carpentry)
- 1 Carpentry Hammer (not consumed)
- 2 Wooden Boards
- 1 Wooden Pole
- Wooden Board (Milling)
- 1 Cubit Measure (not consumed)
- 1 Chemicals
- 1 Timber
- Wooden Poles (Milling)
- 1 Cubit Measure (not consumed)
- 1 Wax
- 6 Timber (of the same type)
Artifacts and Crafting: “Artifacts” are a category of special gear with special rules. Artifacts can be repaired, enchanted, and masterworked. However, artifacts can only be repaired using ancient essences that can only be salvaged from other artifacts.
Artifacts come in five types or “tiers”: Common, Uncommon, Rare, Legendary, and Epic. Most artifacts can be combined with other artifacts of the same type to create a single artifact of the next highest tier.
- Four Common artifacts can be combined to create one Uncommon artifact.
- Four Uncommon artifacts can be combined to create one Rare artifact.
- Four Rare artifacts can be combined to create one Legendary artifact.
- Two Legendary artifacts can be combined to create one Epic artifact.
Before crafting an artifact, it may be important to know that some artifacts cannot be used simultaneously with identical or similar artifacts. For example, dual-wielding wands is not allowed, nor is using a Ring of Cuttlekin while also wearing a Ring of Frogkin.
Brewing
Avatars can harness the process of fermentation to create alcoholic beverages. To create beer, wine, or spirits, start at a cooking station. Use a brewing recipe to combine the appropriate elements into a brewing ingredient. Your Cooking skill will affect your ability to do this. Note that creating a brewing ingredient does not start the fermentation process.
- Helpful Tip: Brewing recipes can be purchased from cooking supplies merchants.
Use the cooking station again to combine your brewing ingredient with a special brewing cask and begin the fermentation process. Each cask is a specific color of wood and has a symbol on the side depicting the type of alcohol inside (beer, wine, or spirits).
- Helpful Tip: The recipes for these casks can be found on Decoration Merchants in Brittany and Midmaer.
The fermentation will continue whether you are online or offline, and if it is in your inventory, bank, or even locked down on a housing lot.
While fermenting, you can hover your mouse over the cask to display its maturity timer. The timer will show the time remaining before fermentation completes, in both actual "real world" time and in-game New Britannian time. When a cask is fully fermented, the maturity timer will be replaced by a matured date (using only New Britannian time).
Once a cask has aged the appropriate amount of time, it can be opened like any container. You can retrieve goblets of wine, mugs of beer, or cups of whiskey from a cask (but you won't be able to add anything into it).
- Helpful Tip: It's important to keep in mind that alcohol can have a weak, moderate or strong effect on your character. The longer the alcohol takes to ferment, the stronger the effect.
To learn more about brewed items, refer to the Food & Beverages section below.
Writing and Publishing Books
Avatars can write in blank books in-game and share them with other Avatars in our player-made books. A Blank Book is an in-game object that appears like any other book in the game, except you can fill it with your own writings. Writing in a Blank Book does not require any Crafting skills, although the actual Blank Book item can be crafted at a tailoring station as a Misc item.
To begin writing a book, double-click on the book. You may either write in the book directly or import text from a file. You must then “publish” the book (by clicking the “Publish” button) in order to save your work. After publishing a book, it can no longer be edited. Published books can be copied by feeding the published book and Blank Books into a Printing Press. Books are currently limited to 8000 characters.
Custom Formatting: You can add custom formatting when you create a custom book using the “Import Text” feature. (You cannot add custom formatting when writing a book using the in-game text editor).
Custom formatting includes bold, italicized, underlined, and colored text.
To add custom formatting in your text file, you’ll need to use special tags at the start and end of the text that requires custom formatting. Custom tags and examples of how to use them are below.
- Bold: Use a “[b]” tag at the start of the strong statement and “[/b]” at the end.
- Example: [b]This text will be bold.[/b] This will not.
- Italics: Use an “[i]” tag at the start of the emphasized text and “[/i]” at the end.
- Example: [i]This text will be italicized.[/i] This will not.
- Underline: Use a “[u]” tag at the start of the underlined phrase and “[/u]” at the end.
- Example: [u]This text will be underlined.[/u] This will not.
- Colors: Use a “[000000]” tag at the start of the phrase and “[-]” at the end, but replace the numbers with the one that represents the color you want. (See below for example color codes.)
- Example: [ff0000]This text will be red.[-] This text will be default color.
Colors are defined with a 6-character hex color code. You can go to a site like https://htmlcolorcodes.com/ to find the perfect color code for you, but some examples are below.
- Magenta: ff00ff
- Red: ff0000
- Orange: ff6600
- Yellow: ffff00
- Green: 00ff00
- Cyan: 00ffff
- Blue: 0000ff
- Purple: 6600ff
- Black: 000000
- Gray: 666666
- White: ffffff
- Brown: 663300
You can even combine several tags. For example, if you want a bit of text to be bold and italic, you can [b][i]do something like this![/i][/b] However, if you do so, make sure to properly wrap your tags so that each additional set of custom tags is fully inside the other (as shown in the example).
Food & Beverages
Consuming food or beverage items will provide long term benefits, sometimes called “buffs,” to your character. Buffs from these consumables typically range in duration from 30 minutes to 8 hours and will persist when you change from one scene to another.
To consume food or beverage items, you should double-click the item in your inventory, right-click the item in your inventory and select “Use Item,” or place the item onto your Utility Bar for easier activation. Food and beverage consumables can only be consumed while you’re not in combat.
Shroud of the Avatar uses a six-slot food/drink channel system. Food and beverages utilize one, two, or three of those six slots. Your avatar can utilize up to six slots at any time, in any combination of one-slot, two-slot, and three-slot items. Examples of utilizing all six slots include consuming six one-slot food/beverage items; two three-slot items; or even one one-slot item, one two-slot item, and one three-slot item. If any food or drinks are imbibed after all slots have been filled, the system will do its best to remove any excess food or beverage buffs of lesser value or lesser duration. One-slot food and beverage items typically provide smaller buffs and durations, two-slot items provide moderate benefits, and three-slot food and beverage items provide larger buffs and longer durations.
Gems, Jewels, and Socketing
Alchemy allows magical gems and jewels to be cut from a sufficient number of fragments, or from intact precious stones harvested via mining. These cut stones can then be socketed into crafted equipment (while at the alchemy table). A socketed stone adds attunement to that stone’s magical element while the equipment is worn or wielded. This stacks with attunement from improving active skills.
Gem/Jewel Type | Elemental Attunement | Gem/Jewel Type | Elemental Attunement |
Amethyst | Moon | Garnet | Sun |
Citrine | Air | Onyx | Death |
Diamond | Life | Ruby | Fire |
Emerald | Earth | Sapphire | Water |
An item may only have a single type of precious stone socketed into it. Once socketed, precious stones may not be removed or replaced. Chest armor, shields, and weapons are socketed with Gems. Rings and amulets require the slightly smaller and cheaper-to-cut Jewels.
Socketing a Gem or Jewel adds related bonuses to the pool offered when Enchanting an item. For example, socketing a Ruby Jewel or Gem into an item means fire magic related bonuses may appear when Enchanting that item. Gems and Jewels do not affect Masterworking bonuses.
Masterworking and Enchantment
Crafted equipment can be further improved using appropriate Masterworking and Enchanting crafting recipes. An item can be Masterworked at the crafting table that created it. Items are Enchanted at the alchemy table.
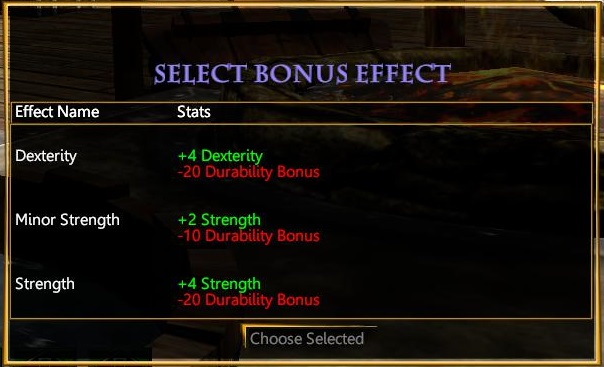
Successfully Enchanting or Masterworking an item allows the choice of one of three randomly-selected permanent bonuses, while lowering the maximum possible durability of the item. Even repairing an item with a Crown of the Obsidians cannot recover Max Durability lowered by Enchanting or Masterworking, with one exception: at Grandmaster level, there is a chance to sometimes add maximum durability back to the item. Once a specific bonus is chosen it will not be offered again on subsequent attempts to improve an item with that skill.
Socketing a Gem or Jewel into an item allows bonuses related to that Gem’s element to appear as Enchanting bonuses. For example, after socketing an item with a Ruby, bonuses related to fire magic spells can be offered when Enchanting the item. Masterworking bonuses are not affected by socketing a Gem or Jewel.
Masterworking specializations can unlock item type specific Masterworking bonuses. For example, learning and improving the “Masterwork Blade Weapon” skill unlocks additional possible bonuses when Masterworking bladed weapons, as well as improving your chance to succeed in Masterworking attempts with blades. Rings and Necklaces cannot be Masterworked. (They can be Enchanted.)
An item can be Enchanted and Masterworked up to five (5) times each, provided the item has enough durability. Each subsequent attempt becomes significantly more difficult, and an item must have more than 30 maximum durability to be Enchanted or Masterworked. The same item can be both Enchanted and Masterworked. Masterworking an item does not make it harder to Enchant or count against the number of times an item can be Enchanted, and vice versa.
The higher your associated crafting skill level, the greater the power of the effect added to the item. Also the power of the effect is directly proportional to how many levels of Masterworking or Enchanting have been applied.
Any failed Masterworking or Enchantment attempt will decrease the durability of the item. Also note that no further Enchantments or Masterworks are allowed for any gear that reaches 30 durability (or less).
Patterns
"Patterns" allow players to change the visual appearance of many items in the game while preserving the functionality and data associated with the item the pattern is being applied to. For example, applying a pattern to a weapon will allow it to keep all of its original stats (including damage range, durability, and enchantments) but will make it look different.
Patterns can be obtained through purchases (e.g. pledges, Add-On Store, and bundles) and in-game activities (e.g. salvaged from gear found on defeated enemies).
- Patterns in Pattern Packs: These patterns are consumed when used, so can only be used exactly once. They come in packs of 6 or more.
- Eternal Patterns inside Gear: When you’ve purchased a suit of armor or a functional weapon (from the in-game Crown Store, the Add-On Store, as a pledge, as a bundle, etc.), that gear has starter level stats, is non-lootable, is indestructible, and cannot be enchanted/masterworked. If you want to use a purchased item in crafting, it can be salvaged for an “Eternal Pattern.” Salvaging a purchased item will have a 100% chance to give an Eternal Pattern from the gear.
- Important! Please note that salvaging a purchased item forfeits all of its protections from destruction and PvP loot-ability. That item’s Eternal Pattern can be used just like a regular pattern, with the critical difference that it can be recovered by salvaging the item that it was applied to. This allows anyone who uses from purchases or pledges to make exactly 1 item at a time from their gear if they choose. This also preserves the rarity of those items while allowing them to be used in the crafting system.
- Crafting Symbol Chest Patterns: You may reshape your existing crafted chests/containers to apply the appearance of special Crafting Symbol Chests. Each of these chests includes a brightly emblazoned symbol of the intended crafting school applied. The patterns necessary to reshape chests/containers can be found on Decorations Merchants.
- Player Vendor Customization Patterns: These patterns can modify the appearance of Player Vendors. They can be found in a variety of places, including in-game Merchants, the in-game Crown Store, and the Add-On Store. These patterns can be applied at an Alchemy table.
You will use patterns to reshape existing pieces of gear in much the same way you enchant gear at a crafting station. To apply a pattern, take a weapon or a piece of armor to the appropriate station (ex. a longbow to a carpentry station) and then use a pattern to reshape that item into something visually different.
Removing Patterns: Eternal Patterns can be removed from items which are using them. You can remove an Eternal Pattern from an item by salvaging it (therefore destroying the item), by applying another pattern to that item, or by using a Pattern Remover at a crafting station. Using a Pattern Remover resets the item to the original visual state and removes the pattern without destroying the item or the pattern.
Salvaging
Unwanted or broken equipment can be salvaged to recover raw materials. This requires the appropriate crafting table, tool, and training in the appropriate skill.
Item Type to be Salvaged | Crafting Table/Tool | Salvage Skill |
Metal Weapons and Armor | Blacksmithing Table/Hammer | Blacksmithing Salvage |
Cloth and Leather Armor | Tailoring Table/Scissors | Tailoring Salvage |
Wooden Items (Such as Bows) | Carpentry Table/Hammer | Carpentry Salvage |
Books | Tailoring Table/Scissors | Tailoring Salvage |
Salvage attempts usually generate scraps. Items with metal in them give metal scraps, wood gives wood scraps, etc. Many items will yield more than one type of scrap, depending on what was used in their construction. Scraps can be combined in varying quantities with non-salvaged raw materials to create a full unit of a given material (like an ingot). Salvaging crafted items may yield components used in their creation, like hilts and blades, if Salvage skills is high enough.
Talking to Players and NPCs
You’ll use a conversation window to communicate with both players and NPCs.
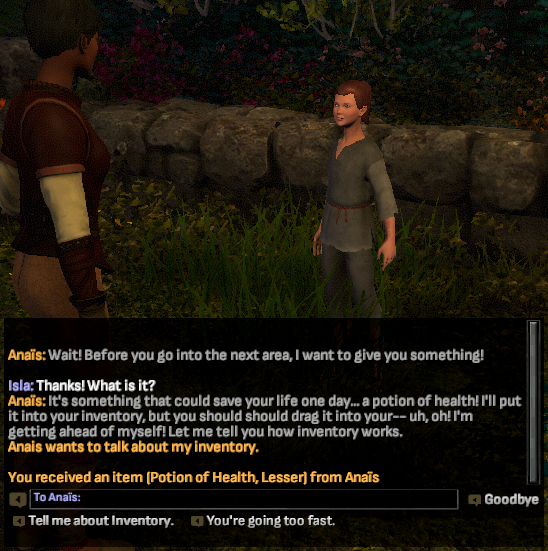
To converse with NPCs or other players, press the ENTER key to bring up your chat log. Type the text you want conveyed to the npc/players within the chat box, and press ENTER again to send the text, which also exits text entry mode (an industry standard we have adopted). NPCs can also be conversed with by double-clicking on them.
NPCs with something important to say may try to get your attention or even approach you and begin a conversation without any prompting.
When your Avatar begins a conversation with an NPC, the camera will fix on them in cinematic fashion and you will not be able to move. When you are done speaking with that NPC, close the chat window or hit ESC to restore normal movement and control. NPCs will sometimes end conversations on their own, especially if you remain silent too long.
The conversation window has a tabbed interface, similar to a manila file folder. You begin with two tabs, but can create more. You can freely reorder chat tabs by clicking and dragging them.
To move the entire chat window, left-click + drag while the cursor is within the text receiving area. To resize it, left-click + drag the window borders as desired.
You can drag a tab off the main chat window to create a new independent window. Dragging a tab over a new chat window will attach it to that window.
Each tab has a drop-down menu that allows you to filter what that tab receives, change the tab’s name, change the font size, or remove the tab entirely.
The chat log can be scrolled through by left-click + dragging the slider on the right side of the chat window. You can disable the requirement to hit Enter before each text entry in the Options menu.
There are several additional icons to the far-right of the chat window. The plus symbol opens new tabs. The triangle allows you to change the selected tab, which can be useful if you have more tabs open than can be displayed at once. The gear opens a dropdown with additional miscellaneous chat options. The thumbtack locks and unlock the auto-hide feature, “pinning” the chat window on the screen. By default, the chat window auto-hides itself when not being used.
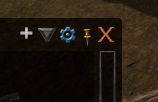
Player Conversations
When chatting with other players in any channel other than Universe, you can “link an item.” When any players mouseover that chat link, they will see additional details about that item. In the Universe channel the name of the item will still appear but it will not be linked.
There is a character limit to these links. The usual limit for player input is 384. An internal limit to link items is set to 2000 to allow multiple items to be linked at once.

Added a /translate command to use in chat. This will translate the last line in the chat to the current language set in game options, or you can specify it when entering the command, e.g. ‘/translate en’. More information can be found in the player guide.
/translate Translate the last line in the chat tab. This is best used in private while talking to someone that speaks another language. By default, the translation will be into the language currently set in the game, or you can specify the language code (e.g. /translate fr for French). The complete list of language codes can be found on the Internet (e.g. List of ISO 639-1 codes at Wikipedia). You can also specify the number of last few lines in the chat tab to translate (e.g. /translate fr 3 or /translate 3 would translate the last 3 lines).
NPC Conversations
To send chat directly to a specific NPC, select them with your left mouse button before sending a message. Double-clicking on friendly and neutral NPCs alsos opens conversation with them, assuming you do not have a weapon in hand.
- Helpful Tip: It’s best to sheathe your weapons and exit Combat Stance (Z key) before speaking to NPCs. While it’s true that you will automatically sheathe your weapons when interacting with Friendly NPCs, this courtesy does not extend to Neutral or Enemy NPCs—so be careful not to accidentally introduce yourself with a blade to someone’s face!
You can talk to NPCs as you would any other player. Of course, humans tend to be a bit more intelligent than computers, so some suspension of disbelief will be required. By default, most keywords that the NPC understands will be underlined, and you can click on those keywords to ask more about that given subject. (This may be disabled, along with keyword highlighting to enhance immersion if desired.) Note that you will still need to ask the NPC about some things explicitly via typing, such as answering questions and asking about things not explicitly mentioned in dialogue.
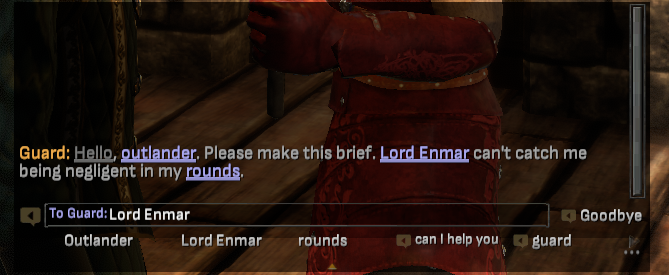
A keyword toolbar can be toggled open at the bottom of the chat window when conversing with an NPC. Click the small up/down triangle below the center of the keyword list to toggle the visibility of that list. This toolbar will include every keyword you have uncovered for that NPC, including keywords relating to quests you are currently on and keywords learned from past conversations with that NPC.
Most conversational NPCs respond to (at least) the following phrases.
- “name”/“What is your name?”
- “job”/“What do you do?”
- “health”/“How are you?”
- “help”/“What can I do to help you?”
- “bye”/“Farewell.”
- Note that this last phrase will close the conversation tab for that NPC after a few moments.
- Helpful Tip: Some NPCs can give you directions. Ask them questions like “Where is the bank” or “Where is the town crier?” If you ask an NPC where something is and they don't know, they'll respond with a brief list of every location where they can direct you.
NPCs open a chat tab specific to their conversation when you first address them. You can click on the chat tab created to automatically target that NPC to talk to them. Private messages from other players and messages from game administrators will appear in these tabs as well to ensure you do not miss them.
Conversations with Merchants and other NPCs that have Special Windows: When you begin a conversation with a merchant NPC, you can use the “buy” keyword or “Buy/Sell” button above the conversation window to bring up their trade window (and close the conversation window). You can hold down the ALT key to bypass the conversation and go directly to the trade window. You can also choose the option to always “Skip Conversation With Merchants” in the Options menu.
Public and Private Vendors have the same conversation options as merchants.
Trainers use the keyword “train” or the “Train Skills” button above their conversation windows.
Bankers use the keyword “bank” or the “Bank” button above their conversation windows.
Tasks and Quests
Some NPCs may send you on quests, asking you to perform tasks for them, or reward you for your accomplishments.
- Helpful Tip: Wondering if a specific NPC can offer or advance a quest? Try using the “help” keyword when talking to that NPC. Many quests use special keywords thematically connected to the current task, but most tasks also use “help” as an alternate keyword.
Quests are composed of one or more tasks. Once all tasks in a quest are successfully completed, you’ll probably get a special reward (often provided by the NPC that originally gave you the quest). Rewards can include gold, special items, Adventuring Experience, Producer Experience, and access to more challenging quests. Completing quests and their tasks can also change your standing in the Truth, Love, or Courage virtues. (Strongly embracing or rejecting one virtue or another can sometimes affect how NPCs treat you. Consult with the Oracle in one of her confirmatories to learn how well you’re doing in your pursuit of the virtues.)
Characters who have quests for you, or who have current active tasks, have a blue, sparkly glow and appear as blue Points of Interest on your compass. A character's sparkling effects and compass marker will turn off once you complete all quests assigned to it. Similarly, an item in the world that has a strong connection to a quest may have a special blue glowing effect and appear as a blue Point of Interest on your compass. While traveling on the overworld, a scene which includes one or more active tasks will have effects to indicate this and improve its visibility. If desired, you can now turn off Task Highlighting in the Options menu.
If an NPC wants you to give them an item or letter (perhaps as part of a quest), they will open a special trade interface listing the specific item(s) they are looking for, allowing you to pick the item from your inventory and hand it over. When NPCs require more than one item from a stack of an item type, you can offer the whole stack and they will take as many items as they need out of that stack (or out of multiple stacks), so that you don’t have to give them the exact quantity.
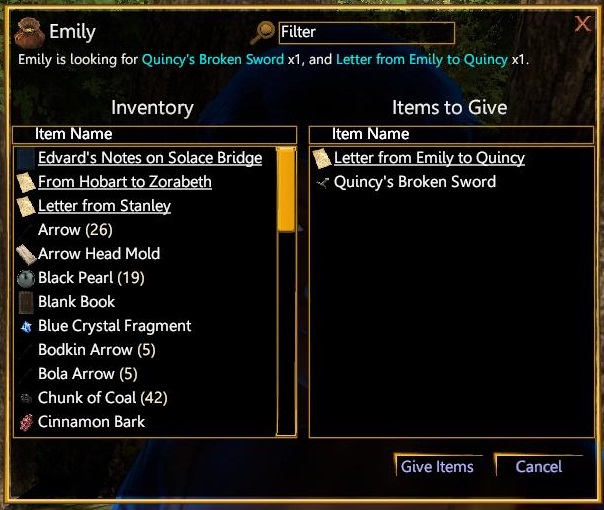
Quest items are only able to be stored in your main inventory; you cannot store quest items in your bank or any subcontainers within your character’s backpack. Also, quest items do not encumber you.
Task List
Quests that generate tasks display those tasks on screen.
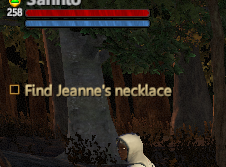
These tasks mirror the tasks listed in the “Current Tasks” section of the Journal. Clicking on a task on this heads-up display (HUD) task list will open the Journal to the page on which the task exists.
You can right-click that task in the HUD to open a context menu that includes an option to hide the task on the HUD. In the Journal, you can also click “Track” or “Untrack” on a task that has been hidden to show or hide that task. While tracking a task, it’s title will display against a green background. Tasks that are not tracked will display their titles against a yellow background.
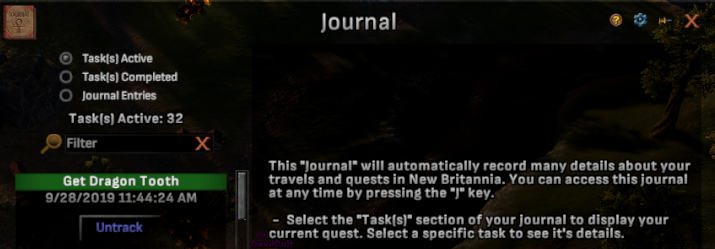
The HUD task list displays from 3 to 10 different tasks. Players can change this in the settings cogwheel on top-right of the Journal. Whenever you have more tasks, a button will appear under the HUD task list that indicates the number of tasks that are currently not shown. Clicking this button will open the “Active Task” section of the Journal.
Tasks in your list will mark their completion as you accomplish them.
Resetting Quests
You can reset the quest state of your character. You can do this at any time, but for best effect you should consider only doing so after many of the quests you’ve completed have received a great deal of polish and other additions.
- Important! A character's quest state can only be reset once, so use this option wisely!
Resetting your avatar’s quest state has the following effects:
- Your Quests and Tasks are Removed: All tasks will be removed from your active task list and journal. In their place will be a single task telling you to speak with Arabella.
- Your Quest Items are Removed: All main-story quest items and quest rewards owned by your character are deleted.
- Your Virtue Scores is Reset: Virtue scores are adjusted to a near-neutral state that includes some residual karma from past deeds.
- You Forget Compass Discoveries: Your character no longer remembers the names and locations of any compass discoveries.
- You Forget NPC Names: Your avatar no longer remembers the personal name of any NPC.
- NPCs Forget Your Name: NPCs that knew the name of your character no longer do.
Note that resetting your quest state will not change your character’s location. When you log in after resetting your avatar’s quest state, your avatar will be in the same location as before you logged out. You will also not lose any emotes you have unlocked.
To reset your character's quest state, go to the Shroud of the Avatar login screen. Click the cog icon next to your avatar's name and begin the process by selecting the "Reset Quest State" option. Accept the options that follow to finish resetting your quest state. The resetting process will take a moment. Your avatar’s quest state will be reset when you next log in with that character.

Slash Commands
A list of common chat / commands (also known as “slash commands”) and their functionality follows. To use a chat command, type in the command followed by any input required (denoted in the below list by a pair of <>) and the ENTER key to execute it.
- /leave: leaves your active party.
- /friend <playername>: add player to friend list.
- /unfriend <playername>: remove player from friend list.
- /block <playername>: add player to blocked list.
- /unblock <playername>: remove player from blocked list.
- /w <playername>, <text>: send a private message (or “whisper”) to a player.
- While typing /w and part of a name, pressing the TAB key will automatically finish the name for you when there is only one valid option. This will work for names in your Guild, in your Friends list, and anyone who you whispered or whispered to you in the current session.
- /r <text>: reply to the last private whisper you received.
- /p <text>: switch to party chat text entry mode.
- /l <text>: switch to local chat text entry mode.
- /orb <text>: switch to noble’s chat channel. (With appropriate backer reward item)
- /n <text>: switch to noble’s chat channel. (With appropriate backer reward item)
- /loc: print the player location in world coordinates.
- /loctrack: toggles location coordinates on the screen. (Great for bug report screenshots.)
- /bug <text>: copy a small bug report to the clipboard.
- /stuck: reset the Avatar’s position
- /follow: follow the targeted Avatar
- /AFK: Enter AFK mode.
- /<emote>: the emotes from the emote list may be entered as a chat command.
- Emotes can also be triggered by typing %emote% as part of a sentence. “Look! Behind you! %point%”
- /em <statement>: Allows whatever a player types to be used as an emote. Typing /em says “Look! Behind you!” %point% will result in other players seeing “Yourname says “Look! Behind You!”” and your avatar performing the point animation.
- /visible: hides the Avatar model from view. (Useful for screenshots.)
- /leaveguild: Leaves the current guild
- /reportplayer <playername>, <text>: report inappropriate behavior, abuse, or harassment.
- /reportcontent: File a report on inappropriate player content, bugs, etc.
- /assist: Targets your current target’s target.
- /assist <NAME>: Target's <Name> target.
- /who: Displays a list of nearby Avatars. Avatars not in your party or guild will appear as “?” until you get close enough to confirm their identity. This command does not work in PvP scenes.
- /z <text>: switch to scene chat.
For example, type the following into your chat window to send Lord British a friendly greeting as a private message.
- /w Lord British, Hello
Additional slash commands are listed in the “Quick Reference” section, below.
Shopping and Merchants
Many NPCs buy and sell things. You can activate the Shopping interface in a number of ways.
Double-clicking an NPC will call up the Shopping interface window, if one exists. NPCs may also open up a Shopping interface window as part of a conversation. “What do you sell,” “Show me your store,” “What is for sale,” “What goods do you offer,” or the keywords “vendor” and “buy” will all work.
Hovering over an equipable item will display comparison between that item and the relevant item that you have equipped (if any). (unless you disable item comparisons in your Options settings).
You can buy and sell goods from an NPC using a tabbed interface and set quantities for purchasing/selling multiple items. You will be asked to confirm a transaction before it is completed.
New Britannian merchants are canny and will generally pay you only half an item’s listed value. When selling the same item themselves they will charge twice the listed value. Be aware that the selling price for equipment also declines as it loses durability. In later releases merchants may pay you more for items related to their specific trade.
An Avatar starts with no gold but a small selection of harvesting tools and adventuring gear. Hunting monsters for loot and harvesting resources to craft items are both excellent ways to make money.
Shopping and Merchants in Offline Mode
Merchants in Offline mode have a different "Buy Price" for player-crafted items than merchants in Online mode. This allows players to sell crafted goods for a profit to merchants in Offline mode. Additionally, Merchants in Offline mode now have an additional stock list that includes items from the in-game Crown Store, Pledges, and Bundle packages.
Public Vendors
Public Vendors offer an alternate way to buy and sell goods with other players rather than meeting them face-to-face. Their stock comes entirely from other Avatars. Public Vendors are found in most major towns, often standing near a crafting pavilion, town square, or bank. They will not stock more than ten items from a specific Avatar or four hundred items in total. They will also not take more than ten purchase orders from a specific Avatar or four hundred orders in total.
Player Vendors are similar to Public Vendors, with the biggest difference being that players can place them in their own lots.
Selling and Buying Items
You put items up for sale by going to the “Manage Inventory” tab and dragging the item you wish to sell over to the right side, to the “Your Items Listed For Sale” panel.
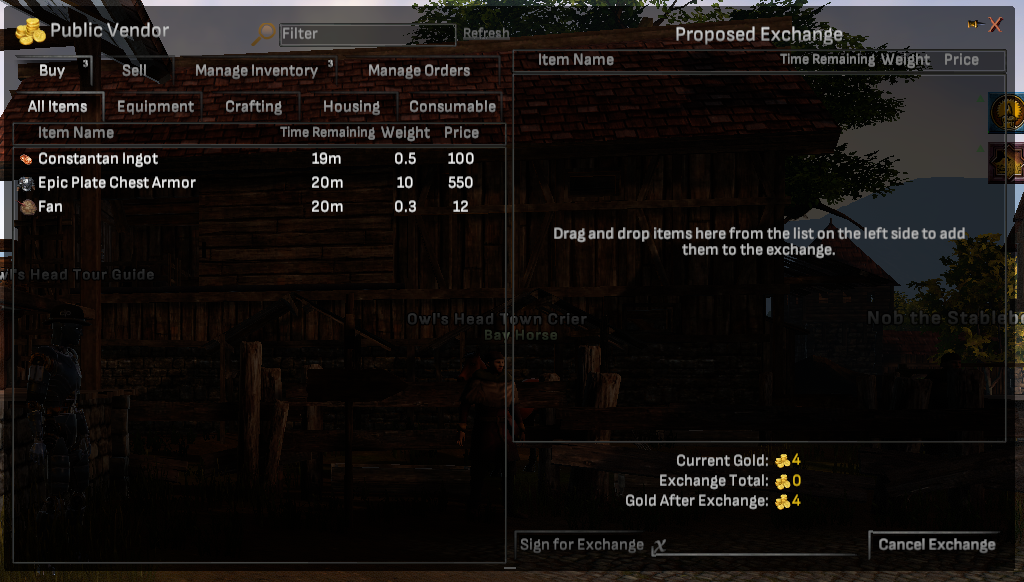
When you offer to sell an item to a Public Vendor you are not simply handing the item over for gold like with a normal vendor. You must pay a fee to the Public Vendor, who will then display your item for sale to other Avatars at the price you set. This fee is 10% of the price you are selling the item for, plus ten gold. The deposit fee will not be refunded regardless of if the item sells, expires, or is reclaimed by you.
Once you have paid the fee your item will be available for purchase to anyone browsing that Public Vendor. When another Avatar buys your item the gold will be sent to your mailbox, where you may claim to add it to your total. Mailboxes can be found at all bank buildings. A Public Vendor will stock an item for a full week before the item expires. Items made available for purchase show up in the “Buy” tab.
If an item expires without being purchased the Public Vendor will remove the item and credit you half the item’s value, collectable from your mailbox. That is half the value listed on the item, not half the price you were selling the item for. Note that the item itself will not be returned and should be considered gone.
You may cancel a sale at any point before it expires by double-clicking or right-clicking on your item in the “Your Items Listed For Sale” panel, at which point the item will be returned to your inventory.
Ordering Items
You may also place an order for a specific item or stack of items with the Public Vendor through the “Manage Orders” tab. This allows other players to sell their items to you, if they wish, at a price you have pre-determined. Double-click or drag the picture of the item you want to order over to the “Your Purchase Orders” panel on the right. Enter the quantity of the item you wish to order and how much you are prepared to pay for them. If the order expires, your deposit will be sent to your mailbox for you to collect. If you cancel the order, you will receive the refund immediately.
You will need to deposit the price you are prepared to pay for your order with the Public Vendor, along with a small non-refundable fee (10 gold + 10% of the price). If you cancel your order or it expires, your deposit will be sent to the bank for you to collect.
Fulfilling Orders
Placed orders may be fulfilled through the Public Vendor’s “Sell” tab. To fulfill a placed order, you must have the items the other Avatar wants to buy in your inventory. Double-click on the order or drag it over to the “Proposed Exchange” panel and click ”Sign For Exchange.”
The items will be immediately removed from your inventory and the gold will be directly added to your total. The Avatar who placed the order will be notified and able to claim the items from the bank.
Mailboxes
Mailboxes allow you to send mail to other players, receive mail from other players, and receive mail notifications based on Public Vendor and Player Vendor transactions.
When you receive mail, a Letter Icon will appear on the right edge of your screen. The icon indicates the number of unopened pieces of mail present in your mailbox.
You can access your mail at any mailbox. Every bank throughout New Britannia has a mailbox, typically just inside the front door. Also, mailboxes can be crafted and placed on housing lots.
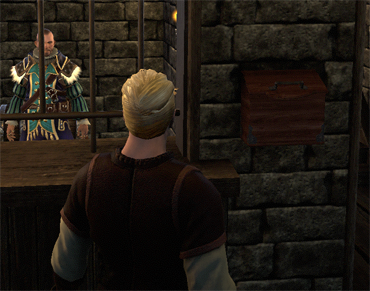
Accessing a mailbox will open your Mail window. The left portion of this window lists all of your available mail. When you select a piece of mail, its contents will appear on the right side of the window. Mail shown in this window includes mail from other players, Vendor gold transactions (via purchase, expiration, or refund) and text receipts regarding unexpired items that are forcibly removed from Player Vendors (see below) and moved to your bank.
Mail can be multi-selected for mass take-all and discard operations.
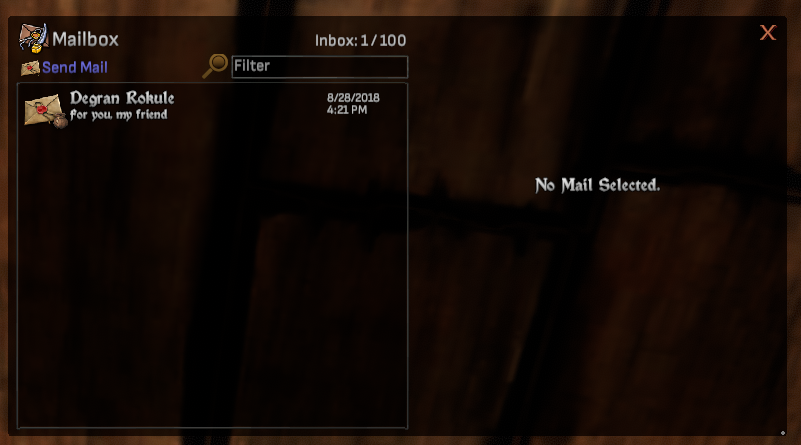
Mail from Vendors
When one of your vendor listings is sold, expired, or removed, you will receive mail that notifies you of the event and includes any proceeds or refund from that transaction.
When vendor items are sold, expired, or removed, you will receive a Letter Icon notification.
Unexpired items on a Player Vendor can be forcibly removed for the following reasons:
- You use the "Locate Player Vendor Items" feature at the bank to remove an item from a Player Vendor and send it to your bank.
- You are banned from the lot on which the Player Vendor was placed, which removes. All your items from that Player Vendor and all your items are sent to your bank.
Mail Expiration
You’ll automatically receive a notification regarding any piece of mail that you leave in your mailbox for two weeks. That notification will inform you that your mail will expire soon. The next time you open your mailbox, a 5-day expiration timer will begin for this old mail. After the 5-day period, that mail is deleted and added to your “DiscardedMail” log file on your hard drive. Any items associated with the mail are sent to your bank.
Saving Discarded Mail
Discarded mail is logged to a file in a directory parallel to the one that contains chat logs. The discarded mail logs will include the dates that the mail was sent and discarded, the names of the sender and addressee, the subject text, the items contained in the mail, and the text of any notifications about Vendor transactions.
- Helpful Tip: These logs are handy for those who like to keep these generated receipts for their records. Receipts can now be easily kept in the log file rather than cluttering the mailbox.
Music and Instruments
Musically-inclined Avatars can play instruments and songs for the enjoyment of friends, tavern patrons, or random passers-by. At present, your character can only play music while having a hand-held instrument equipped (such as a lute) or by interacting with an instrument placed in the world (such as the piano in the Soltown tavern). Music can be played while sitting or moving.
Playing Instruments with Your Keyboard
To play an equippable instrument, you must equip it, use the “/play” command to ready it, and use number keys 1–8 to play musical notes. Non-equipped instruments like pianos do not need to be readied with /play.
Playing Instruments with In-Game Sheet Music
Play a particular song by acquiring and double-clicking on the song’s sheet music while you have a musical instrument equipped.
Custom Music Files
Blank Sheet Music allows you to create custom songs with any .abc or .mml files stored in your Sheet Music folder. The default Windows filepath to this folder is shown below.
- C:\Users\<username>\AppData\Roaming\Portalarium\Shroud of the Avatar\Sheet Music\
Place custom musical files into the same Sheet Music folder mentioned above, equip a musical instrument, and type “/play <songname>” into your chat window (replacing <songname> with the name of your custom music file) to play custom music in the game. All custom music files must be in the .mml or .abc file format.
By default, the game begins with a copy of RuleBritannia.abc already in this folder.
“Band files” can be used to collect solo parts for multiple instruments into one shared list. Not all instruments are required and the order doesn’t matter. Band files must be placed in the same folder mentioned above and be in the .txt file format.
As an example, you might have a band file named MyOpus.txt and these music files: accordionpart.abc, bagpipespart.abc, drumpart.abc, flutepart.abc, harppart.abc, lutepart.abc, pianopart.abc, and streetorganpart.abc. Your MyOpus.txt band file needs to only include the text below in order for you to play your associated music files.
Accordion=accordianpart.abc
Bagpipes=bagpipespart.abc
Drum=drumpart.abc
Flute=flutepart.abc
Harp=harppart.abc
Lute=lutepart.abc
Piano=pianopart.abc
StreetOrgan=streetorganpart.abc
To play music from a band file, equip a musical instrument listed in the band file and type “/play <bandfilename>” (replacing <bandfilename> with the name of your band file). If you attempt to play an instrument listed in the band file, you will play that one part. If you have a One-Man Band equipped, you will play all appropriate parts which are included in the band file. If you attempt to play an instrument not listed in the band file, no music will play (although you may still animate playing your equipped instrument).
Chat Window Commands for Music
Use the chat window commands below to play instruments.
Chat Window Command | Result |
/play | Ready equipped instrument. |
#1-8 | Plays notes. #1 is 1 Middle C pitch. |
/playlist | Prints a list of all the songs in your songs folder. |
/play <songname> | Plays the song, by file name, from your songs folder. |
/play <songname> loop | Loops the song after finishing it. |
/play <songname> sync | Prepares a song to play while in a party. |
/playstart | Starts all party members playing their synced song. |
/datafolder | Opens the data folder for music and book writing. |
Singing without an instrument is not yet properly implemented.
Playing Music As a Group
Use the command sequence “/play <nameofsong> sync” to play a song together with a group. You'll get a local message that you have prepared a track for /playstart (the method in which parties can synchronize music). That message is broadcast to everyone in the party.
Titles
You can earn a variety of titles over the course of your adventuring career. Review the titles currently available to your avatar by pressing the minus key ( - ) on your keyboard’s numberpad. This will open (or close) the Title window. Select the title you wish your avatar to display and press the “Set Title” button, or change your title using the same technique. You can stop displaying any title by pressing the “Clear Title” button.
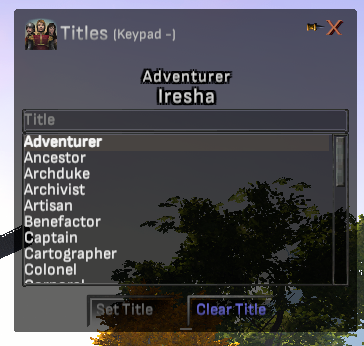
The title you choose to display will appear over your avatar’s head for all to see.
All titles are persistent, meaning that they remain in place after you log out of the game. However, there is one exception: the “Hospitaller” title. This special title must now be set each time you log into Shroud of the Avatar.
Adventuring Parties
Shroud of the Avatar can be played as a single-player adventure, but most find it fun and rewarding to meet challenges with like-minded friends. Players can organize themselves into temporary social groups called parties (sometimes referred to as “groups” for those familiar with the concept in other online games).
Players can be invited to party with you if you are the leader of a party or if you are not currently in a party. When invited to a party, a dialog will pop up that the player may accept or decline.
Parties are limited to twelve members.
Earned Adventurer Experience is divided evenly between party members without regard to relative levels. When an enemy is slain, all nearby party members share experience equal to a base of 50% plus an additional 25% per party member. For example, a party of two would gain 100% experience, and a party of eight would split 250% experience. Party bonuses only apply for those within 40 meters of the slain enemy. Grandmastery training benefits only extend to players in the same party.
Looted gold is split evenly between all party members. Other items are divided according to the party’s loot mode. (See “Party Loot Mode” below.) You may wish to discuss loot distribution with your party members before heading off to adventure together.
Supply bundles and other expanding items will show their contents to nearby group members.
All party members are shown in the list with their status listed. Status includes Leader, invited, and member of party.
While in a party you will be able to see your party member’s nameplates so long as they are in the same scene as you, and you have nameplates toggled on.
If the party leader disconnects or leaves the party, leader status will be assigned to a new party member.
Party leaders can do the following.
- Invite new party members to join.
- Kick party members.
- Make a new party leader.
- Manage invited members that have not accepted (un-invite).
Offline party members will remain in the party, but their name will be grayed-out.
HUD elements (displayed vertically in the top left corner) for the party include name, Health, and Focus of current party members.
Most scenes are shared by everyone in them. This includes most city, town, road, and wilderness scenes. It is possible to encounter Avatars not in your party in these scenes.
Other scenes are specific only to your Avatar and members of your party. Examples include Solania Catacombs, the Kingsport Sewers, and the Ravensmoor Dungeon at the south end of the Hidden Vale. Most of these scenes are accessed from inside other scenes rather than directly from the overworld.
If you are inside a solo/party scene, you will only see players that are in your party. Other players will be placed in different instances of that scene.
When you create a party and you are already in a party scene, scene ownership converts from private to group so others can join. If others in the party are also in their own private instance of a scene, they are invited to “reload” so that they can join the party.
When you leave a party (or get kicked), you leave the instance as well, if the instance is a party scene.
While on the overworld, you will see the location of party members. If party members are pulled into a random encounter, you can join and assist them by double-clicking on their shield icon.
Looking for Group
A party leader can add their party (aka “group”) to a public listing of open groups for others to join. Players not in the party can use this listing to find an open group to join.
To open the “Looking for Group” window, press ALT+F on your keyboard. If you are not already in a party, it can also be opened from the Social window’s “Party” tab by clicking the “Join Party” button.
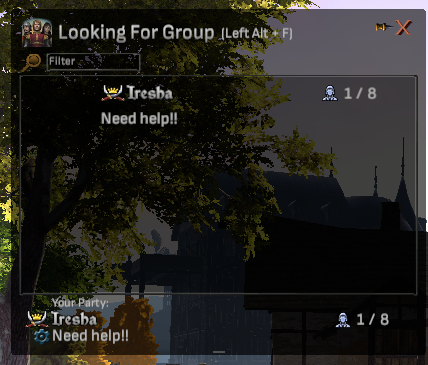
A party leader can enter a simple description in a text entry field that includes whatever information they wish to advertise their group. For example, they can mention “Tier 1-5 enemies,” “PvP,” “Helping new players,” “Roleplaying,” and or mention a specific scene in which the party will be spending their time. Also, players who want to help other players may find this a useful tool, as they can list groups that offer general help, lessons on crafting, instructions for combat, assistance with taming, etc. Those looking for groups can filter by any term.
- Helpful Tip: Teleport scrolls may be used to teleport to your party members.
Party Loot Mode
The leader of a party can choose the rules that will be used for dividing loot between party members.
To review your party's loot rules, go to the "Party" tab of the Social window (F). The three loot modes are listed in this tab.
- Free-for-All: Every player for themselves in this first-come, first-served looting mode.
- Roll: An item that requires a loot roll will be listed in a new window where relevant players can decide to pass or roll on that item. Players will have 20 seconds to decide if they wish to pass or roll on that item. This is the default loot setting.
- Those who choose to pass on the item cannot win the item. If you leave the scene in the middle of a pending roll you will automatically pass on the item. If time expires before you make a selection you will automatically pass on the item. If all members pass on an item, that item will be destroyed.
- Those who choose to roll will roll a 100 sided die. All roll results will appear in your chat window after all answers are received. The player with the highest number wins the loot item, which will be placed in their main inventory.
- Players can avoid frequent loot rolling requests by choosing to “Auto Roll for Loot.” To choose this option: open the Options window, go to the Controls section, and check the “Auto Roll for Loot” option.
- Master Looter: The party leader specifies one specific party member who will have permission to loot, regardless of which instance or scene that player is in.
Only your party leader can set your party's loot mode. To do so, your leader should click the loot mode text, which brings up a context menu where the new mode can be selected.
To the right of your party's current loot mode will be additional options for that particular mode.
- Roll has a value threshold. This value threshold dictates which items will be put up for rolling; any item worth less than the specified amount will be lootable as normal while anything equal to, or above, this value will be rolled on by all party members in the same instance.
- Master Looter displays the name of the current authorized looter.
You’ll be notified when anyone in your party gains an item from looting (including from fishing). Likewise, your party will be notified when you gain items while looting.
Guilds
Players can group together indefinitely in social groups called Guilds. Guilds allow like-minded players to organize and keep track of one another in a more permanent way than parties and a more structured way than the Friends list.
Seek out a guild registrar in any large city (such as Marcus the Guild Registrar within the barracks in Owl’s Head) to begin creating a Guild. Bring plenty of funds, as creating a guild costs 25,000 gold. The Avatar who creates a guild is leader by default.
Creating or joining a Guild will add a Guild tab to your Social menu. From here you can view Guild membership and toggle displaying your guild name on your nameplate on or off. Guild leaders and officers may manage membership and rank privileges. Any guild member may leave the guild from this tab.
You may also leave your Guild at any time with the “/leaveguild” command.
There may only be one guild leader at a time. The guild leader may invite new members, promote them to officer rank, demote officers to member rank, and kick any individual from the guild. Officers may invite and kick normal members. Officers may not affect the rank or membership of other officers or the guild leader.
If the leader quits the guild without promoting a new leader first then the most senior officer will automatically be promoted to leader. If the guild has no officers then the most senior member will be promoted to leader. Be aware that if the last guild member leaves a guild it will be dissolved, and an additional 25,000 gold fee must be paid to create a new one.
Guildmates share access to an exclusive chat channel, available with the “/g” command.
Guild Warfare
Guilds who seek to compete in martial prowess or who find themselves unable to resolve disputes peacefully can declare war on one another. To declare war on another guild you must be leader of your guild. Right-click on the Avatar or nameplate of the leader of the guild you wish to declare war on and select the “Challenge to a Guild War”option from the dropdown menu.
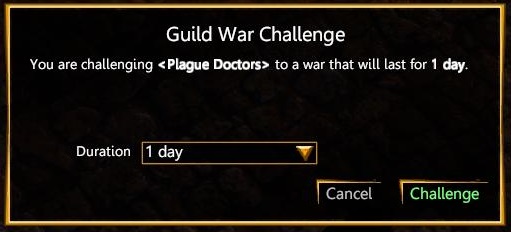
A Guild War Challenge menu will appear, allowing you to set the duration of the war, from one to ten days (earth time). After you hit the Challenge button the other guild leader will receive a notification and the option to accept or decline.
Once two guilds enter a state of war, all members of both guilds will be set to open-PvP for the duration of the war. This means that not only can the guilds at war freely attack one another in any scene, but other open-PvP Avatars can attack and be attacked by the warring guilds as well. When the war concludes, all guild members will return to their previous open-PvP status. At present, winning a war that lasts longer than 23 hours awards a trophy to the guild leader of the winning guild, suitable for display and bragging rights. This trophy appears in the victorious leader’s bank around 15 minutes after the war ends. The trophy is a plaque with the “kill stats” of the war.
Guild members can check the ongoing status of any wars with the Wars tab, opened by the semicolon key (;) by default. Right-clicking on a specific war allows members to bring up the running scoreboard for the conflict.
If either guild leader wishes to forfeit the war before it’s duration concludes, they may do so by right-clicking on the war in the Wars tab and choosing to do so from the dropdown menu. Leaders may also forfeit by right-clicking on the opposing guild leader and choosing the forfeit option from the dropdown menu.
Guild Chat Window Commands
Guild managers can set a Message of the Day (MOTD) for their guild. Guilds that have a message will display in the chat windows of members of that same guild.
There are 3 chat "slash" commands associated with this feature:
- /getguildmotd Displays a guild’s current (or expired) message of the day to the chat window and copies the text to the clipboard.
- /setguildmotd <message> Sets the message of the day for the guild. To set this message, you must be the leader or officer of the guild.
- /unsetguildmotd Expires your guild’s current message of the day. The message will no longer be shown to players, but can still be retrieved via the /getguildmotd command.
Guild members can use a chat “slash” command to create a file useful for reviewing recent guild activity.
- /guildactivitylog Writes a log file to the player's data directory. This log contains various guild activity from the past 30 days, including new member invites, kicking of guild members, and more.
Special Events and Contests
Shroud of the Avatar may offer special events and contests as player activities at various times throughout the year. Examples include Lord British’s Birthday and Fishing Tournaments.
More details about these activities are in the official Player In-game Events forum.
To help players identify and get to the activities when they are occuring, the Teleport to Zone scroll window shows color-highlighted scenes. These listings will be color-highlighted for a few hours, days, weeks, or longer, depending on the duration of the activity.
- Monthly fishing tournaments are blue.
- Treasure hunts are brown.
- Daily special fishing locations are yellow
- Special events may appear in red
Note that if your avatar has not yet visited one of these highlighted scenes and the scene is technically still “locked” for you, you might take this as an opportunity to visit the scenes while the activity is taking place.
Player Scripting with Lua
For those who would like to add their own features and UI elements while playing Shroud of the Avatar, we allow players to do so with a scripting language called Lua.
Lua is a full-featured but simple-to-use scripting language integrated into Shroud of the Avatar. Players can use it to query an ever-growing set of data via a console, and that data can be used to create new features, display alternate data in the UI, or develop other client-side add-ons with just a few lines of code. Manage and display the information you need in the way you want!
Lua Chat Commands
Shroud of the Avatar has an optional feature that can execute certain Lua functions or display errors from Lua scripts in your in-game chat window. You can enable this feature by selecting a chat tab, clicking the "Settings" cogwheel, and checking the "Lua" checkbox in the Settings menu.
Below is a list of special Lua chat commands. Enter one of the commands in your in-game chat window to perform its function.
- /lua reload — Restart all Lua scripts.
- /lua unload — Unloads Lua until you reload it again.
- /lua path — Displays the path to the Lua folder in the chat window. Also, this command opens that folder.
- /lua code <code here> — This function displays Lua variables directly in the chat without using an add-on.
Creating Lua Add-Ons
In short, create your Lua file with the .lua extension (e.g. YourFileName.lua), place it in the Shroud of the Avatar Lua folder (which can be found by typing /datafolder in your in-game chat window), and run the game (or type /lua reload if the game is already running).
The system uses Moonsharp interpreter with Lua 5.2.
- Lua 5.2 Manual: https://www.lua.org/manual/5.2/
A list of functions usable in Shroud of the Avatar can be found in the API document linked below. New functions are occasionally added to this list, so don't forget to check back sometimes for changes.
A Lua demo script can be found at the link below.
How to Install an Add-On Made With Lua
After creating a Lua add-on, or getting one from another player, type /lua path in the chatbox to open the Lua folder.
If the file containing the Lua add-on is compressed, extract it to that folder.
Your Lua script files need to be in the root of Shroud of the Avatar’s Lua folder (i.e. the one opened with the /lua path command). Note that if your script is placed in a subfolder within the main Lua folder, it might not work.
To execute your Lua add-on, just start the game and it will run automatically. If you are already playing, you can type /lua reload in the chat box to load all scripts within your Lua folder.
Where to Get Shroud of the Avatar Add-Ons and Lua Information
The latest information, and scripts from players, can be found on our official Lua Discussions and Player Created Scripts forum. In this forum, you can chat with other players about Lua and Shroud of the Avatar add-ons, including how to get started in creating Lua projects.
We also have a Discord channel with dedicated players that will be glad to help you with Lua.
Managing Add-Ons in the Game
The “Lua Add-On(s) Manager” is a Lua management tool in the game that you can use to turn Add-Ons on and off. This manager can be found in the Window Selection menu.
Creators of Add-Ons can enter information as local variables in their scripts to populate this window.
More information about this can be found in our official Lua Discussions and Player Created Scripts forum.
Special Rewards and Items
Some of our pledge levels offer special rewards or items which require a player submission in order in order to become available.
Heraldry
If you are eligible, you can submit a heraldry blazon device that can be displayed on shields, tabard chest pieces, and banners in our game.
To submit your blazon, log into the Shroud of the Avatar website and go to your account page. The heraldry link is under the “Special Rewards” tab. Follow the link for instructions on how to upload your own custom blazon or create a new one with our blazon generator system.
You can modify a blazon design as often as you wish until the form is locked and submitted for review. A blazon that has been locked can only be changed after you purchase a change voucher, change the blazon, and lock the form again. Note that changing your blazon does not change the blazon already displayed on any existing items. Once a heraldry pattern is used to reshape an item, that item will retain its blazon until it is reshaped again.
Heraldry Blazon Device Generator
Thanks to the hard work of the College of Arms, we have adopted a version of their Heraldry Blazon Device Generator that you can use to generate a family crest to display on chest armor, shields, cloaks, chests, and banners. Blazons created using the generator will not require approval before being available in the game.
Custom Image Submission
You may submit a custom image instead of using the device generator, but please note that the image must look like traditional heraldry and it will be reviewed before appearing in the game. Reviews may take up to 2 weeks. If your custom heraldry design is rejected, you’ll be sent an e-mail with the reason for the rejection.
Heraldry Patterns
Your heraldry pattern can be applied to items of the appropriate type. Once you apply a heraldry pattern to an item, that item will display your blazon. If you trade your pattern to someone else, they can use that pattern to apply their own blazon (not your blazon) to any appropriate item.
To collect your new heraldry patterns, log into Shroud of the Avatar and open the Rewards window. At the bottom right of this window, click the “Claim Rewards” button. Your patterns will appear in your rewards inventory, including patterns for cloth legs and torso, leather legs and torso, plate legs and torso, a shield, a short banner, and a long banner. All of these will be eternal patterns that include the word “Heraldry” in their name.
When you craft an item using your heraldry pattern, your current blazon will be displayed on the crafted item. Note that you cannot use a heraldry pattern until your blazon has been submitted and approved.
- Important! Eternal patterns that have been applied to an item can be recovered if replaced with any alternate pattern. Other (non-eternal) patterns can be replaced, but doing so will consume them and they cannot be recovered.
Contributor Display Names
Eligible players can submit a name to be displayed on a Brittany Graveyard tombstone, within the Domesday Book of Contributors, and on the Shroud of the Avatar Credits page.
To set your contributor display name, log into the Shroud of the Avatar website and go to your account page. The link for updating your display name will be under the “Special Rewards” tab.
You can modify a name as often as you wish until the form is locked and submitted for review. A name that has been locked can only be changed after you purchase a change voucher, change the name, and lock the form again.
Brittany Graveyard Tombstone Name
Eligible players may have their names appear in the game on a tombstone in the Brittany Graveyard.
After a Brittany Graveyard Tombstone name is approved, that name will display after a game update (within 30 to 90 days).
Domesday Book Name
The Domesday Book of Contributors is in the game somewhere in the Castle Brittany library of Central Brittany. The names therein appear in the order that they were submitted by players.
Once a Domesday Book name is approved, it will display after a game update (within 30 to 90 days).
Shroud of the Avatar Credits Page Name
Our credits page lists our developers, crowdsourcing contributors, and all eligible players. The names within each group are displayed alphabetically.
- The Shroud of the Avatar Credits Page: www.shroudoftheavatar.com/?page_id=84121
Quick Reference
Below is a list of convenient hotkeys, chat commands, and more.
Runic
New Britannians use an alphabet called Runic. Important carvings, books, and letters can sometimes be found that use this ancient style of writing.
Runic is based on the English alphabet. Use the chart below to translate runic whenever you see it in New Britannia.

Movement Hotkeys
- W or Mouse Wheel+Hold Move Forward
- Left-Click+Right-Click Move Forward (If Not In Combat Mode)
- A Move Left
- S Move Backward
- D Move Right
- Double-Tap W Sprint Forward
- Double-Tap A, S, or D Directional Combat Roll
- SPACE BAR Jump
- [ Rotate Left
- ] Rotate Right
- Keypad + Auto-Run Toggle
- Keypad / Toggle Run/Walk
Combat Hotkeys
- Z Toggle Combat Mode
- TAB Cycle Enemy Targets
- F1 Target Self
- F2–F8 Target Party Member
- 1–0 Activate Corresponding Hotbar Glyph
- R Start Glyph Combo
- X Swap Combat Deck
- T Toggle Auto-Attack
Interaction and UI
- Left-Click Swing Melee Weapon
- Double-Left-Click or E Select Object or Target
- Right-Click Interactive Menu (If Available)
- Right-Click+Hold Free Look (aka Mouse Look)
- N Toggle Character Names
- SHIFT+Drag Split Item Stack
- CTRL+Drag Remove Item from Stack
- Mouse Wheel Up Zoom In
- Mouse Wheel Down Zoom Out
- V Toggle Camera View
- F9 Toggle UI Visibility
- F11 Take Screenshot
- Keypad - Toggle Title Window
- Left CTRL+W - Show Unwatered Plants Nearby
Windows Hotkeys
- I Inventory
- C Character Sheet
- K Skills
- Y Combat Decks
- J Journal
- B Recipe Book
- O Emotes
- F Social (Friends, Party, Guild)
- ALT+F Looking for Group
- H Blocked Players
- M Map
- U Lot Deeds
- Keypad . The Price of the Oracle
- Keypad 0 Nearby Players List
- Keypad * Item Permissions
- ; Guild Wars
- ESC Options Menu or Hide Open Windows
- ALT+F4 Quit Game
Housing
- P Ping Lot Signs
- Q Deco Rotate Left*
- E Deco Rotate Right*
- Left CTRL+Q Deco Rotate Left 45°*
- Left CTRL+E Deco Rotate Right 45°*
- Left ALT+X Scale Up*
- Left ALT+Z Scale Down*
- R Flip Axis of book or block 90°*
- N Deco Flip* (Note that this only works for a limited number of decorations.)
* This command requires you to be in decoration mode to use. The decoration must be dragged into a house/lot/POT for which you have appropriate permissions in order for the special commands to function.
Pets
- Keypad 1 Pet Passive
- Keypad 2 Pet Defensive
- Keypad 3 Pet Aggressive
- Keypad 4 Pet Stay
- Keypad 5 Pet Follow
- Keypad 6 Pet Attack Target
- Keypad 7 Pet Dismiss
- Keypad 8 Pet Teleport
- Keypad 9 Pet Stop Attacking
Conversation Window Chat Commands
- ENTER Open chat dialogue box
- /P <text> Switch to party chat text entry mode
- /L <text> Switch to local chat text entry.
- /Z <text> Switch to zone chat text entry.
- /G <text> Switch to guild chat text entry
- /W <playername>, <text> Send a private message (or “whisper”) to a player.
- /R <text> Reply to the last private message received.
- /Uorb <text> Switch to Universe chat text entry.
- /T <text> Switch to Universal Trade chat text entry.
- /orb <text> switch to noble’s chat channel. (Requires appropriate backer reward item.)
- /N <text> switch to noble’s chat channel. (Requires appropriate backer reward item.)
- /<emote> Enter an emote from the emote list as a chat command. Emotes can also be triggered by typing %emote% as part of a sentence. For example, typing “Look! Behind you! %point%” into your chat will display the text “Look! Behind you!” and then your Avatar will use the “point” emote.
- /em <statement> Allows whatever a player types to be used as an emote. Typing /em says “Look! Behind you!” %point% will result in other players seeing “Yourname says “Look! Behind You!”” and your avatar performing the point animation.
- /sit Sit down.
- /AFK Enter AFK Mode.
- /assist Targets your current target’s target.
- /assist <NAME> Target's <Name> target.
- /follow Follow the targeted Avatar.
- /friend <playername> Add player to friend list.
- /unfriend <playername> Remove player from friend list.
- /block <playername> Add player to blocked.
- /unblock <playername> Remove player from blocked list.
- /leaveguild Leave your guild.
- /getguildmotd Displays a guild’s current (or expired) message of the day to the chat window and copies the text to the clipboard.
- /setguildmotd <message> Sets the message of the day for the guild. To set this message, you must be the leader or officer of the guild.
- /unsetguildmotd Expires your guild’s current message of the day. The message will no longer be shown to players, but can still be retrieved via the /getguildmotd command.
- /guildactivitylog Writes a log file to the player's data directory. This log contains various guild activity from the past 30 days, including new member invites, kicking of guild members, and more.
- /getpotmotd Displays a Player-Owned Town’s current (or expired) message of the day to the chat window and copies the text to the clipboard.
- /setpotmotd <message> Sets the message of the day for the current Player-Owned Town. To set this message, you must be the owner or steward of the town.
- /unsetpotmotd Expires a Player-Owned Town’s current message of the day. The message will no longer be shown to players when entering the scene, but can still be retrieved via the /getpotmotd command.
- /who Displays a list of nearby Avatars. Avatars not in your party or guild will appear as “?” until you get close enough to confirm their identity. This command does not work in PvP scenes.
- /loc Print the player location in world coordinates into the chat channel and saves that information to the players clipboard.
- /loctrack Toggles location coordinates on the screen. (Great for bug report screenshots.)
- /allowfirstpersonoverworld Toggles the ability to access first-person view while using the “V” key on the overworld.
- /visible Hides the Avatar model from view. (Useful for screenshots.)
- /slew Allows an owner or steward of a Player-Owned Town to fly around their POT in “free camera” mode. Also allows the owner of Player-Made Dungeon to fly around their dungeon.
- The default speed can be increased or decreased by scrolling your mouse wheel up or down.
- You can turn off this mode by entering “/slew” in the chat window again or pressing ESC twice.
- /stuck Reset the Avatar’s position.
- /xp Outputs your character’s Adventurer and Producer experience (both shared experience and unique character experience) to your chat window.
- /bug <text> Copy a small bug report to the clipboard.
- /reportplayer <playername>, <text> report inappropriate behavior, abuse, or harassment.
- /reportcontent File a report on inappropriate player content, bugs, etc.
- /quit Quit the game
- /invite <name> Send an invitation to a player to join your party.
- /uninvite <name> Cancel an invitation sent to a player to join your party.
- /leave Leave your party.
- /copy Copy the text in the current chat tab. Entering a number to copy a number of lines equal to that number (e.g. /copy 3 only copies the last 3 lines of chat).
- /translate Translate the last line in the chat tab. This is best used in private while talking to someone that speaks another language. By default, the translation will be into the language currently set in the game, or you can specify the language code (e.g. /translate fr for French). The complete list of language codes can be found on the Internet (e.g. List of ISO 639-1 codes at Wikipedia). You can also specify the number of last few lines in the chat tab to translate (e.g. /translate fr 3 or /translate 3 would translate the last 3 lines).
- /sotawiki Open the player-run SotAWiki website in your browser.
- /playtime Display how much time you’ve played Shroud of the Avatar with the current account.
- /time Displays the player’s local real world date and time, the Shroud of the Avatar server date and time, and the in-game date and time.
- /roll <number> Roll a random number from 1 to the number indicated.
- /fps Toggle the FPS display on the screen.
- /walk Make your avatar walk instead of run.
- /run Make your avatar run instead of walk.
Common NPC Chat Keywords
- name Ask for NPC’s name.
- my name is <your character name> Tell the NPC your character’s name.
- job Ask about NPC’s job.
- health Ask about NPC’s health.
- help Offer to help NPC. (For NPCs connected to a quest, this will often start, advance, or conclude that quest.)
- bye Close NPC conversation.
Reporting Bugs
As Shroud of the Avatar is in active development, we need your help to find any errant bugs you encounter so that we can quickly take care of them.
To report a bug, either left-click the sealed letter in the master menu or open up your chat log (ENTER key) and type in /bug followed by your bug report and the ENTER key. This will copy your bug report and game information to the clipboard and bring up the SotA bug forum where you can paste the clipboard into a post for us to receive. Before posting in the forums please follow these guidelines:
As an option for task and quest bugs, you can report them by right-clicking on a task on your HUD, selecting “Report a Problem,” and filling out the report field.
To find out the current position of the Avatar in the game, open up the chat log (ENTER key) and type in “/loc” followed by the ENTER key. This also copies out the location to your clipboard so that it can be pasted elsewhere as needed. Note that this is included in the information pre-loaded into the /bug command.
The F11 key will take a screenshot of the game and save it to your installed SotA directory; you may find it helpful to include a screenshot with your bug report.
There is no need to submit crash logs. Whenever there is a client crash, the data we require is automatically logged for us.
From all the developers of Shroud of the Avatar, thank you for helping us make this game the best that it can possibly be!